05
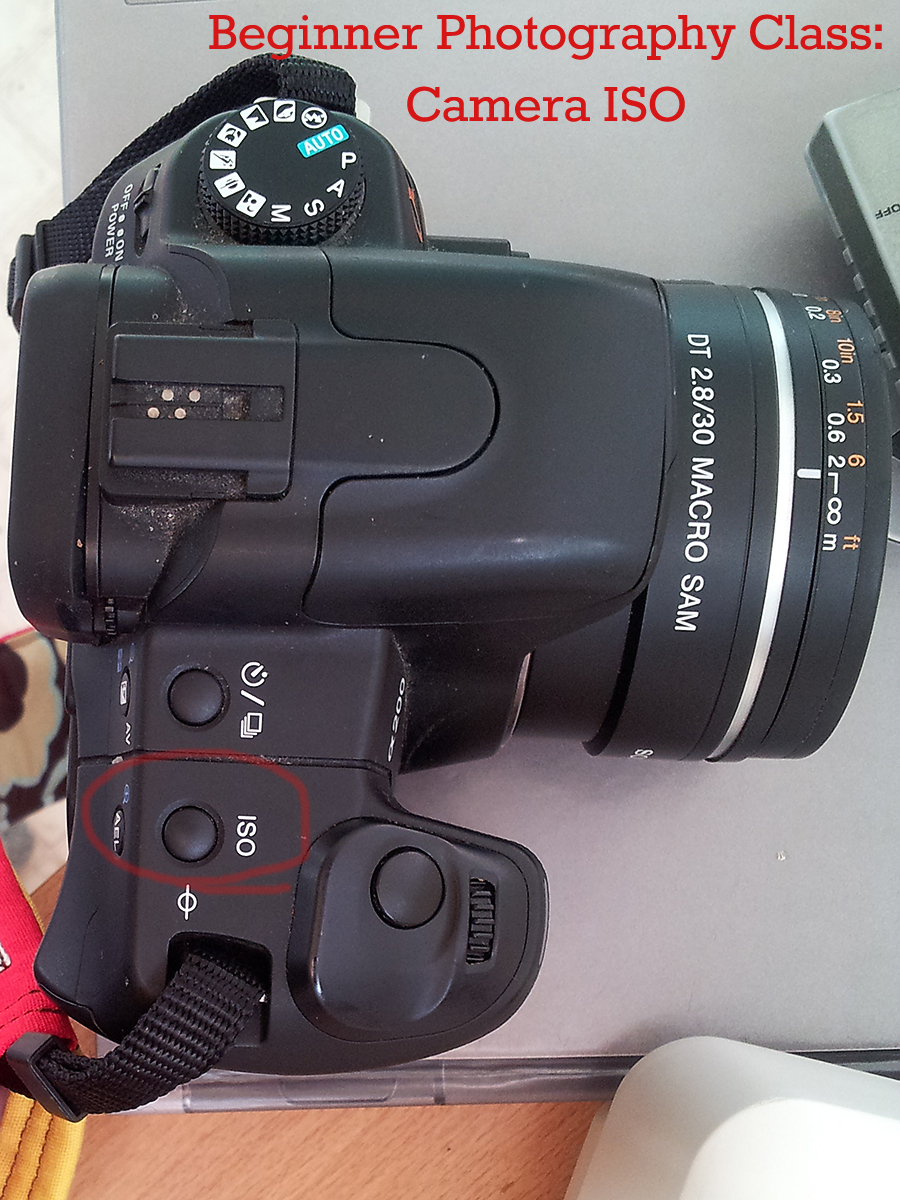
2013Beginner Photography Class: Camera ISO
Hold tight, friends. Compared to January, February is going to be one intense month! We’re going to attempt to hammer down the exposure triangle. We’ll go bit by bit, but for those of you unfamiliar with the exposure triangle this is going to be a month full of learning! The exposure triangle has three parts (duh, it’s a triangle. I’m a master of the obvious): Camera ISO, Shutter Speed, and Aperture. We’ll hit these one week at a time and pull it together in a large assignment at the end of the month. But first let’s recap some highlights from your first assignment!
Assignment Recap
This week I’ll show you an image from each participant because there are only 6 active participants in the group pool. I may showcase fewer photos in subsequent posts, but I’m just overwhelmed with joy that 6 people jumped in!

The soft processing, focus on the toes, and timelessness drew me to this image. Add in the juxtaposition of a girl wearing her Sunday best and eating drippy ice cream and this definitely catches my eyes! CraftLea has captured one for the wall here.

Andrew Aldrich is my father in law. I call him “The English Major” because book learning really isn’t his style. I’m so proud to see how far he’s come in the past few years through mentor-ships and watching all the YouTube material he can get his hands on! This was taken using a DSLR, but Andy also has a SLT in his endless bird photography gear 🙂 I could totally see this as an art print.

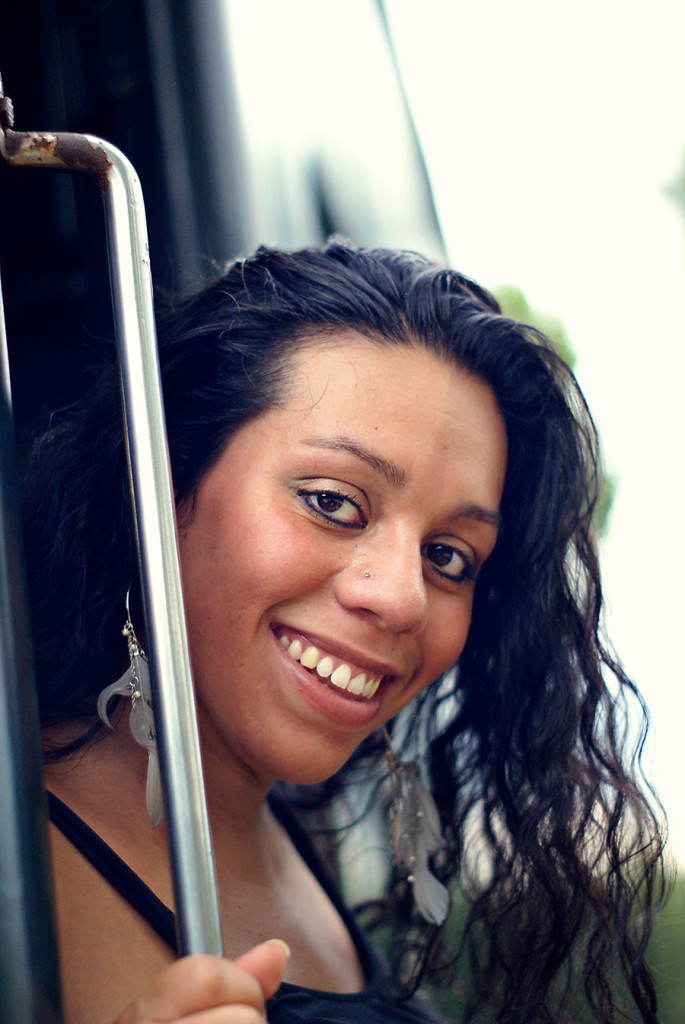
Heather Beals caught this great candid of her daughter. I love the expression and that she filled the whole frame with her fierce girl. She also managed to use on-camera flash competently: she’s not too close to the wall (leaving horrid shadows) and she’s not to close to her subject (washing out/overexposing the skin). The quirky camera angle just adds to the photo feeling, but it’s the expression here that really makes the photo!

Sara Beth nailed this. Stunning image, vibrate colors, great focus on the subject. Those flower hairs… dreamy. Sara Beth is using a point and shoot! Proof that fantastic images are made by people (who know their gear) rather than the best camera. Bravo!

Of the folks so far in the group, Teddy Bouch has the most defined style of the current participants: he loves the interplay of contrasted light. In this image the symmetry from the lights on the boat and the water really caught my eye. He also nailed a solid black exposure at night which is not an easy feat and show growing mastery of his camera.

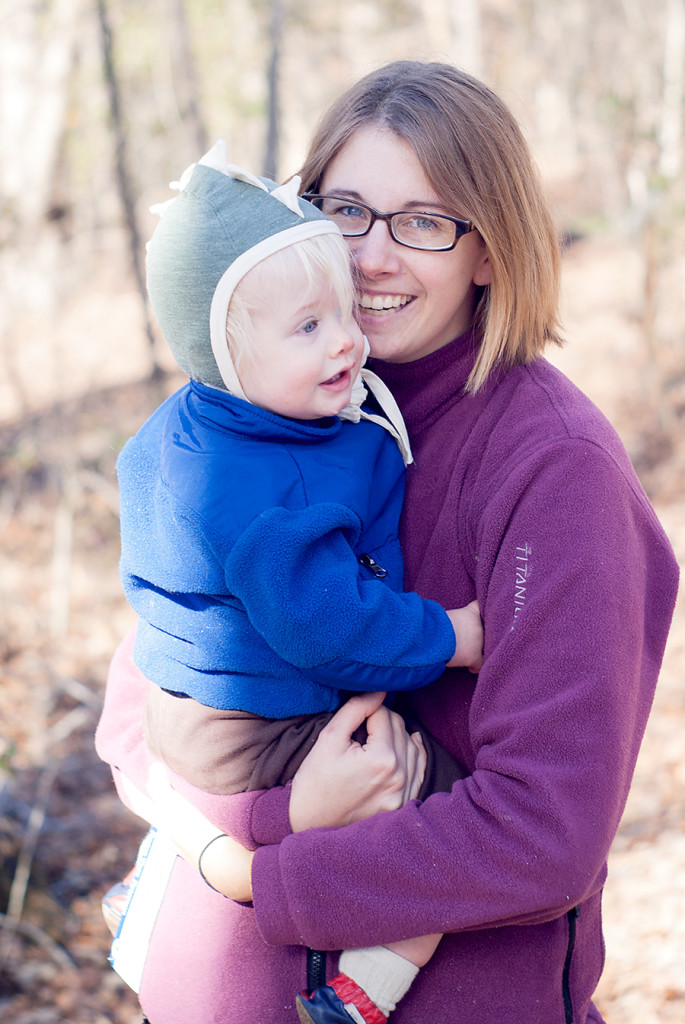
Amanda is the mother of little Micah that I photographed in December. I personally have a love for a more lifestyle/photojouranlistic style with kids so this image absolutely caught my eye. The attitude in Elijah’s face and the complete toddler disregard for the photographers presence along with the perfectly highlighted static electricity hair just screams of everyday childhood to me. The black and white processing brings out all the detail while minimizing visual clutter. Great capture and one I know she’s putting on a canvas for her wall!
Camera ISO: Definition and Brief History
Ready to learn about camera ISO? Me neither. But let’s eat this elephant one bite at a time!
ISO: is an acronym meaning International Organization of Standards. ISO is a measurement of your recording material’s (film or sensor) sensitivity to light. It’s also referred to as film speed. It’s measured in numbers 50-3200 (and beyond). The 50 end of the scale is less sensitive to light while the 3200 end of the scale is super sensitive to light.
As for the history, basically back in the film days a bunch of folks got together and standardized the speed of film. It involved lots and lots and lots of math and scientific processes that most of us wouldn’t understand without diligent study. This also allowed users to be able to compare different film manufacturers (say Kodak and Fuji or my favorite, Ilford) in a pinch; I knew what conditions I could shoot best with my beloved Ilford film, but if I needed some film in a pinch and went into the local film store which only carried Kodak, what would I pick that was similar? Knowing my film was rated 400 ISO meant I could grab the same ISO in a different brand and expect roughly the same results. Without the ISO scale, it’d be like flying over to Europe and wondering why size 30 pants were about 10 sizes too small when in the USA I wear a 12!
What Does Camera ISO Do?
In those two paragraphs above that you probably skimmed (don’t worry… I would have too), I told you that “ISO is a measurement of your recording material’s sensitivity to light.” I also said that it’s measured on a scale from 50-3200 with 50 being least sensitive and 3200 (and higher) being most sensitive.
That doesn’t mean a whole lot to you right now. But let me introduce you to some of my family and compare them to the ISO scale. Don’t worry… this will most likely be funny. You tell me how long it will be until each person burns in the sun and I’ll tell you what their Camera ISO speed is.
Comparing Camera ISO and Sunburn

Derek. ISO 3200 fries in 20 minutes or less.
This is my love Derek on his 33 birthday. He’s a pale dude with an English/Sicilian background. When he was a child his hair was so blond it was almost white. How long do you think it’ll take Derek to sunburn on a bright day? You’re right! I have about 15 minutes before I’ll be rubbing this guy down with aloe vera gel for days. Derek’s camera ISO is 3200. He’s super sensitive to light!
Me. ISO 800. Fries in 45 minutes to an hour. (and Sedryn… ISO 3200 like daddy)
This is silly old me. I’ve got lighter hair, blue eyes, and a yellow undertone to my skin. I’m pretty much a mutt in the realm of heritage, but I’m 1/16th Blackfoot. How long do you think it’ll take me to burn? About 30-45 minutes. My camera ISO rating would be about 800. I’m not as sensitive to light as Derek, but I still turn into a crisp much quicker than others.
Johana. Camera ISO 200. Burns in 1.5-2 hours.
This Derek’s sister Johana. She was born in Columbia, South American and came to live with Derek’s family around a year and a half. How long before she burns (or even tans up a little bit)? About 1.5-2 hours. Johana isn’t super sensitive to light, but she still can get burnt. Her Camera ISO would likely fall around 400.
Ron. ISO 100. Burn? Is he capable of burning?
This is Johana’s sweet husband Ron. He’s got some deep chocolate skin and is of African American decent. I’m not even sure he would burn! Ron’s Camera ISO is probably 100. You can leave him out in the sun most of the day and he’s not going to get toasted.
So you might be thinking: “Wouldn’t I always want to use Ron’s ISO of 100? I don’t want my images sun burnt (overexposed)!” Well, it’s not that simple. You don’t want your images under tanned (underexposed) either.
When to Use a Lower ISO
Right now it’s just past noon and sunny outside today. So I grabbed my camera and set it to take an image of the first thing I saw right in the sun. I don’t want my picture sun burnt so I pick Ron’s ISO of 100. Perfect.
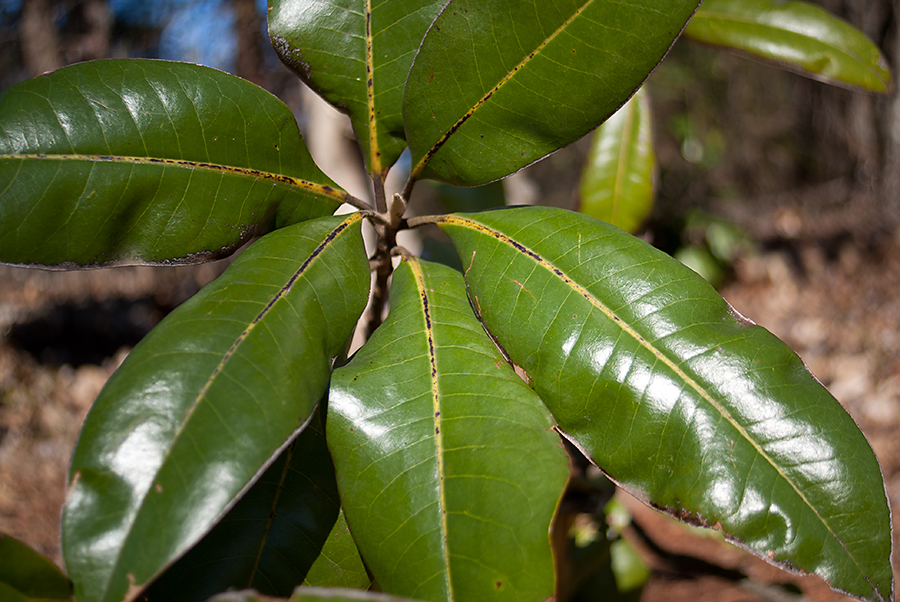
ISO 100, F/2.8, 1/1000 of a second
Now let’s switch to Derek’s ISO of 3200. In the sun, we’re going to expect Derek to get crispy-fied! Same settings except I changed ISO. This is called an overexposed image; it’s sun burnt. The Camera ISO of 3200 sucked in so much light that all you can see is a bright blob of white. Some of the darkest areas show up as colors.
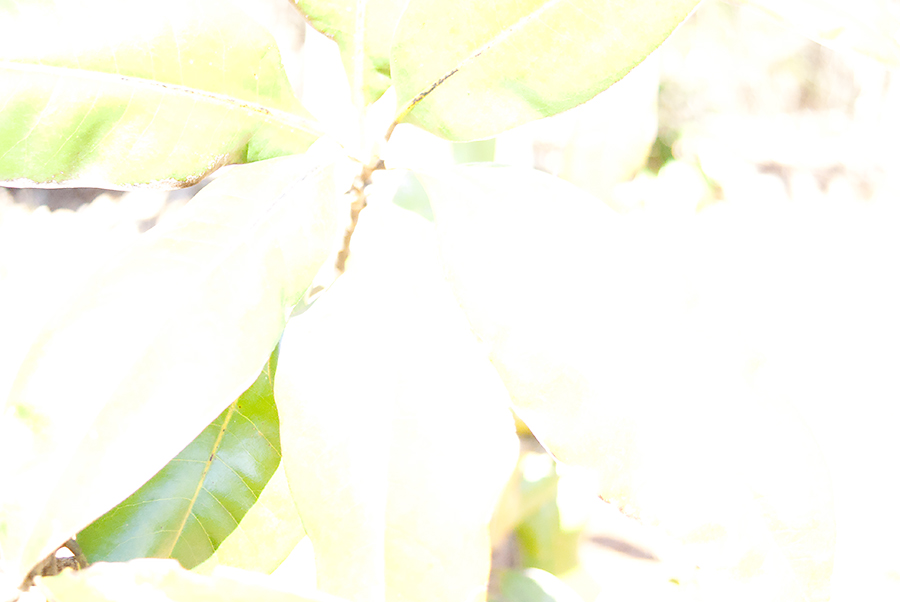
- ISO 3200, f/2.8, 1/1000 of a second
Use lower Camera ISO when your light is plentiful. On bright days or in places where lots of light is reflected on your subject a lower ISO between 50-400 will serve you well.
When to Use a Higher ISO
Same day, same time, same basic settings. I jog on down to where there’s shade. I set it at Ron’s ISO of 100 and leave all settings the same. Um… what is that a picture of? This is called an underexposed image. The ISO of a 100 was too slow to tan up in these conditions. Only the lightest areas in the image are showing up as colors other than black.

- ISO 100, f/2.8, 1/1250 of a second
Switching over to Derek’s ISO of 3200, I took the same shot. Now you can see what I saw! The only thing that changed here was Camera ISO.
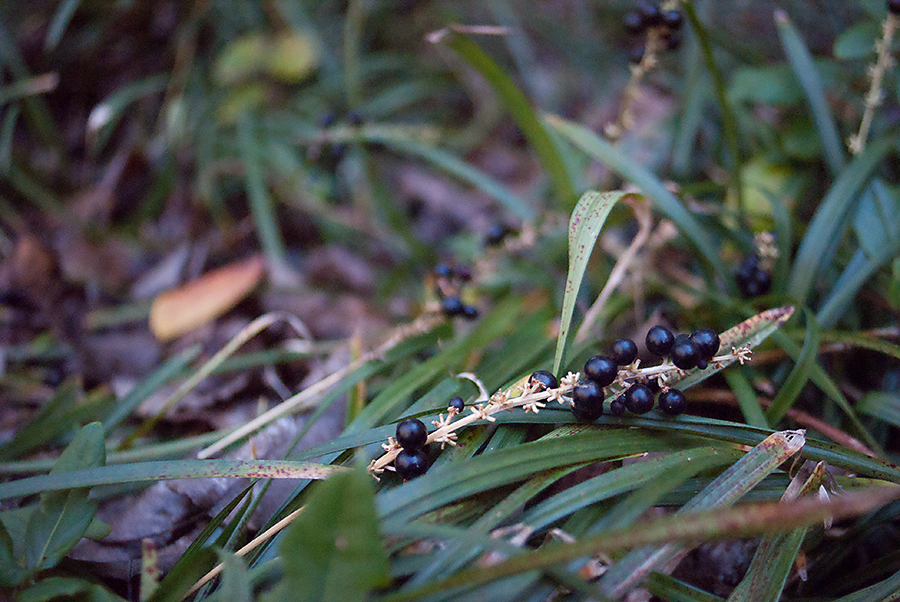
Use higher camera ISO when your light is limited. ISO between 800-3200 is going to work best in deep shade, inside the house, and at night.
A note on Camera ISO and Image Grain/Noise
In a perfect world, changing your Camera ISO to suit your lighting conditions would produce identical shots at both ISO 50 and ISO 3200. News flash: it’s not a perfect world.
The higher up you going on the ISO scale toward 3200 (and beyond) your image is going to have more and more fuzzy little dots. In film days this was called grain because you were literally seeing the larger little grains of the light sensitive negative on your final print. In the digital days this is generally referred to as noise although both terms are used interchangeably. Noise is worst in areas that are darker. Here’s a crop on the two darkest areas of my images above. The first image is the magnolia leave at ISO 100 and the second is the berries at ISO 3200.
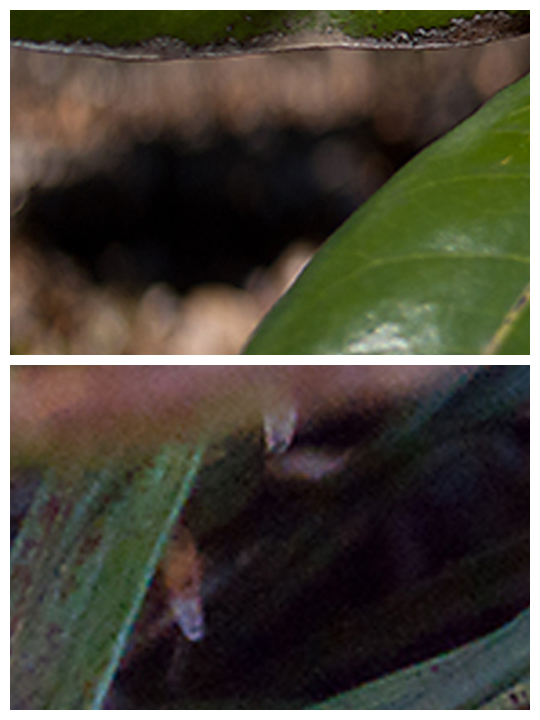
In the first image shoot at ISO 100 the black is smooth and truly black. In the second image shot at ISO 3200 the black is speckled and interspersed with other colors.
I find I really like noise in my black and white images (mainly because I shot black and white film first and was used to the grain), but in color images noise can cause color shifts that I really don’t like.
In general, shoot at the lowest ISO appropriate for your lighting conditions.
How Do I Change my Camera ISO
If you were shooting film, this would be easy. You’d change your roll of film to one with the appropriate ISO. But I’m going to bet that most of you are probably shooting with a digital camera. How easy it is to change your ISO is going to depend on your camera.
Digital Point and Shoot
You may or may not be able to change ISO directly with your digital point and shoot. You’re going to have to pull out your manual to find out for sure. Some of the cameras that look like point and shoots but are really SLT/translucent mirror cameras will have this capability (Sony Nex and Nikon V1 for example).
But don’t loose heart if you’ve got a point and shoot. You’re going to be able to tell the camera if it’s bright and sunny or if it’s not by changing your mode. Again, this is going to take a good manual consultation. But for an example here’s my point and shoot.
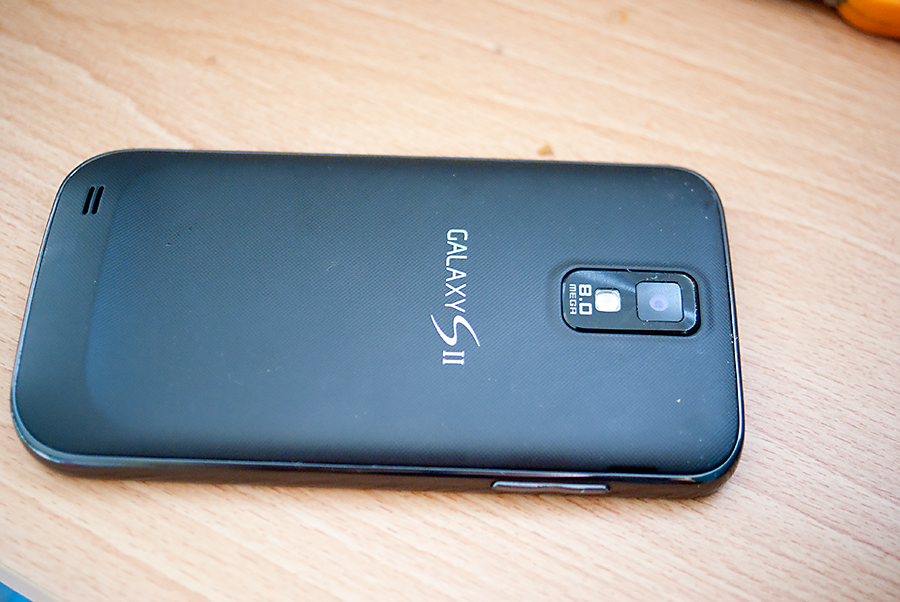
Hello Samsung Galaxy SII. Yep, the only point and shoot I own is my phone 😉 And this little phone sees a lot of daily use. It’s often with me and it’s not heavy on my neck. Anyhow. If I open up my camera application and click the settings icon then–> Scene Mode. I’m going to see the following options and can scroll down for even more options.

Selecting Modes that increase or decrease your Camera ISO on a point and shoot. (Remind me to clean my phone screen or learn to do phone screen shots before showing you my phone again. Gross!)
To tell my camera to select a higher ISO I’m going to select party/indoor for something around ISO 800 or Night for something around ISO 1600-3200. You’ll also have to turn off your flash manually. Most of your digital point and shoots are going to have this type of menu with similar icons located either on a dial on the top of the camera or within a settings menu.
Digital SLR
On my Sony a200 there is a dedicated ISO button right next to my shutter release button (You can see that above!). From my brief research, it seams that the major brands Canon/Nikon also have dedicated buttons for this function. You simply click the button and scroll down the appropriate ISO selection for your scene. Here’s where things get a little tricky. Some camera’s will allow you to change the ISO in Auto, Program, and Manual Modes while others will only allow it in Program/Manual Mode. So if it’s not changing in Auto mode, switch to Program (or P on your dial) for the assignment.
Camera ISO Assignment
First, figure out how to change your camera’s ISO. Consult manuals and/or do a Google search for your specific model to see if someone put up a visual tutorial. Also, figure out how to turn off your camera’s flash. No flash is allowed for any of this month’s assignments!
Now you’re going to take four images. You’re aiming for something well-exposed although some of you may have under exposed images due to limitations of you camera’s ISO. Point and shoot users may have the most problems, although all of you may find your night sky is more grey than black. We’ll learn about that later this month.
Image 1: A subject in bright sun around noon.
Image 2: A subject in bright sun, but located in the shade (under a tree, in a shadow, etc)
Image 3: A subject inside the house in the evening or in an area of the house where light is limited. Some of you have living rooms like mine that are filled with light during a certain times of the day. Avoid that kind of light. Your lighting should mainly be the kind powered by electricity 😉
Image 4: A subject outside shortly after the sun has set or if you’re feeling brave loooong after the sun set. Bracing your camera on something/using a tripod is going to help with this! As is making sure your flash is off! If you have a DSLR and it won’t focus at night, switching it into manual focus is totally an option.
The little group of you who are participating seem to prefer meeting over in our Flickr group and I’m not sure if the link-up I used worked. So I think we’ll just move all assignments into the Quiet Graces Free Beginner Photography Class group. If you’d like me to link to your specific blog when I post one of your images in a lesson then hop on to this thread and give me that web address. So once you’re ready, add your images to the group, self-critique, and receive share constructive criticism in the community. I’ll be featuring some of you in our assignment wrap up (as well as some of the educational parts) so extra bonus points if you get them up before next Tuesday! I know this is a short turn over time for an assignment… but it’s only four images! You could knock them out in one day if you concentrated. (And truth be told… I’m the one who needs this pep talk the most!)
Give me some feedback. Did the whole sunburn metaphor work for you? Or are you just annoyed with hearing about skin colors? Did you learn something? Are you excited about the possibilities?

Shutter Speed- Free Beginner Photography ClassBeautiful Newborn and Lifestyle Portraits by Quiet Graces Photography
[…] Okay so we’ve tackled one of two harder points of the exposure triangle, now let’s hit the easiest: shutter speed. I promise this concept is so much easier to understand than ISO. Plus you won’t have to deal with any crazy family skin tone metaphors. Ahem. But first lets have a look at some of the results from our Camera ISO assignment! […]
Using your Camera in Manual Mode: Exposure Triangle {Free Beginner Photography Class} @ Beautiful Newborn and Lifestyle Portraits by Quiet Graces PhotographyBeautiful Newborn and Lifestyle Portraits by Quiet Graces Photography
[…] class for the first half so far than you already know all of the parts of the Exposure Triangle: ISO, Shutter Speed, and Aperture. However, because we’ve let the camera pick at least one of the […]
A Free Beginner Photography Class @ Organic Natural Maternity, Birth, Newborn and Baby Photography by Quiet Graces Greenville, SCOrganic Natural Maternity, Birth, Newborn and Baby Photography by Quiet Graces Greenville, SC
[…] Camera ISO and Assignment #2 […]