09
2013Setting Exposure in Manual Mode: The Zone System
Today features a really technical post on how to nail exposure using your knowledge of stops and something called The Zone System. Again, if you like technical stuff, you’ll thrive off this post. If you don’t like technical stuff, read over it but feel free to keep clicking away until you figure it out on your own. The wonderful thing about digital photography is that you do have your LCD screen to check… the not so wonderful thing is that regardless of your choice of Film or Digital, time and the moment you’re shooting will still march on. Find the balance you can live with and go for it.
The Zone System
The Zone System was invented by Ansel Adams for use in film photography. It’s a system that assigns each color tone a stop value and aids the photographer in deciding what to set your exposure from. Ansel Adams pioneered this zone system in a time before color films was widely used and before digital photography was even dreamed up. That means that the world is seen in monochrome which is a little difficult for the modern photographer who is used to color. Let’s take a look at what each of these zones represent with tonality before diving into how to use the Zone system to nail exposure straight out of the camera.
The Tonality of the Zone System
| 1 | 2 | 3 | 4 | 5 | 6 | 7 | 8 | 9 |
Let’s talk real quick about what each color zone contains.
- Zone 1 is dark black. It renders as a smooth black with no texture in the final image.
- Zone 2 is a dark color recorded with the beginning of texture.
- Zone 3 is a dark color with average texture.
- Zone 4 is your average dark foliage, dark stone, shadows in portraits or in landscapes shot in sunlight.
- Zone 5 is dark colored skin, gray stone, average weathered wood tones, and your 18% gray card.
- Zone 6 is average Caucasian skin, light stone, or shadows on snow scapes.
- Zone 7 is very light skin, snow with side-lighting, and my son Sedryn’s crazy blond hair.
- Zone 8 are whites with texture, snow in the full shade, and highlights on average Caucasian skin.
- Zone 9 are glaring texture-less white subjects like snow in full flat sunlight or a white sheet of paper.
Read those again and get a feel for them. Ask yourself: what zone is a bronze statute? What zone is the sand on the beach? How about an orange tabby cat?
Using the Zone System to Set Exposure
The Zone System has us identify the area we’re most likely to loose detail or color when taking our shot. With digital cameras, we’re more likely to blow the highlights than lose detail in the shadowed or dark areas. So we’re always going to want to expose for the highlight that we don’t want to lose detail in. If you’re shooting film, it’s the opposite, you’ll want to expose for the shadowed area that you don’t want to lose detail in.
Remember our good old gray card and 18% gray? That’s zone 5 or middle grey. Remember how your camera meter is always straining to set the average exposure of your scene at 18% gray or Zone 5? If you’re shooting a scene with average contrast, your camera will likely do fine in auto mode. But try to photograph the detail in snow or coal and you’ll be cursing your camera in auto mode for turning both of those things into a Zone 5 middle gray. Or photograph an extremely varied scene and you’ll blow all your highlights in digital photograph and lose all your shadow detail in film photography. Let’s explore how the zone system helps with those two areas.
Photographing snow. What zone is snow? (look up at the chart) It’s Zone 8 in even diffused light. Your camera is trying to turn all that brightness into a Zone 5 essentially underexposing for the way you want the image represented. So you’ll look at your settings for an EV of 0 and move Zone 8 minus Zone 5= 3 Stops toward overexposure/positive EV. Bam! Quick exposure decision. (though it may take you awhile before you memorize what constitutes a stop…some days I still have to consult a chart for aperture)
Photographing coal or a dark night sky. What zone is the coal? It’s Zone 2 or 3. So you’re going to roll that exposure down 5 minus 2 or 5 minus 3 Zones or 2-3 stops toward underexposure/negative EV to capture all that detail in the darkness without overexposing it.
You sort of getting a feel for this? What complicates things is when you have a scene like Ansel Adams was so fond of with lots of white highlights and lots of shadow details. Digital users will always attempt to expose for the brightest highlight you want detail to be recorded in. Film users will attempt to expose for the darkest shadow area that you want detail in. The system isn’t perfect, and no matter what the image you’ll record, you may still need to put a high contrast image through editing software (or send film to a film lab with experience in push processing film to bright out highlights and dodging and burning prints to get the best print). However, knowing this system is going to give you the best possible negative to create your final print, especially if digital users shoot RAW files.
Zone System Case Studies
Let’s spend a few minutes doing a case study on how to use the Zone System. I’ll show you the images in both color and black and white so that you can begin to see the world in the monochromatic tonality of the Zone System and talk you through why I’m choosing to expose for a certain zone. In these images, I’m shooting digital so I’ll want to expose in a way that favors the highlights. If you’re shooting film, remember you’d want to expose for the shadows.
Case 1: Baby Boy in the River
Here’s my first photograph of my son playing in heavily contrasted light set at EV 0 according my 18% gray loving camera meter.

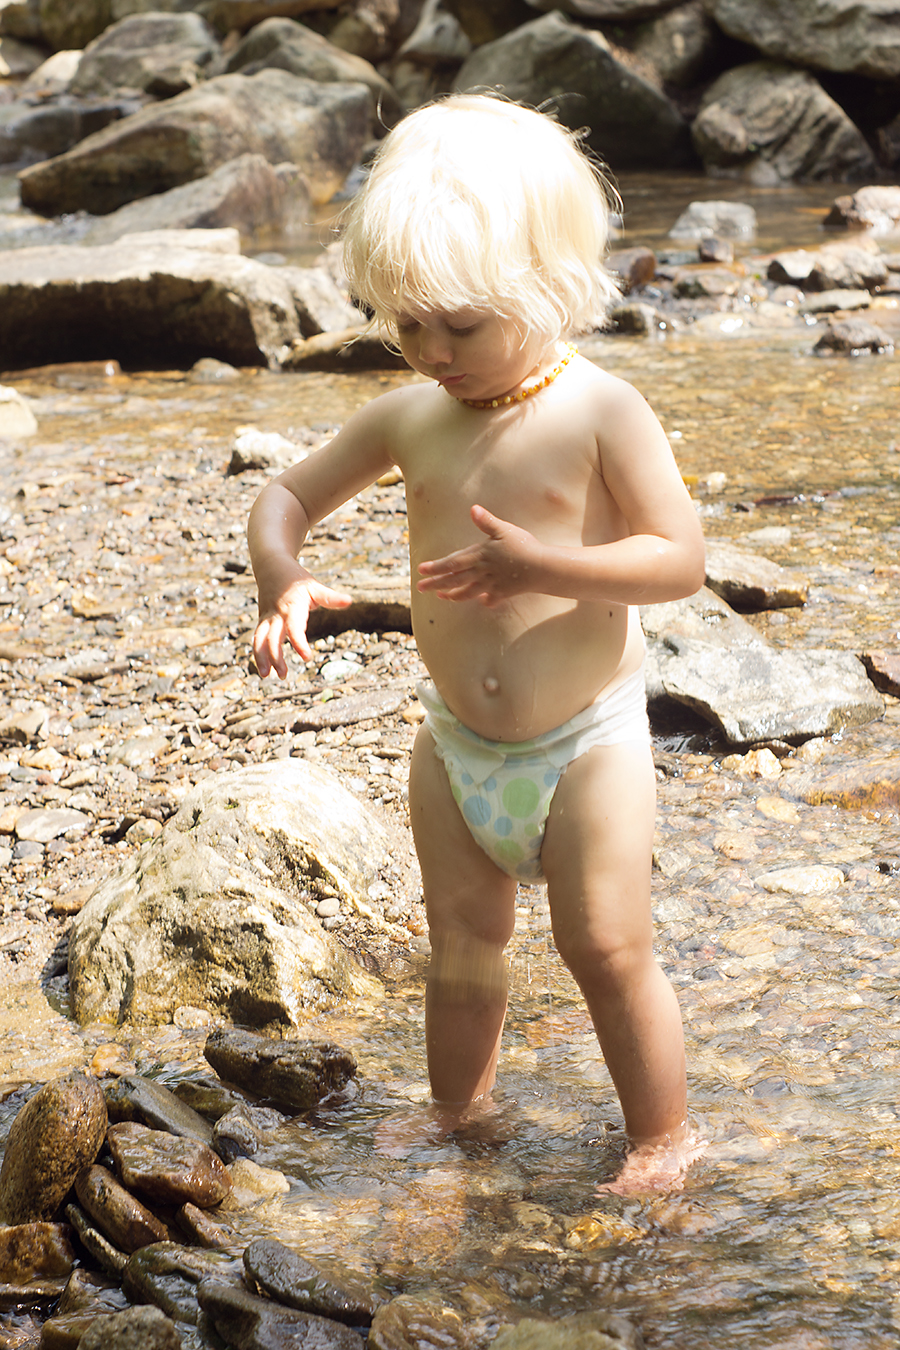
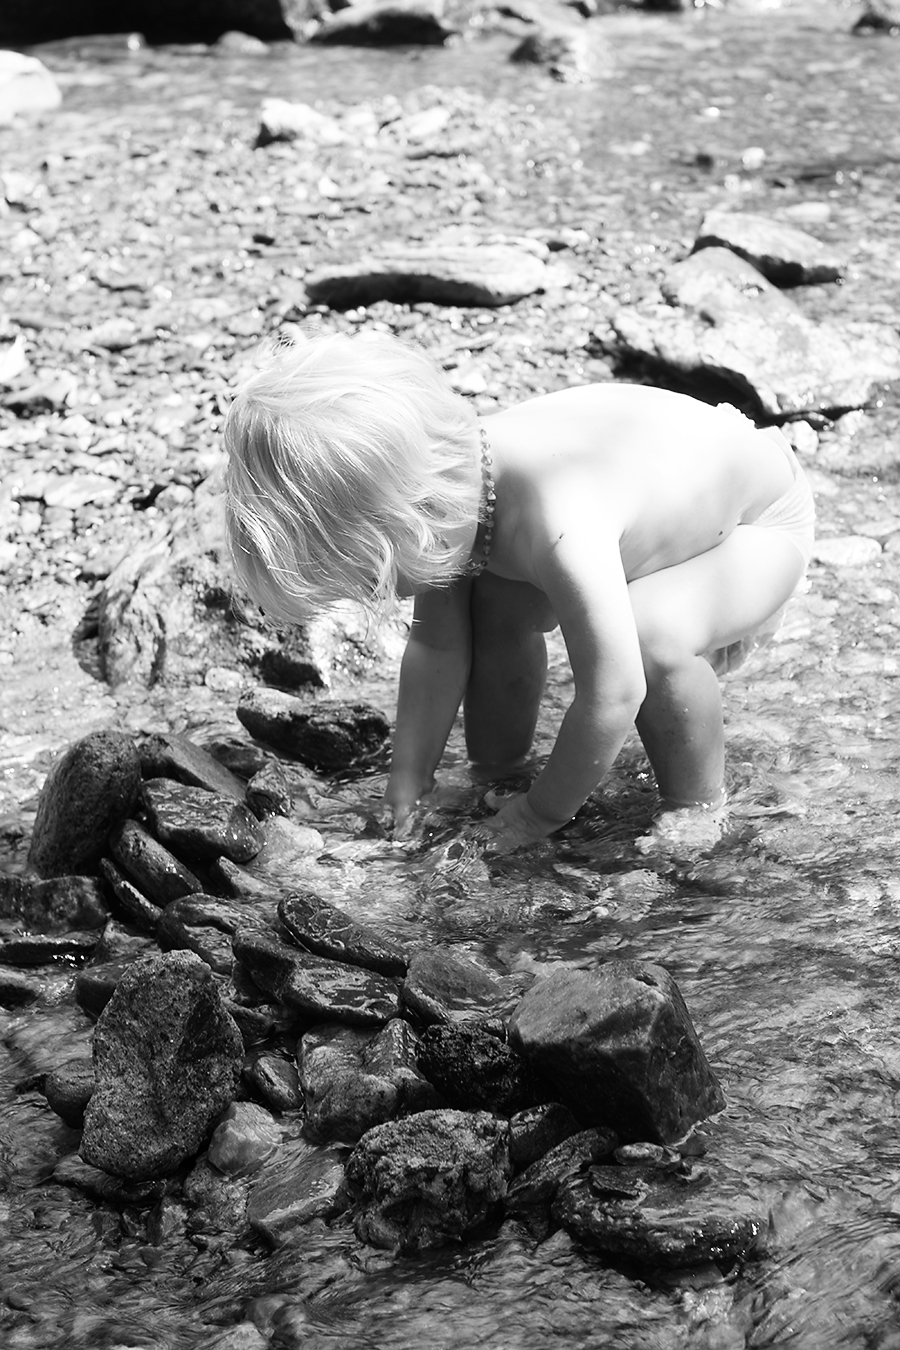
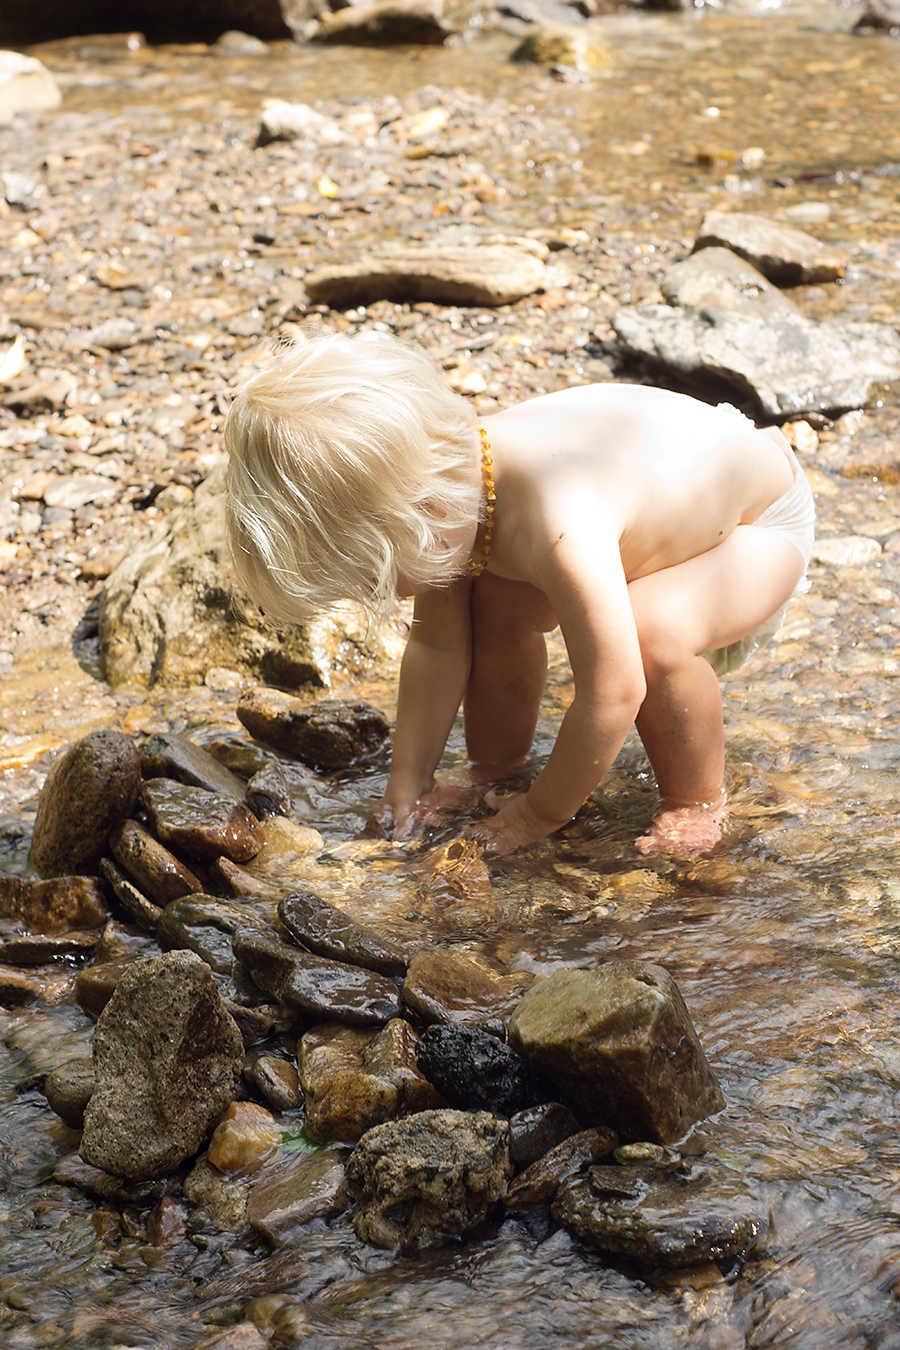
I shot black and white film for so many years before even picking up a digital camera and using color that I can naturally see the world in this black and white tonality of the Zone System. But as you can see in the color image, you really can see these zones in color as well. Even though Sedryn’s hair is more cream in the color image than bright white, you can still see how there is no detail and that Zone 7 is completely blown out.
On my second image, I adjusted my settings to be about 1.3 stops under exposed. I wish I had gone at least a full 2 to guarantee all my Zone 8 highlights wouldn’t be blown. You can see I did blow out the Zone 8 highlights on his very fair skin even in this image: right there around his shoulder and back in the harsh evening sun. However, underexposing (according to my light meter) just this much brought back all the detail in his hair. Overall, this an image with rich contrast across almost all 10 zones.
Is the Zone System Irrelevant with Current Technology Advances?
Light meters in modern cameras are more sophisticated than those used in Ansel Adam’s day. They are multi-segmented and attempt to balance the light across the image out; that’s why shooting in Auto mode with a modern digital camera often produces satisfactory results. Many photographers think digital photography brings about the death of the Zone System; I am not one of those photographers.
As I mentioned before, I do not like math… but I do like science and every single one of my hobbies require the math part of science. If I don’t cut or piece a quilt top exactly there will be wonky spots. If I don’t check my gauge when I’m knitting then my result could be wildly bigger or smaller than expected. For me the zone system is a system of measurement that’s super helpful when I’m outside with a highly contrasted scene. I’d rather lean on it than spend a lot of time fiddling with taking a shot and then looking at my LCD and then readjusting repeatedly to get the image I envisioned.
Yet at the same time, I’m not going to say that this system will work for every photographer. If the math of stops and the identifying of zones sort of blows your mind, then this isn’t the system for you. Be critical about what works for you. You’ve grown enough in your skills and should be progressing your way through conscious (although maybe a bit slow) competency of manual mode.
Wrapping up Manual Mode and a Quick Assignment
This week is my last post on manual mode. I’m hoping your well on your way to understanding setting your own exposure and are able to navigate manual mode with a bit of growing confidence.
Your assignment this week is to leave me a comment here about: What are you understanding? What are you struggling with? What would you like clarified? What helped you the most? If there are enough questions, I’ll address them in a seperate FAQ Manual Mode Post. If not, I’ll make a point to answer each of you in the comments. I’m so looking forward to hearing from you and I hope to see your images in the Quiet Graces Free Beginner Photography Class Flickr Pool very soon!

Andrew
The concept of stops and all the math of this is fine to me (big surprise). The workflow of two posts ago was particularly helpful. Instead of thinking about it as having a whole lot of different factors that I needed to balance, I suddenly had an ordered way to address each and to adjust from. I felt a lot more organized and ready to approach each picture.
It’s those aspects of photography that involve greater amounts of judgement and intuition that I’m still really struggling with. Looking at something and guessing at the value or amount of light is not as straightforward and formulaic, and I simply don’t have an eye for it (hopefully this comes with a ‘yet’). I’ve always struggled with judging color, value, and other aesthetics.