10
2013Basic Editing: Layer Masks
The Layer Mask is sort of the king of the good photo editing software. But it’s kind of hard to explain. Let me try in plain English. You know those Name/Word Canvases that you get little kiddos to make? Here’s an example from pagingfunmums.com.

You lay down the masking tape in the arrangement you want and then you paint over top. Later you peal off the masking tape to show your design. That’s what a layer mask does. You apply your extra work, but then decide you don’t like it in just a few places or that you only want it in a few places and so you mask off the portions you don’t want effected by the changes. Does that make sense? I hope so.
How to Apply and Use a Layer Mask
Note: I’m about to use a technique that I think is cheesy in most cases. It’s called Selective Color: where most of an image stays in black in white but you select one thing to remain colored. I’ve used this technique two times ever and in both cases I think it was cheesy. In fact, the only places I’ve seen it done tastefully was Schindler’s List and Disney’s Paperman Short Film. I’m only using this technique here because it’s really easy to see the effect of the layer mask. However, layer masks are useful in everything: from layers to curves to skin smoothing to creating beautiful vignettes. If you can dream it… a layer mask can isolate the technique. So I’ll show it in selective color first so you can see what I’m doing, and illustrate a layer mask technique with a vignette where I physically have to add the Layer Mask.
Using a Layer Mask with a Brush
Here is an image I’ve turned black and white. Gradient map comes up with a layer mask attached. I’ve circled that below.
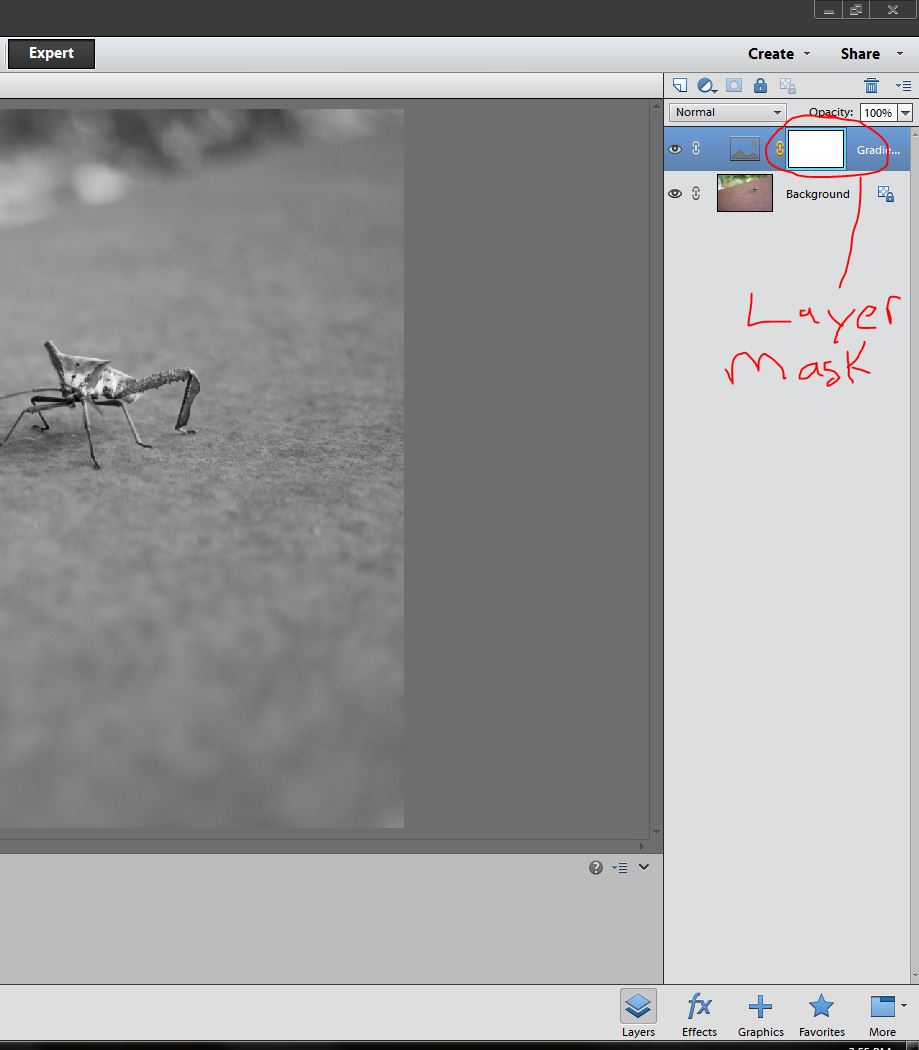
I’m going to select the brush tool (the tool I use most of the time when working with a layer mask). Using the brush at 100% opacity and with a soft edge I’m going to reveal some color by masking off the gradient map layer.
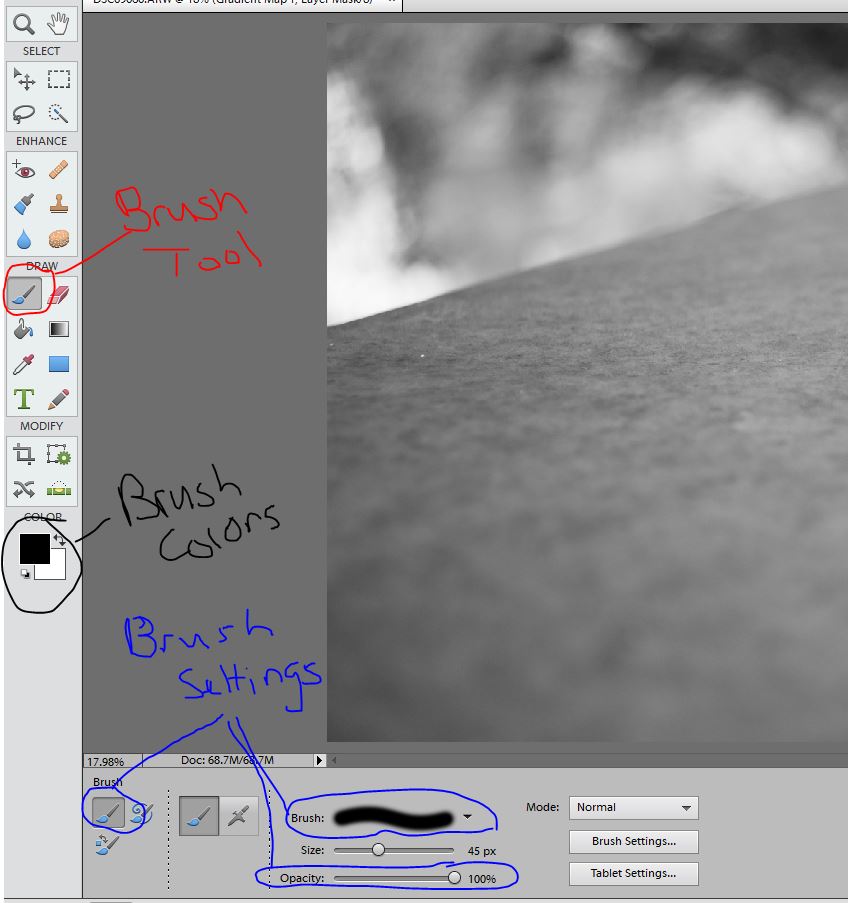
A black brush will remove and effect while a white brush will reveal the effect. So here I want a black brush.
I brush over the detail I don’t want effected by the layer in black while my layer mask is selected. Make sure the layer mask is selected. You paint the details you don’t want shown right on the image but you’ll see the black appearing on the previously white layer mask.
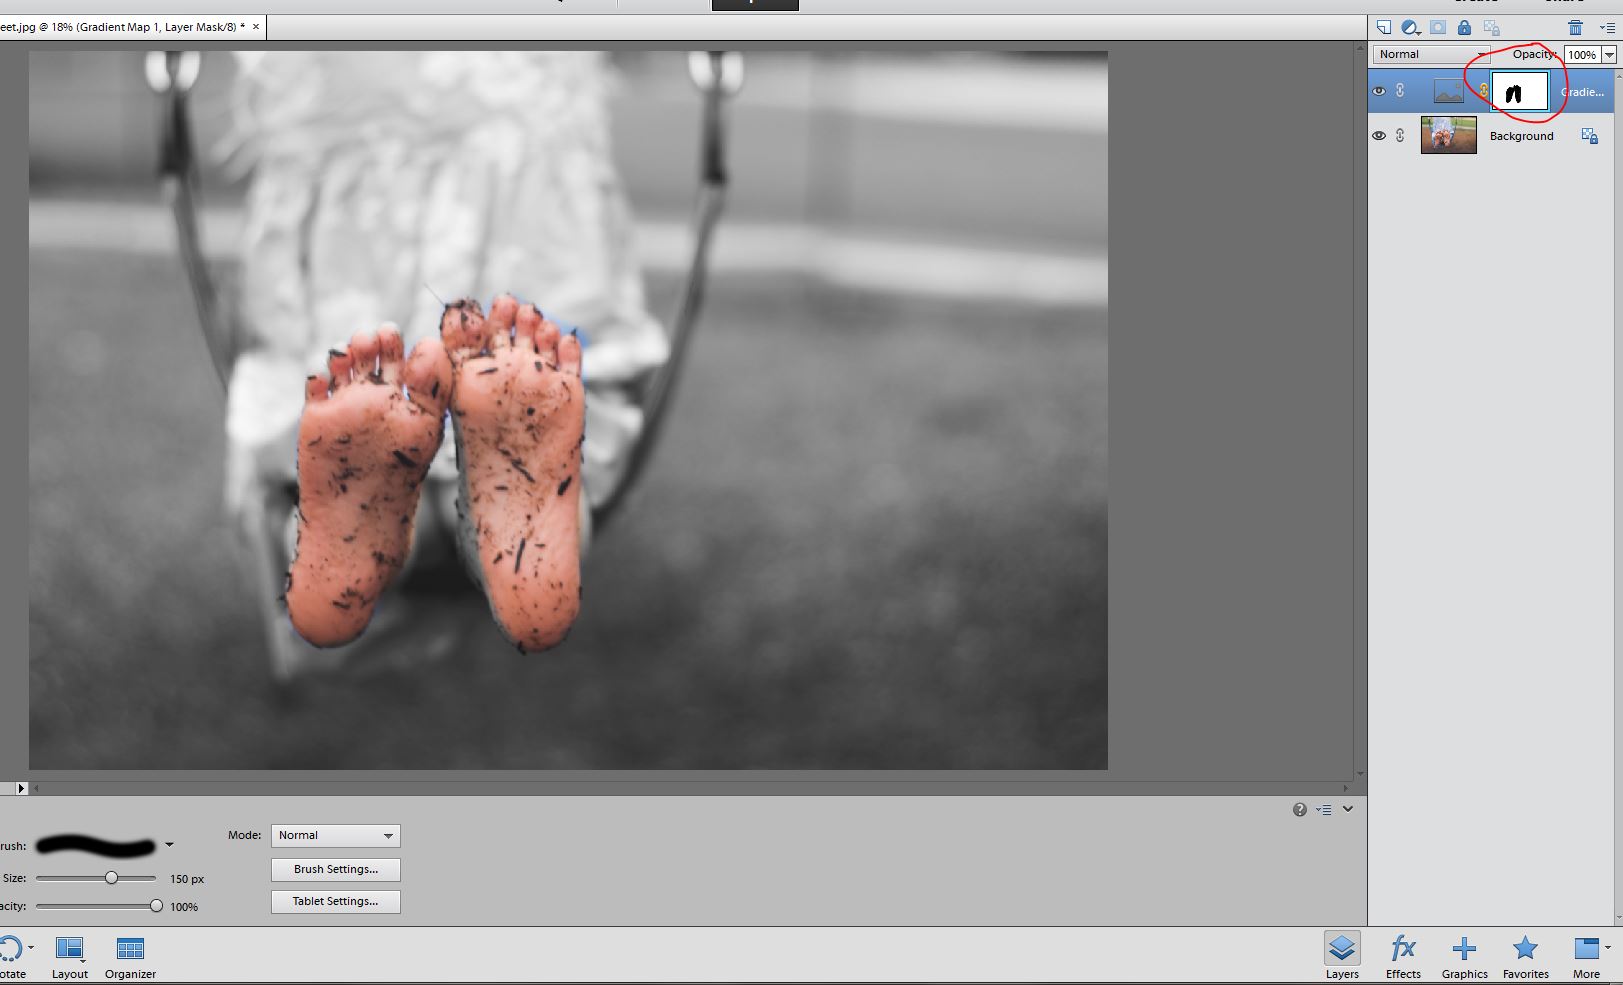
This reveals the layer below which is a color layer. Obviously if I really wanted to do this for this image, I’d need to spend a bit of time refining the edge by switching from black to white brushes and making sure I painted this the way I wanted. (Excuse the change in image mid-way through the tutorial. I suddenly realized the bug itself was black and white… epic fail.)
Adding a Layer Mask to a Layer without a Mask while Making a Vignette
Here I’m going to apply a vignette. It’s a fancy French word meaning to darken the edges of a photo so as to draw the viewers eye where the artist wants it. These are the steps I use to do that.
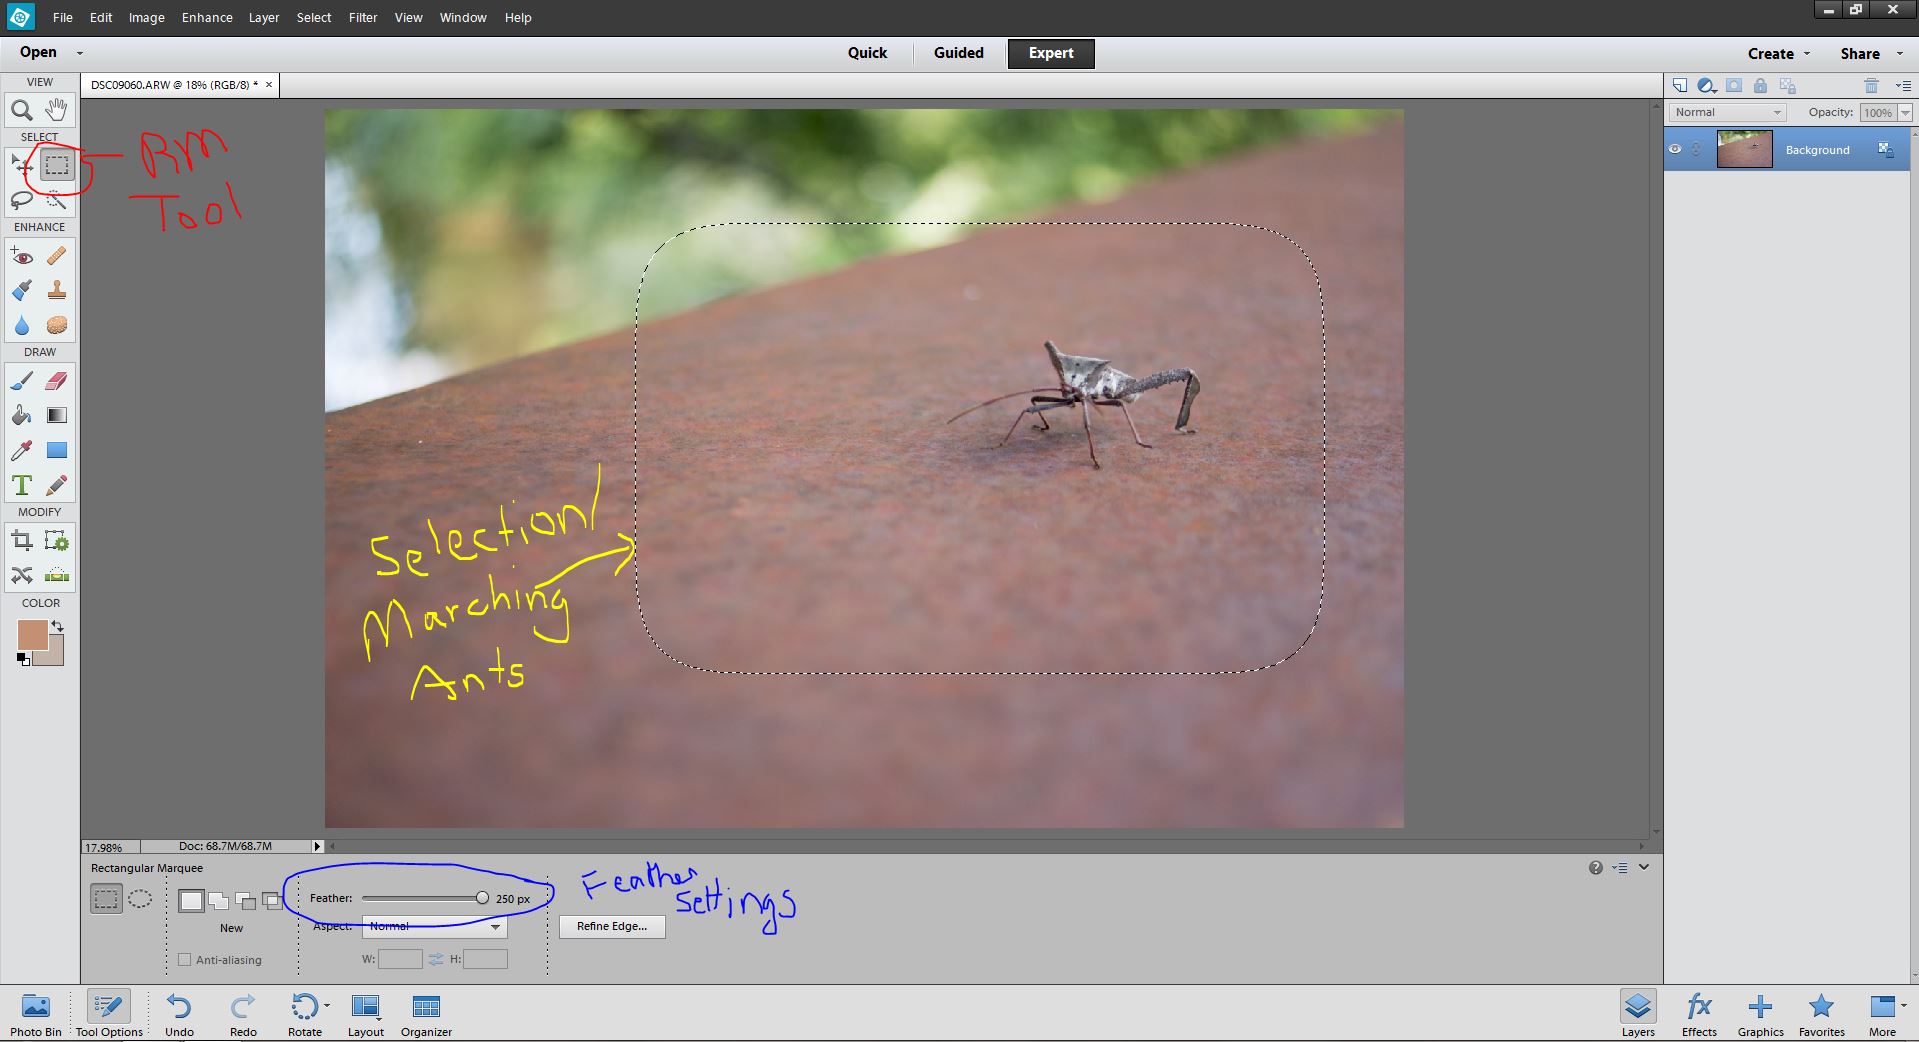
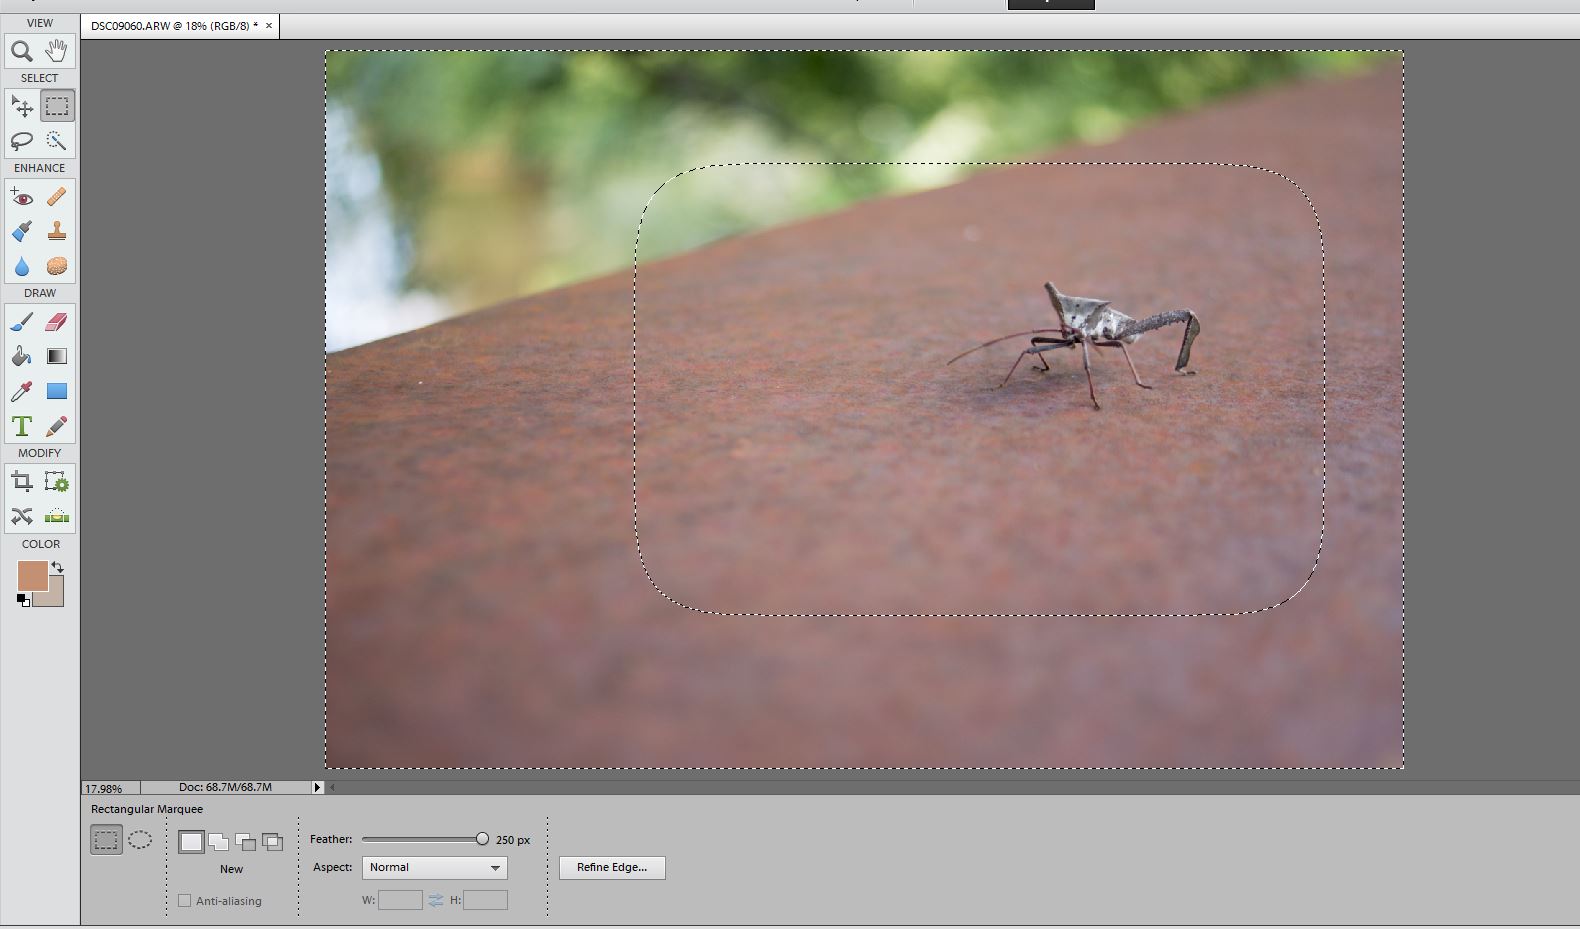
- Select the Rectangular Marquee Tool and change the feather settings to 250px
- Use the Rectangular Marquee Tool to select the part of my image that I don’t want effected by the vignette. You’ll see marching ants around your selection. If you don’t like where the selection ended up press Ctrl+D (or Cmd+D on a Mac) to deselect and try again.
- Right Click inside the selection and then click “Select Inverse.” Your Marching Ants/Selection will look like this now.

- Now right click your background layer and click “Duplicate Layer.” Click Okay.
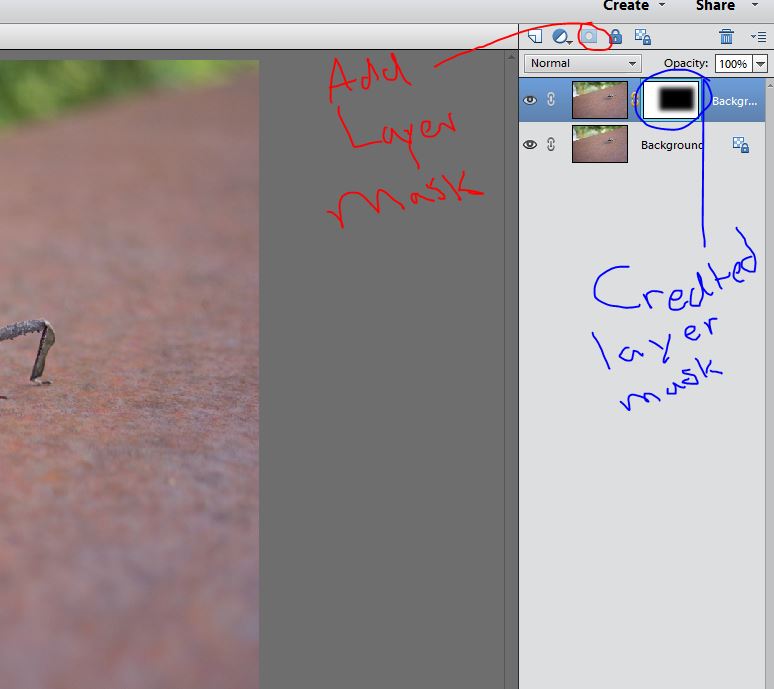
- Then Select the Add Layer Mask Button and your selection will turn into a layer mask.
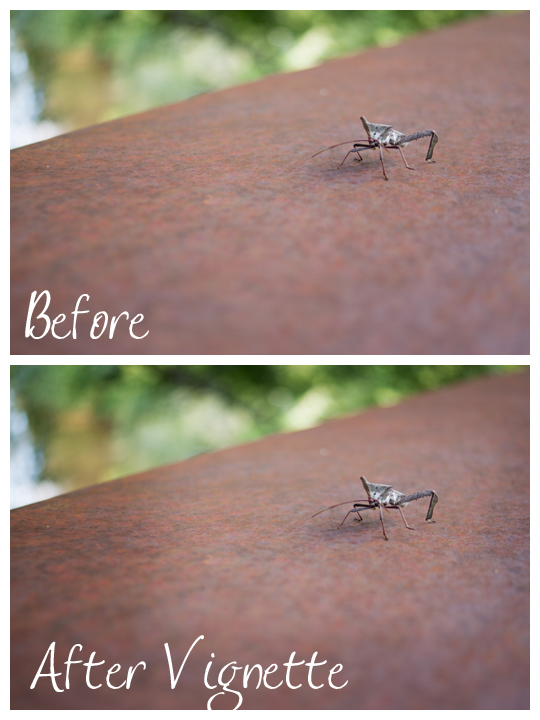
- Now change the Layer Type to Multiply and then adjust the Opacity of the Vignette to your liking.

A quick before and after.
Final Layer Mask Thoughts
I know this was a super quick overview of layer masks, but I want you to know that Layer Masks are the secret superhero power of photo editing software. They are used in everything. I gave a beginners overview but if you want to learn more, I’ll once again send you to Amanda at Everyday Elements for further study.
