26
2013Basic Editing: Magic Histograms with Levels and Curves {Free Beginner Photography Class}
This one is going to be a super long post. You’ll find that you prefer either levels or curves. That’s okay, but it’s nice to know how to use both. Personally, I’m a level’s girl, but I do like to use curves on newborns 🙂
Definitions
Histograms are Magic
I haven’t really talked about histograms during the course of this class because I feel like it’s an intermediate topic. I’m going to touch on it briefly here because both levels and curves are changing the histogram from your original image. A histogram is a chart showing you the relative tone quality of your pixels. The left of a histogram chart records dark pixels while the right of the chart records light pixels. You’ll read all over the web that a histogram with a gentle bell curve should produce the perfect exposure. Honestly, that’s just not true. Ready for a Quick Case Study?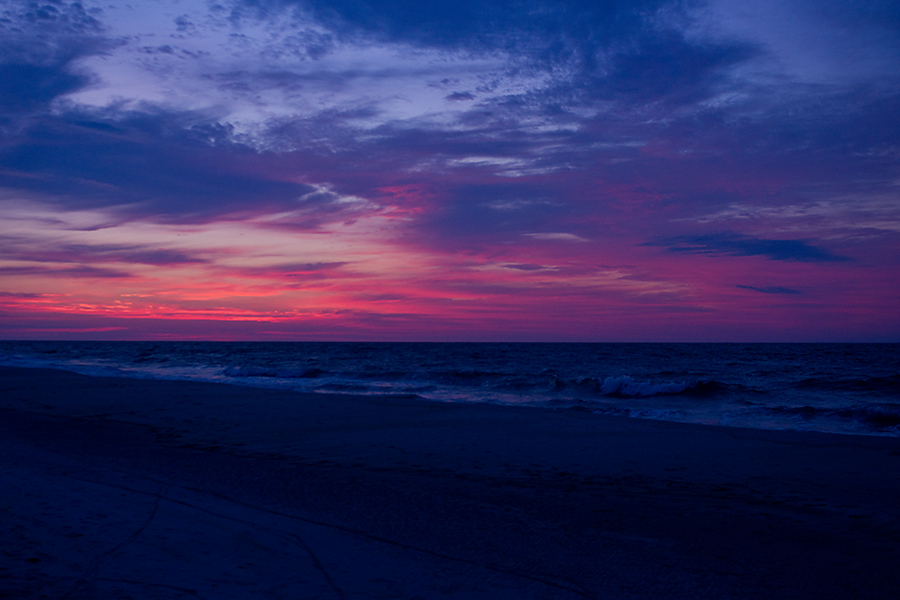
This image is pretty close to the ideal bell curve idea except for that spike in the dark tones likely caused by the dark beach/ocean. Is this a great exposure? Yes, for this image.

There’s a considerable amount of light tones in this image. Critics would gasp at this poor histogram if they saw it without the image, but I think the image is well exposed and edited.
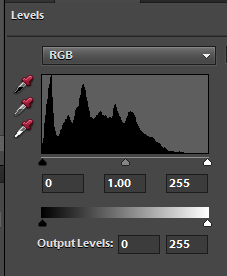
This image by our class member Amber has no curve at all in the histogram. It’s a steep rise into the darks. Is this okay? Yes. I think it’s slightly underexposed, but not be more than -2/3 stops.
Now we can access the histogram through levels or curves, but it’s way more useful when we’re able to look at it while creating the image. Most DSLRs have the capability to show the histogram in the viewfinder, so jump into your manual and find out how. However, even if you choose not to use a histogram while shooting, you’ll benefit from knowing what a histogram should look like while you’re editing in levels and/or curves.![]()
Levels
Levels is a smarter and better way to adjust for small exposure difficulties and brighten an image than the Brightness/Contrast function. Levels can fix exposure, assist in correcting white balance, and a host of other things. Here I’m going to teach you only the first two. If you want to know more about the power of levels: Browse through this post at Everyday Elements.
Curves
Curves is a little more difficult for me to accurately define. Basically, it’s extremely similar to levels, but it deals a bit more with contrast than brightness. Curves can be used to fix exposure, change white balance, and alter color tones. A much better summary of what curves does can be found here.
Editing with Levels in Photoshop Elements
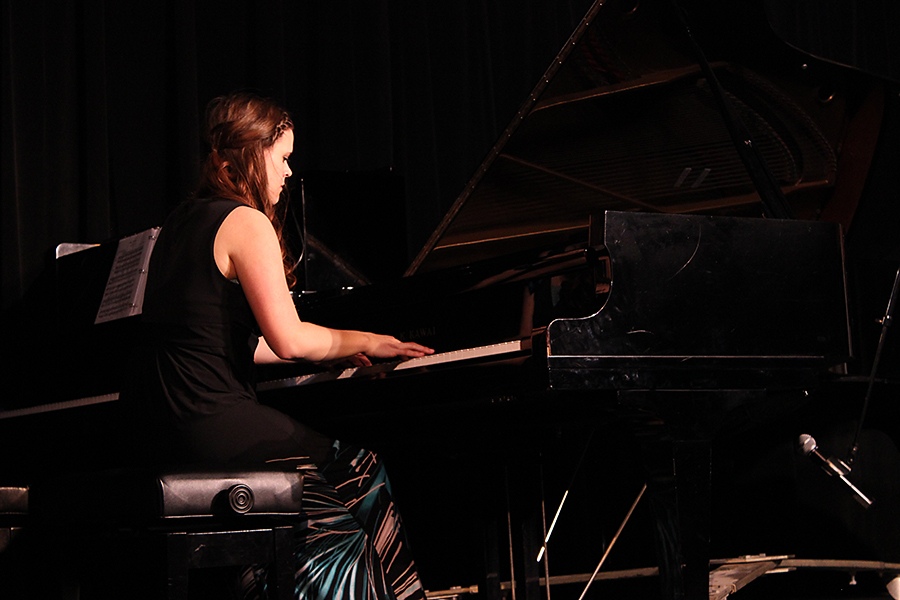
I’ll keep working on the same image throughout this editing series for the sake of consistency. It’s a pretty basic image that anyone could have taken.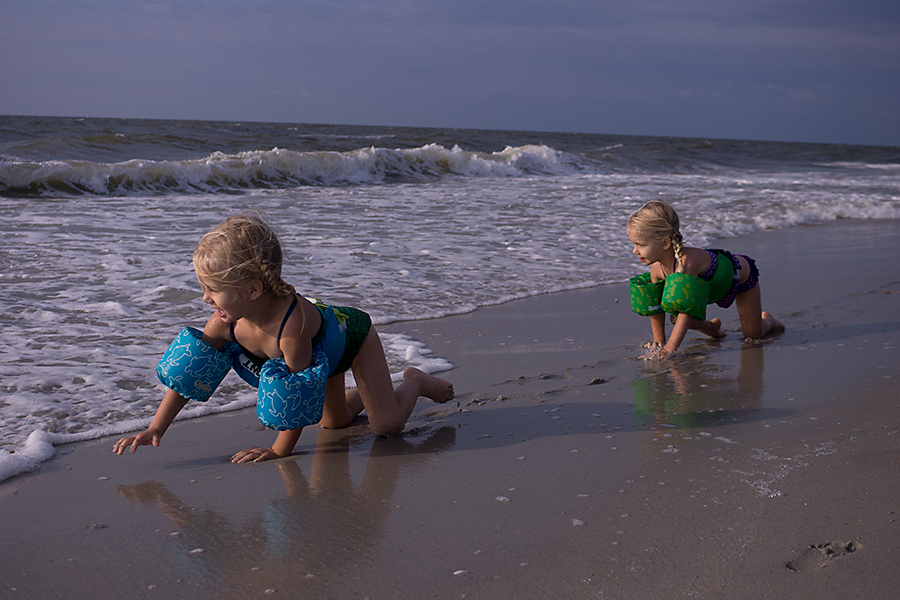
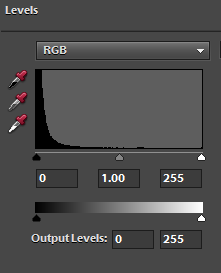
To open a Levels Adjustment Layer in PSE, You’ll click the half moon circle and then select levels.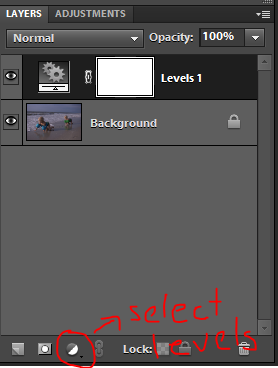 Again, depending on how your PSE interface is set up, you’ll either click your Adjustments tab or an adjustment interface will pop up.
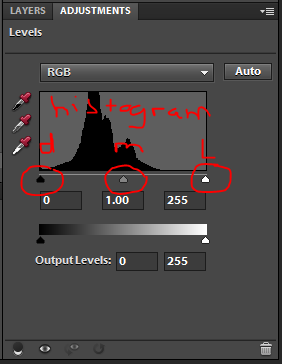 Do you see those little triangles. Those are the dark, mid, and light tones sliders. This is where a great deal of work is done in Levels. For this image, I can see by the histogram that there are not any highlights in the image. So first, I’ll slide my white triangle into the point where the histogram begins to rise. I still think this image is a little dark and levels is more effective at bringing in brightness evenly than the brightness/contrast layer. So I slide my midtone triangle to the left to make the midtones brighter.
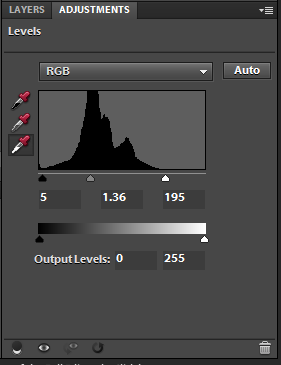 Here is my resulting image.
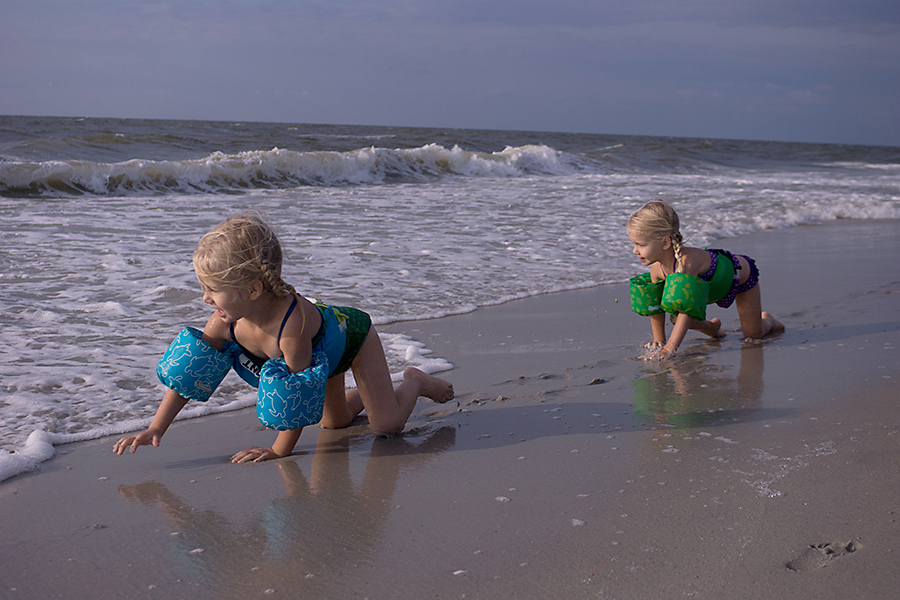 Now levels can also be used to fix white balance issues. If you have an image that is too warm or blue or has strange color casts, you can click one of the corresponding eye droppers. There’s a black, gray (18% gray), and white eye dropper along the left of the levels box.
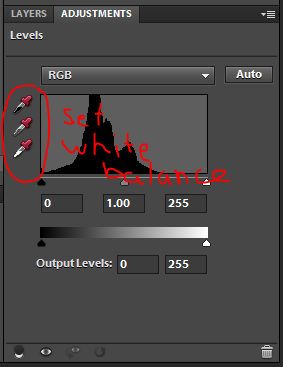 You select the one that you have in your image. For this image, I knew that the white foam highlights should be pure white. Your image may have a black color. A good place for gray is in the whites of the eye, but you’ll have to click in a few places and use undo (Ctrl/Command plus Z) to find the best spot.
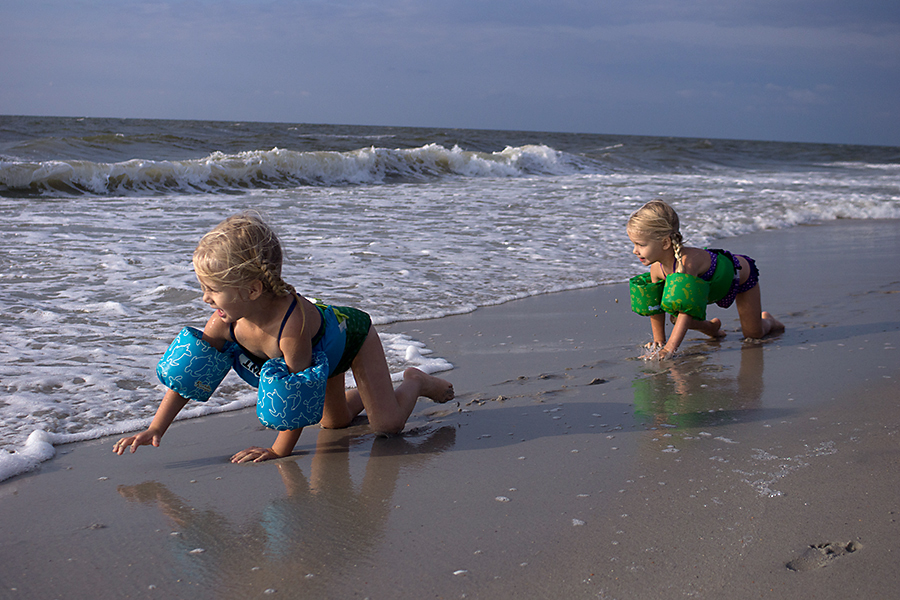
Here’s my image after correcting the white balance.
Editing Curves in Photoshop Elements
PSE does not have native access to curves. But that can be overcome through an action which you install into your effects palette. I’m sure there are lots of free curves actions out there, but the one I use is Everyday Elements Curves. Here is how to install an action in older versions of PSE (which I’ll link to repeatedly in the future). Here’s my Curves action in my Effects panel.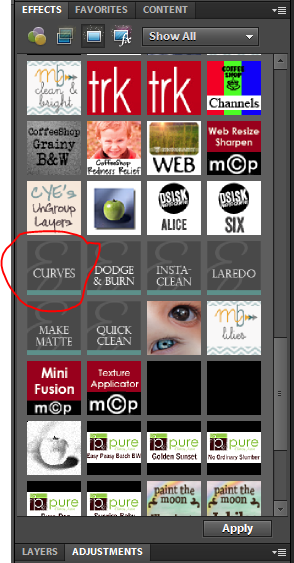 When I click it, the curves function box pops up like this.
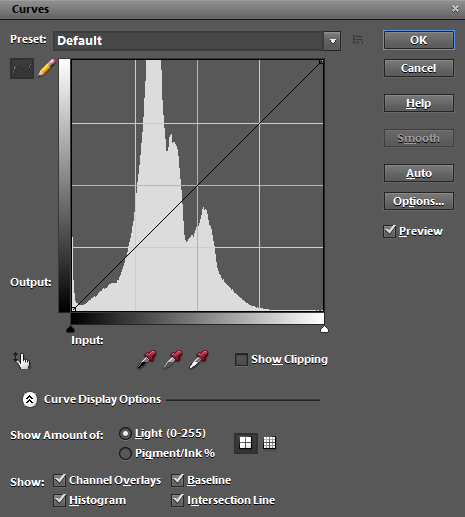 Like levels the curves box is representing from left to right: dark, mid, and light tones. Clicking on the curve and moving it upward will result in brightening the corresponding section while moving it downward darkens the image. Most people use Curves to create what they call a contrast “pop” but applying a slight S-Curve to the image. Here’s what that would look like.
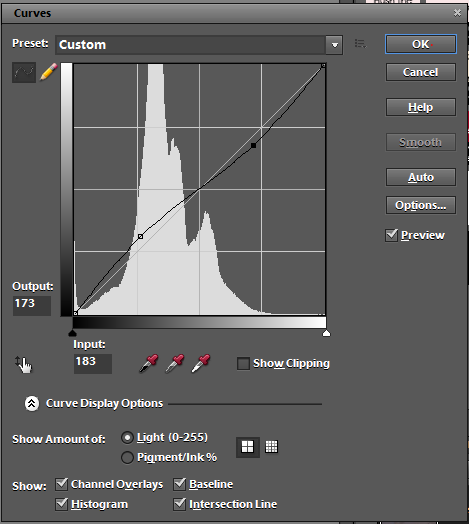
Here’s the resulting image. This would likely look great on any well-exposed image with a good range of tones… but this image is missing lots of dark or light tones.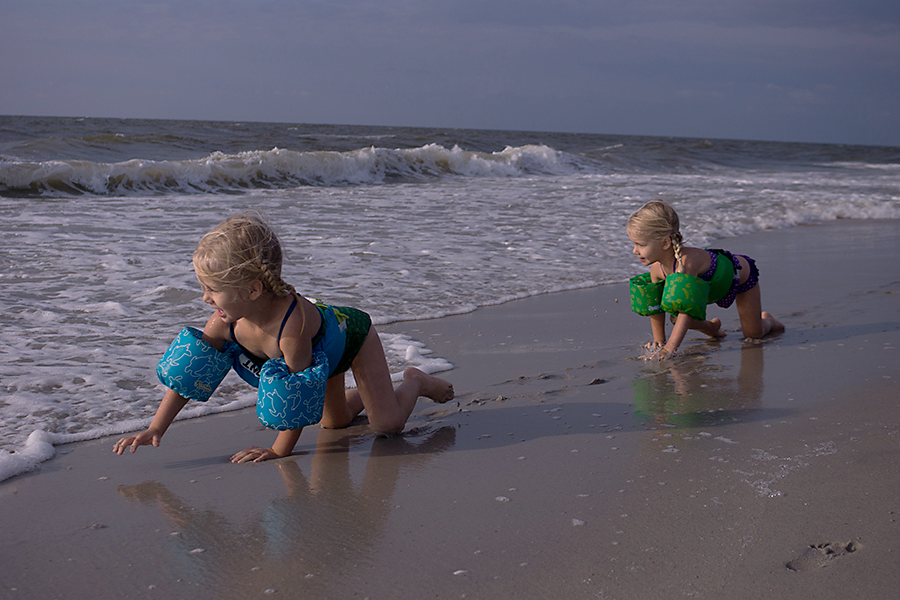 However, what this image needs most is the mid tones brightened. So I brought my the mid tone section of my curve up towards brighter significantly.
Here is the resulting image.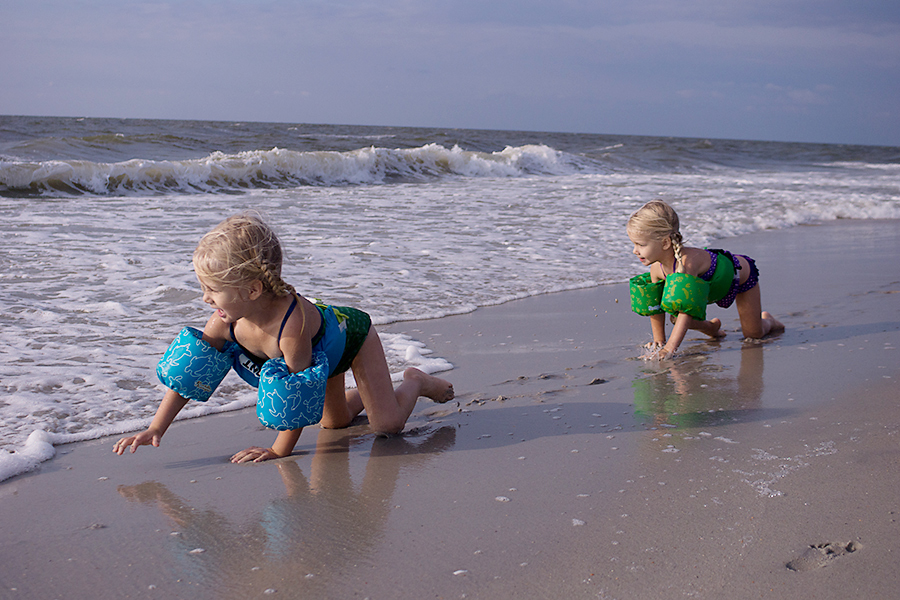
As a side note: to adjust white balance in curves, you use the eyedroppers in the same way that you used them in levels 😉
