05
2013Camera Light Meters and Metering Modes {Free Beginner Photography Class}
Over the last 4 weeks, we’ve been working as a class toward learning how to use our camera’s in modes other than Auto. I’m sure you’re all excited over being able to explore the creativity in Shutter Speed Priority (or Sports on a point and shoot) and Aperture Priority (Portrait and a few others on a point and shoot). Yet, even these two modes have their limitations. In this lesson, we’re going to explore why shooting in Auto, S-Priority, and A-Priority often produces less than satisfactory results as well as when using these modes might be a great option. But first, a round up of some of the great images taken as a part of our Aperture Assignment!
Aperture Assignment Images
I gave 6 images for the Aperture Assignment. I’m not going to number your images here because the assignment I gave was for you to get a feel for the things (like how distance from a subject and lens focal length) that affect depth of field. We discussed depth of field last week in detail so by now you probably have a feeling why these specific assignments affected your depth of field. I will categorize these as wide open and closed though so you can see the difference.
I’m also going to practice giving quick specific critique. Remember, giving and receiving critique is by far the best way to grow as photographic artists.
Wide Open Images

Jessica took this shot of her daughter using a wide open (on her lens) aperture of f/4. It caught my eye because I’m a complete sucker for detail images. The lighting on her right side hand and her shoulders is a little uneven (likely shot during mid-afternoon where there’s little shade other than the shade caused by her little body). But the focus those little dirty and thirsty hands is nailed. Beautiful day to day shot.

TeddyBouch snapped this image of a tiger (at a zoo, which you can’t even tell!) wide open on his lens at f/5.6. He was also zoomed in to 120mm which makes the depth of field on this image even more narrow. What caught my eye was the wild expression the tiger is giving me with lens eye contact. What I don’t really love is the lighting. It’s coming in at almost 90 degrees from the right side of the image. That caused the left eye to be rather dull and shadowed. But this angled lighting also creates the high contrast that Teddy really likes in his images… so it might be a style thing 🙂 Teddy nailed waiting for this expression/eye contact and threw the potentially distracting background way out of focus with the open aperture and the long focal length.
Closed Down Images

This image by Amber caught my eye because of the vibrant colors. She has a small amount of white along the right of the center where the white petals are blown out (meaning there is loss of detail in the highlight area), but other than that Amber brought us in close, nailed her focus, and has a very clear focus point on that front flower despite having a very wide depth of field from an f/22 aperture. Rumor has it she’s blowing it up for her wall and I know it’s going to make her space so cheery!

Flowers were the clear choice for closed down images because they stand for the longer exposure times required by closed down apertures. Sarabeth (my girl who is still rocking her point and shoot!!) has a highest closed down aperture of f/8. It’s sort of right in the middle of the traditional f/stop scale so the depth of field is still pretty narrow and is made more narrow by the closeness to the subject. What drew me to this image initially is the brightly colored flower. I think I might like to see this as a vertical crop with the flower on the far left on the image, though I typically prefer horizontal crops. But what I like most is the leading lines of the branches on the left of the image.

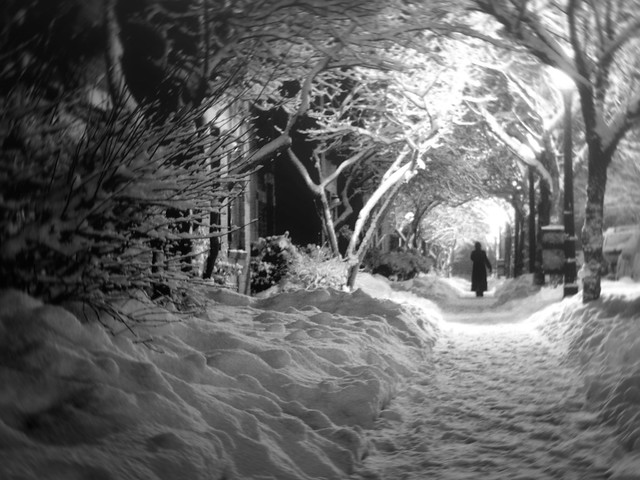
Andrew chose to document these snowy trees at f/29. I shared this in last weeks post, but I felt the need to share it again. 🙂 What caught my eye was the saturated blue of the sky. I think I would like this image even better if I could see right down to the snowy ground. Andrew really captured a great exposure where the whites are white and the blacks black with a fair dose of mid tones tossed in too.
Using Camera Light Meters: Shooting in Auto/S/A Mode
Each camera is equipped with a light (or exposure) meter. A light meter measures the amount of light intensity and while in Auto/S/A modes it chooses your exposure value for you. In plain English: your camera’s light meter is responsible for telling the camera the amount of light in the scene and it will adjust your camera settings in Auto/S/A modes for you.
Now in most circumstances when you camera’s light meter is choosing exposure in Auto/S/A Modes, you’ll end up with a pretty decent exposure. But there are plenty of situations where there are exceptions to this rule and there are a few ways you can tell your camera to meter for these specific situations.
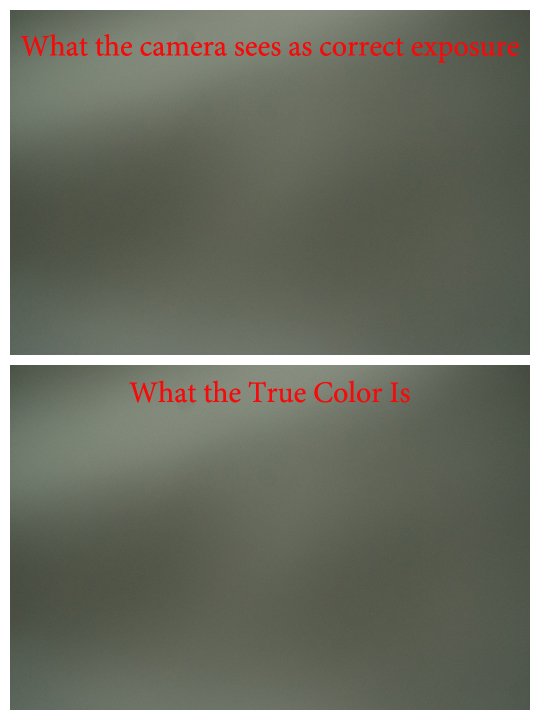
Light meters don’t read the light in color like we do. To a light meter the world is monochrome black and white. Light meters are programmed to set exposure at 18% grey, which appears to us as a mid-toned grey. In you camera’s typical metering mode, it averages all the light it sees together and then tells your camera to produce an image that renders the average light as 18% grey. I know… confusing to read. Here’s your visual explanation.
I grabbed a middle grey, black, and white t-shirt and let my camera meter these in Auto Mode. Then I put the camera in Manual set my exposure to correctly display the colors (leaned toward underexposure for the black and over exposure on the white shirt). All the shirts are intentionally thrown out of focus so as not to be distracting with their wrinkled states 😉
First the grey t-shirt.
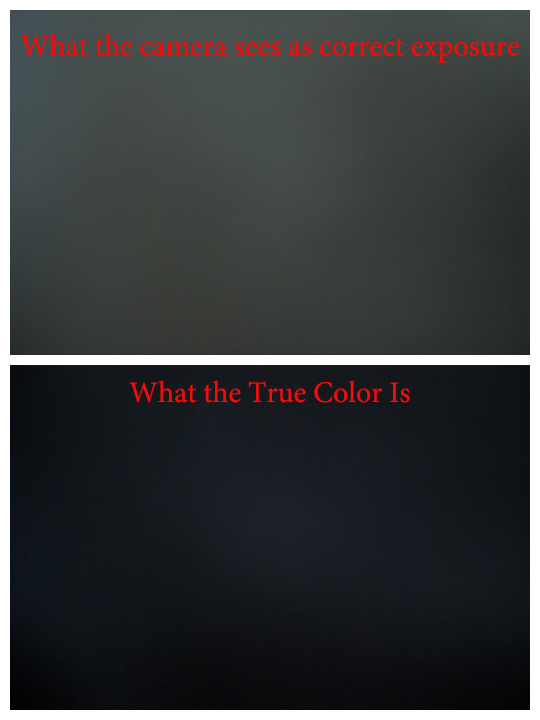
Now the black shirt:
Finally, the white shirt:
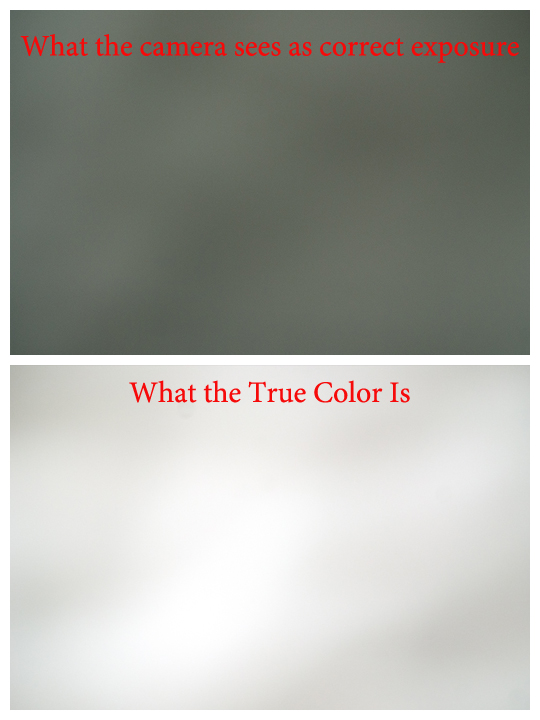
Do you see how this propensity to expose for %18 percent grey makes relying on the camera light meter to set exposure a little difficult?
What if that black shirt is instead the night sky?

By Flickr user noigmn who may or may not have intended the night sky to look this light. Just a good visual.
Or if that white shirt were sand/snow?
(From Flickr User ganesh vnd images. He may or may not have intended dark colored snow… but you get the idea)
Or if your image had such a HUGE variety of very bright/very dark that your camera light meter just goes sort of bonkers and neither the bright nor dark areas look anything like what your eye was seeing.

Do you see why shooting in auto/a/s modes could be a problem in these situations?
When to use Auto/A/S Modes and rely on your Camera Light Meters
Auto/A/S modes are going to give you decent exposures or pleasing pictures:
- if the scene has pretty average light
- if you want the scene to appear brighter than your actual eye sees it (shooting your friends in a dimly lit room)
- if you want the scene to appear darker than your actual eye sees it (snow or a desert in blinding midday light)
When to use A/S Modes rather than Auto
Personally, I prefer not to use Auto at all. By all means stick the camera on Auto if you’re afraid you’re going to miss baby’s first smile or some other awesome milestone while fooling around with your adjustment dial. But other than that… stick it out in Aperture or Shutter Priority modes if you need an easy way out. Then you can at least control depth of field or make sure that shutter speed is fast enough to freeze your never stopping toddler.
Use aperture priority mode when all of the above conditions for auto mode are met and:
- you want a shallow depth of field (f/2.8)
- you want a wide depth of field (f/22)
- you have a small amount of light and want to make sure the flash doesn’t fire and you have your lens wide open (f/2.8)
Use shutter priority mode when all of the Auto conditions are met and:
- you have a fast moving subject
- you need a long exposure time to capture a dark scene (and your camera is probably on a tripod)
- when you’d like to capture the motion of your subject
When Never to Use Auto/A/S Modes
Your camera’s light meter is going to misrepresent the scene if it averages the light and sets the exposure in the following conditions:
- When the light in your scene is on average very bright and you want your picture to remain bright (snow/bright sand, girls in white dresses standing in a very light colored field). This is called a High Key Image.
- When the light in your scene is on average very dark and you want your picture to remain dark (coal/night sky). This is called a Low Key Image.
- When you have a light skinned person in front of a dark background.
- When you have a dark skinned person in front of a light background.
- When the light is both very dark and very bright in areas, but the image lacks any mid-range colors/brightness like TeddyBoush’s cave image above.
How to Change/Trick your Camera Light Meters
There a couple ways to change or trick your camera light meters while still shooting pretty much in a more Automatic mode.
Program Mode
The first is to change your exposure value in Program Mode. Point and shoot users can all use this mode (at least my phone camera can!). We’ll tackle exposure stops and program mode next week.
Set Exposure while Zoomed In
The second way to trick your camera light meters is particularly useful in the light subject on a dark background/dark subject on a light background situation. You’ll fill your viewfinder with your subject and set your settings for that subject. Then back up, ignore your exposure meter freaking out, and click away. This can only be done in manual mode (auto/a/s modes will change your exposure when you step back)…. so it’s not relevant to us yet.
Wait… that’s not entirely true. If you’re shooting with a zoom lens and zoom all the way in on your subjects face, half depress your shutter button to lock focus/exposure, and then zoom all the way back out keeping the shutter depressed- then you’re also using this method. But you better not move a single inch while zooming back out! So maybe that’s not all that practical. (and it might not makes sense to you yet… no problem… we’ll get there!)
Change the Metering Mode
The final way to change/trick your camera meter is to change the metering mode. Not all point and shoot users can change their metering modes. Both point and shoot and SLR/SLT users will have to check their manuals to figure out how to do this as well as for a description of what each of these metering modes do if their names are different than my camera.
Metering Modes
My camera (a very basic beginner level SLR) has three metering modes. I’m going to imagine that all of your cameras have at least these three and possibly even more if the camera is made for a more advanced user.
Multi-Segmented
This is your basic metering mode. It’s the one your camera is set on for default and, therefore, is your auto mode as described above. It simply averages the light throughout the scene. My camera is generally on this metering mode.
Center-Weighted
Switch to center-weighted if you have a subject near the middle of your frame and you have a lighter or darker subject when compared to the background and you’d like the subject to turn out in that 18% gray/mid-tones color.
Spot
Switch to spot focus when your subject isn’t in the middle of the frame and you want to make sure that area is your 18% gray/mid-tones area.
If your camera has different names for the metering modes or has more than these three modes and you’ve figured out how to use them, then feel free to educate us in the comments. Like I said, my camera is an ancient beginner camera 😉
Mini-Assignment
Read up on your metering modes in your manual and when the manual suggests using them. Try out all your metering modes (you can shoot in Auto, A-priority, or S-priority). Try to keep in mind which situation is best for a different metering mode. And if you like, upload an a few images to the Flickr Group and let us know what metering mode you used and why.

Setting Exposure in Manual Mode: The Zone System @ Beautiful Newborn and Lifestyle Portraits by Quiet Graces PhotographyBeautiful Newborn and Lifestyle Portraits by Quiet Graces Photography
[…] our good old gray card and 18% gray? That’s zone 5 or middle grey. Remember how your camera meter is always straining to set the average exposure of your scene at 18% … If you’re shooting a scene with average contrast, your camera will likely do fine in auto […]