18
2013Photography Exposure Stops {Free Beginner Photography Class}
Full Disclosure: If you’re like me and managed to completely fail an open book statistics test in college, then this post might be extremely boring to you. I’m going to try to use the simplest language possible to help us all out while trying to understand this necessary part of manually setting your exposure, but bear with me through the confusion. It may be a long number filled ride. However, I promise you’ll have the knowledge to learn to precisely change exposure when you’re finished reading… even if you’ll need to practice for awhile longer 🙂
What is a Photography Exposure Stop?
A stop is a measurement of the relative brightness of the light used when setting exposure.
Super helpful, huh? Yeah, that’s as plain as I can define it in the English language. So this is where we start diving into the math portion so it’ll all make sense.
We’ve talked about stops just a little bit when we explored exposure value/compensation in this post on Program Mode. Remember how the assignment was to shoot a few things at -1, -2/3, -1/3, 0, +1/3, +2/3, +1 to decide which exposure we liked best in certain lighting situations?
Those -1, 0, +1 numbers denote stops (and the thirds in between denote 1/3 of a stop).
This is where the whole relative brightness thing comes in: every time we go up a whole stop relative to the one before, we’re making an exposure twice as bright. Every time we go down a whole stop, we’re making an exposure half as bright. All of this is relative to our reference point, which in this example is the 0 on our exposure meter.
So -1 stop is one half as bright as 0 stop. +1 stop is twice as bright as 0 stop. +1 stop is four times as bright as -1 stop. So on and so forth.
Let’s make this visual.

Exposure Stops in Relation to the Whole Exposure
So lets say you’re sitting at your desk typing this post and you snap a photo of your workspace, because you really don’t want to go anywhere to take a fancy photo for this post (yet).
You shoot at -1.
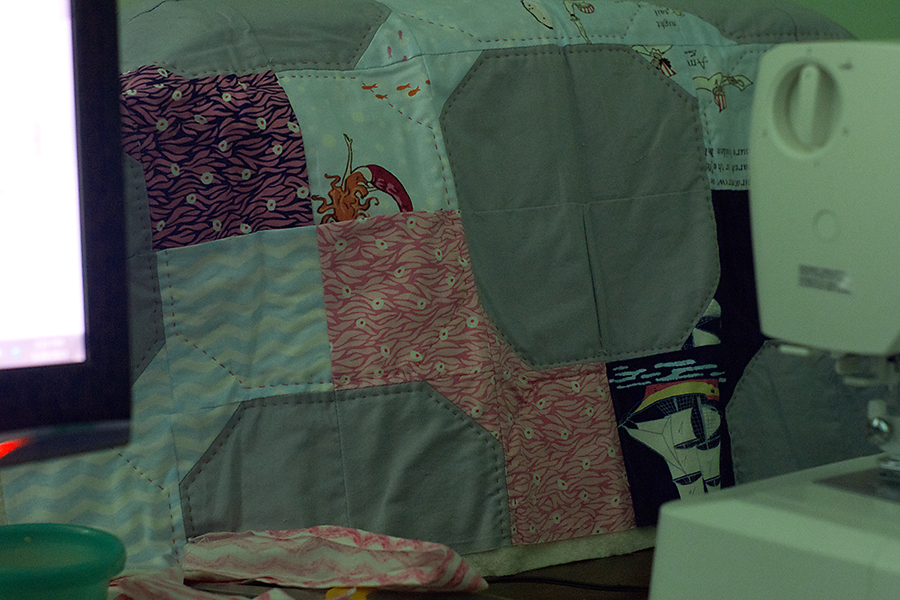
Meh. Too Dark.
Then you bump your whole exposure to 0 on the little exposure value scale.
Not too bad and twice as bright as your previous exposure.
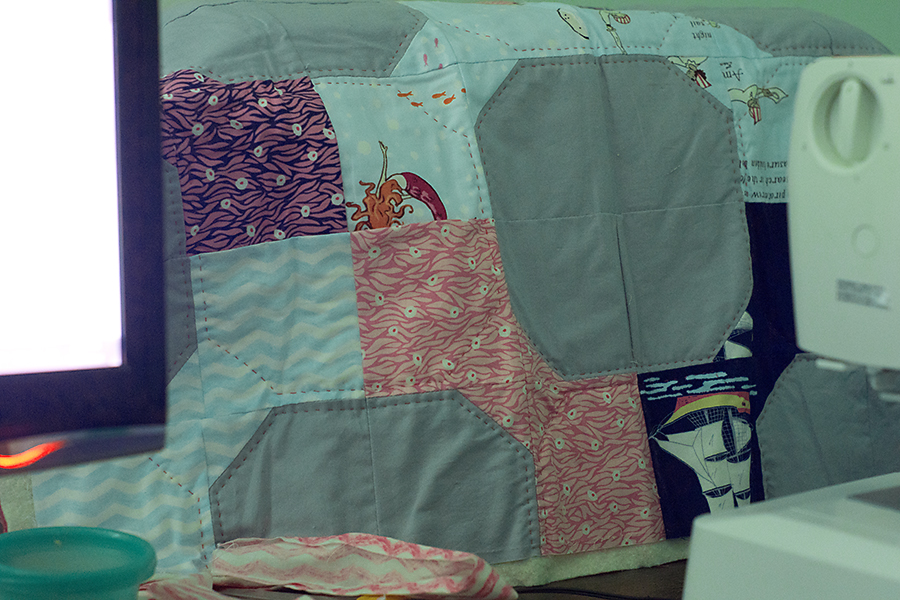
But just for fun you’ll give +1 a try.

Whoa! Computer screen and sewing machine corner whites are blown out because your exposure is four times as bright as your initial exposure.
You hanging with me here so far? Because we’re about to further explore the definition of stops. ![]()
(Please don’t hesitate in the comments to let me know where the math loses you. I’ll try to explain again where it gets foggy.)
Exposure Stops on Each Side of the Exposure Triangle
Each member of the exposure triangle has a stop value. We’re going to explore the numbers denoting a full stop for ISO, Shutter Speed, and Aperture. Then we’ll come back to figuring out how to change variables and still keep the same exposure value.
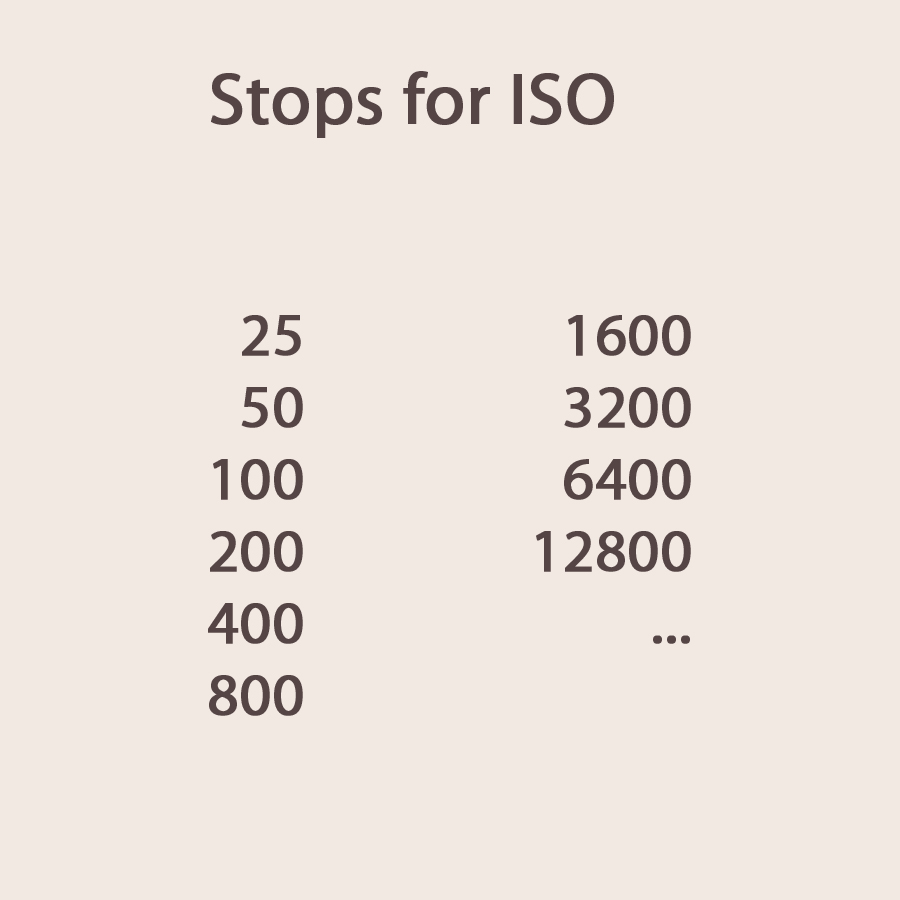
ISO Stops
Remember our Camera ISO Scale? This stop scale is pretty straight forward. Parallel to the concept of stops: each number is doubled from the number before.
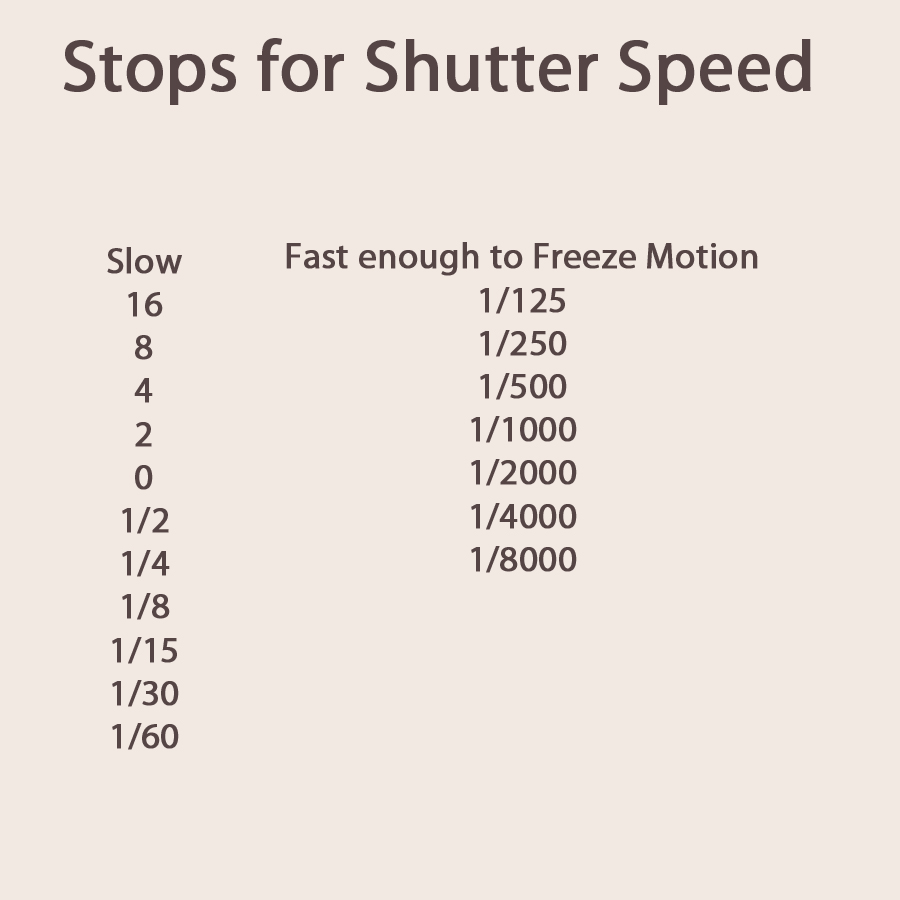
Shutter Speed Stops
Shutter speed is also pretty straight forward. The numbers still basically double for each stop, although there are a few little jumps (1/8 to 1/15 of a second, and 1/60 to 1/125 of a second).
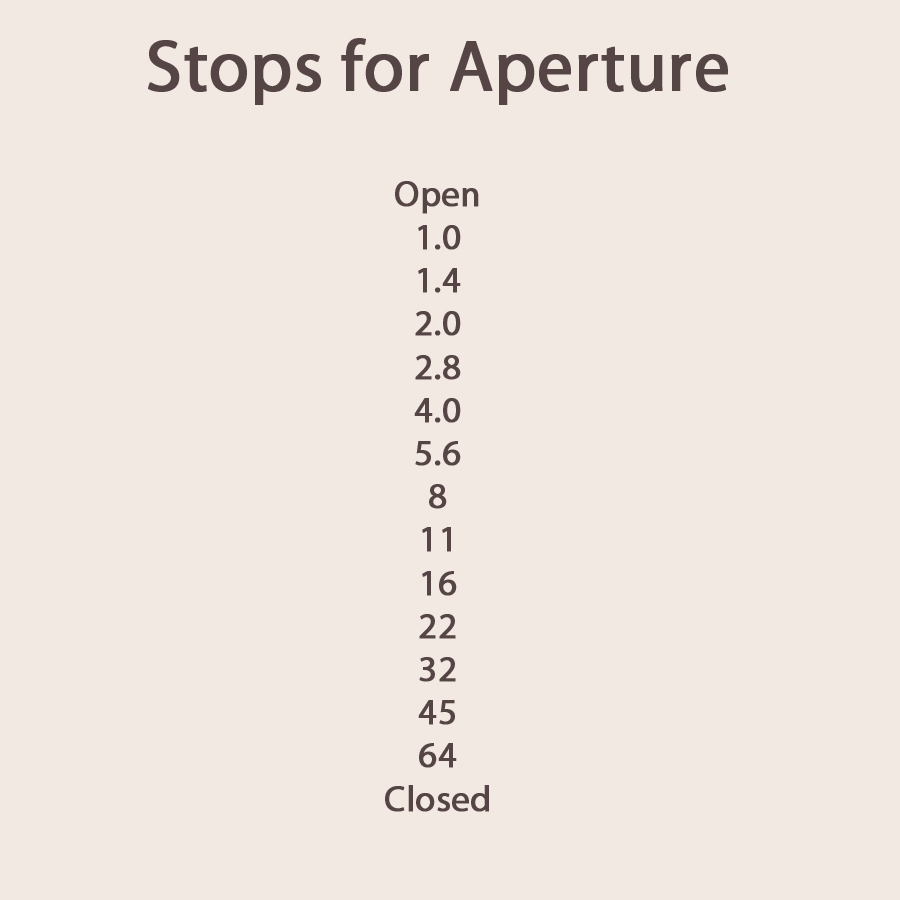
Aperture Stops
Aperture is where the stop scale numbers go a little crazy. Only here do they no longer mirror the divide by 2 or multiply by 2 to get the next stop rule that the previous two categories generally followed.
Whoever gave aperture their number reference points had a reason (probably math based), but the just aren’t neat and tidy like the other categories.
Using Stops when Changing Exposure in Manual Mode
Okay, so now that we’ve got through the math bit, what one earth do stops have to do with setting exposure in manual mode?
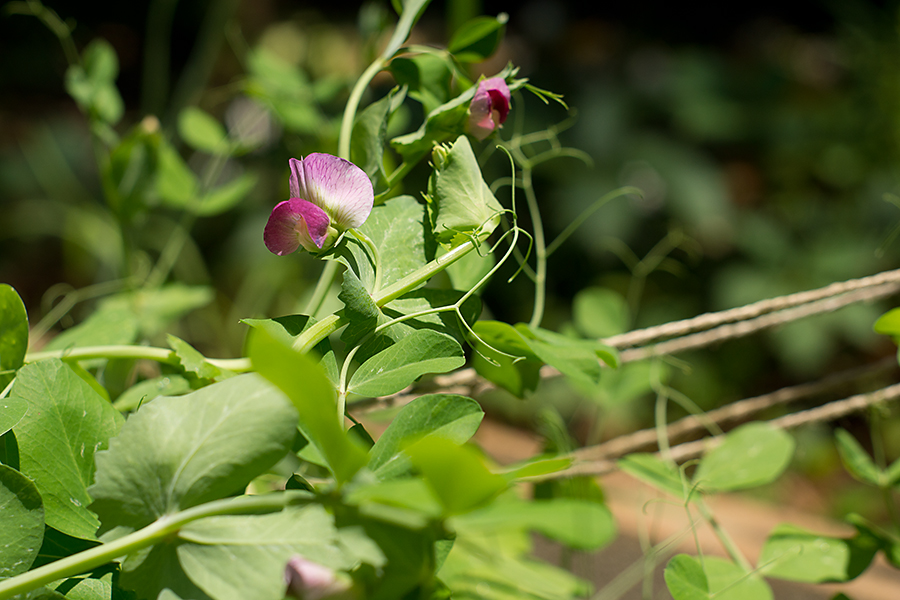
f/5.6, 1/500s, 100 ISO
Let’s say I take this photo above with my exposure value set for 0. It’s a nice photo, but I’m not happy with it yet. I don’t like how there’s no specific subject so I decide to open my aperture to f/2.0 to make the open pea flower the very clear subject. If I only change aperture, I end up changing the exposure as you can see in the following image.
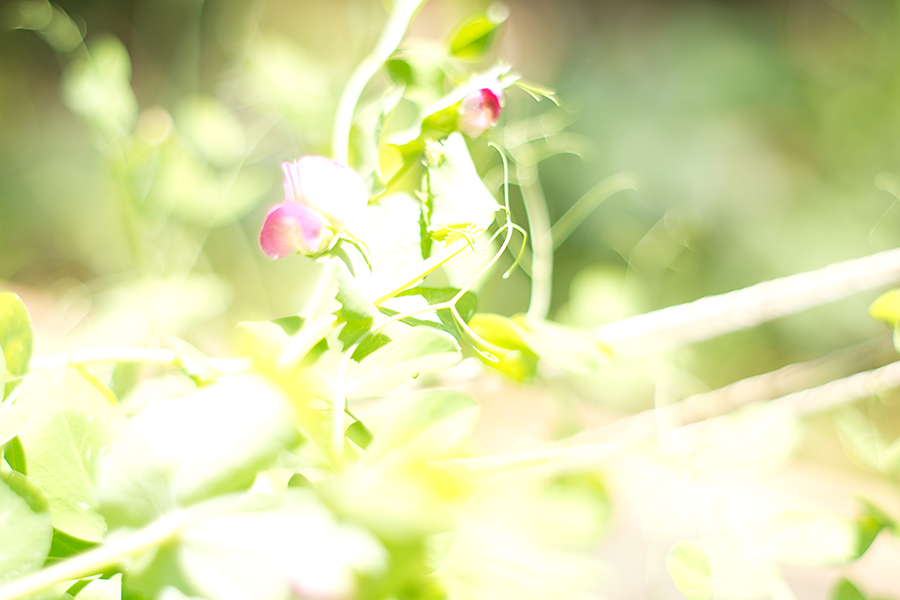
f/2.0, 1/500s, 100 ISO
Only changing aperture results in an image completely blown out! So I know I need to change either shutter speed or ISO the same number of stops in the opposite direction to compensate. Since opening my aperture resulted with more light in the image, I know I will need to use a faster shutter speed or lower ISO to reduce the amount of light reaching my sensor.
How many stops did I change aperture? I started at f/5.6 and dropped to f/2.0 so I opened up by 3 stops.
Knowing how bright it is in the midday sun, I move my ISO up to 50 from 100. Now I’ve closed down by one stop. 3-1=2 stops left to adjust.
My first shutter speed was 1/500. So I adjust my shutter speed two stops faster to 1/2000 of a second. I’ve closed down by two more stops. 2-2=0 I’m back to my exposure value of 0 for the following shot.
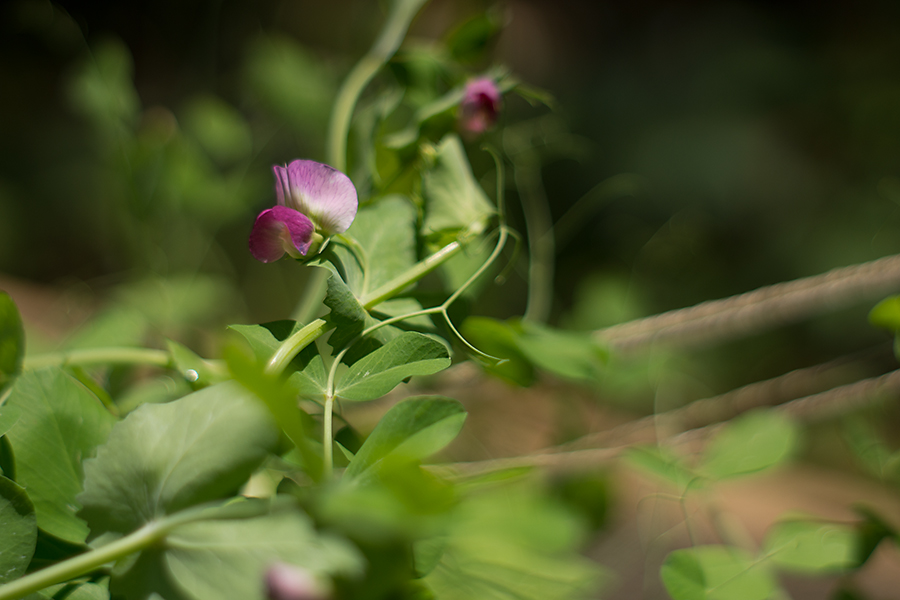
f/2.0, 1/2000s, ISO 50
Exposure Stops Assignment
Is all the math making sense? For some of you this is going to be the most exciting thing you read on Manual Mode (ahem… Teddy… ahem… I do like our class engineer!). For the rest of you this is going to be sort of laborious. I promise that knowing how many stops you changed one side of the exposure triangle helps a ton in knowing how to adjust the other two sides to get the perfect exposure with the elements that you want highlighted. Here comes your learning assignments.
- The first part of this assignment is to hop on over to the following webpage and play with this virtual Exposure Stop Calculator. Get a feel for adjusting the stops to compensate when you change one side of the exposure triangle. Play with it at least 10 or so minutes so that you can begin to really assimilate this information. For extra credit, play with it 5 minutes a day on days you can’t shoot with your camera.
- Print out this chart showing the full stops (as well as the half and third stops that some of our camera will be able to do). Carry it with you and refer to it as necessary while shooting in Manual Mode.
- Go out and take 1 to 3 series of images. 1 image at the exposure value of 0, however, you get it there. The second image, changing one side of the exposure triangle to make that image better (blurry move subject: faster shutter speed. Not enough of the view in focus: closed aperture. Etc.) Then, crunch numbers (or just mess with your dials for you learn by doing folks) until you adjust the correct number of stops to get you exposure value back up to 0 for the final image. You don’t have to start with an exposure value of 0. If you found in the exposure compensation lesson that you like a value of +2/3 or -1/3 better you’re welcome to aim for that point as well. Just aim for the same relative exposure in all three images 🙂
Next week I’m going to walk you step by step through my shooting in manual process and the following week we’ll talk a little bit about why and when it’s best to shoot in manual mode (and maybe touch a bit on Ansel Adams Zone System. Although that might not happen until we talk about lighting… we’ll play it by ear).

english major
my camera was shipped from Chicago today so hopefully i can get out and take some pictures. i went to the two web sites and was confused by the chart. looks like a foreign language to me. but i will give manual a try just to see what happens.