Jun
01
2009We all scream for ice cream!
Did you know that for a multiple pregnancy 1 cup of ice cream is considered a valid serving of dairy?
When you need 8 servings of dairy a day and you’re pregnant in the summer this is FANTASTIC news. Did I mention I’ve never really cared for ice cream prior to the twins?
It’s the beginning of stone fruit season. And the first stone fruit to become available at the grocery stores is my favorite: Cherries! We buy two or three bags to pit and freeze when they are 2.99 a pound. Cherry pie on demand… mmm. So in honor of these two momentous occasions I had a creative celebration.
Cherry Amaretto Ice Cream!

- 1 cup milk
- 3/4 cup sugar
- 1-2 cups pitted cherries
- 1 pint whipping cream
- 1 teaspoon real almond extract
- 3 drops red food coloring (if desired)
- 1 drop blue food coloring (if desired)
- some sliced almonds might be nice too!
- Run the sugar milk and pitted cherries through the blender to combine (nuts if you added them too!).
- Add almond extract and whipping cream, and food coloring (if using). Put through the blender on stir setting for no more than a few seconds.
- Freeze according to your ice cream maker’s instructions.
- Enjoy in your favorite teacups (so it lasts longer than a day!)
Recipe adapted from Pleasant View Schoolhouse’s basic vanilla recipe.
P.S. My husband started a hysterical blog today for your kicks and giggles. Hope you enjoy.
May
30
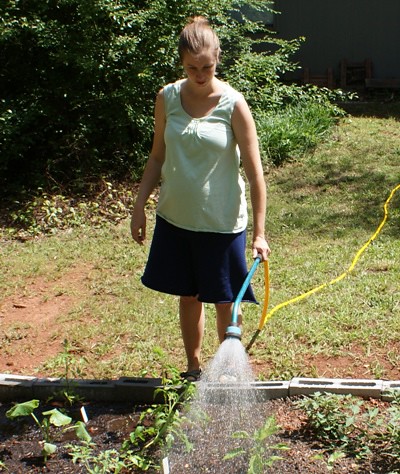
2009 I’ve been sewing like a madwoman recently because I finally have developed enough tummy to lift normal length shirts to too short lengths! I needed some longer tops!
I am really enjoying both Ottobre patterns (despite having to trace them out and add seam allowance) and sewing with jersey fabric on the new machine. I did discover that although I measured a size 42, it was better for me to go one size down due to my really narrow upper body. My first top (which should have been my favorite) didn’t turn out so well because of the size issue. It’s still cute, but will probably only work out when my belly is gigantic!
Here’s a list of what I’ve completed so far in the order completed:
- Navy knit gauchos from this pattern. These are like summer maternity sweatpant equivalents. Ahh.. If I made them again I’d use a more drapey knit.
- Navy knit skirt that I free styled.

- Naughty and Nice Nighty which I added 4″ to the center front pattern (which I pulled up in the pleats) and also added a 6″ or so in length.


- Maternity Crossover Top from Ottobre 2/2007 # 20. Top still waiting on a substantial belly to fill it out. Green, cream, and brown print fabric-it’s all wonky at the seams and binding.
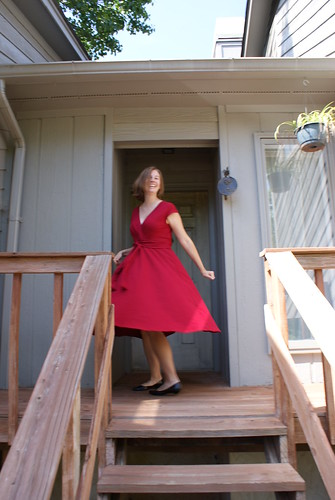
- Red Jersey Vogue 1027. I made this in what should have been my pre-pregnancy size (though I flared out the waist to the next size up) and I would definitely recommend sizing down 1-2 sizes because there is a whole lot of unnecessary wearing ease for a knit garment. I love it though! A grown up twirling dress!
- Pintuck Top from Ottobre 2/2008 # 1 unaltered in green jersey.
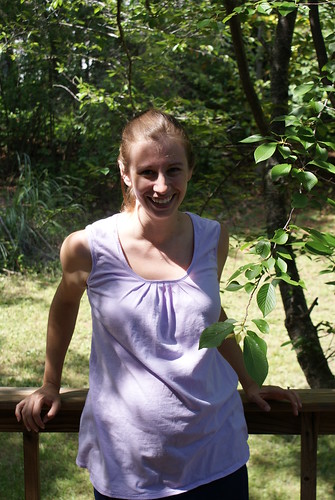
- Pintuck Top from Ottobre 2/2008 # 1 in purple jersey. I added about 4 inches extra width to the front piece and pleated the neckline instead of pintucking.
- Tankini top from this pattern. I chopped off the crotch portion, added about 4″ length (I’m super long waisted!), added 1 1/2″ to the side seam of the front piece (altering out the waist curve), and cut the front piece so it was slanted on the fold to add an additional 5″ to the bottom width. This will fit probably for the next month or so, but I’ll have to make a second top to finish out the summer. I’ll add 2″ or more to the bust panel width (it’s definitely drafted for an A-B cup) and will probably add a swimsuit bra for more support in addition to adding more twin belly ease.
- A self-drafted double layer brown linen skirt. I should have made a tutorial while making it. If I see a suitable fabric lying around the house maybe I’ll do so!
My mom sent me a HUGE box filled with her friend Beth’s maternity castaways so the wardrobe project is a little less demanding at the moment. I think the tan wool flannel jacket is up next on the to-make list. I have nothing to wear to keep me warm or cover up bare shoulders in the blaring Air Conditioners of the south 😉
May
21
2009I can no longer resist the urge to show off their cute little ultrasound photos here on the blog!


Since they are the same gender, we are all still wondering if they are identical or not. They do not have any of the identical twin “markers” since they do not share an amniotic sac and the ultrasound tech is pretty sure the have separate placentas, but those markers occur the later the egg splits. If they egg split early and they are identical, we’ll have to wait until they get here to know! So what do you think from the photos? Identical or fraternal?
May
19
2009My sister visited last week and we had so much fun playing cards, altering a dress, painting rooms, and getting high off of paint (we sure had a serious case of the giggles!). She decided to make us dinner on Wednesday and this is what she made:
We froze the leftovers to eat when we came back from our trip because this macaroni and cheese was so good! I went shopping with her so I sort of know what went in and what order it was cooked in, but since her Mac and Cheese uses our Creative Genes, it may not turn out perfectly for me (or you) again!
Ingredients to Have on Hand
- box of pasta (she used the swirly kind)
- yellow cheddar (shredded or cut in thin slices)
- sharp white cheddar (shredded or cut in thin slices)
- 2 can Campbell’s cheddar cheese soup
- Worcestershire sauce
- Dijon type mustard
- McCormick GrillMates Montreal Chicken Seasoning (this is our family’s signature spice)
- 4 eggs
Unscientific Instructions
- Put on the pot for the pasta. Preheat the oven to 350
- Warm 2 cans soup in a saucepan. Add 2/3 of your shredded/sliced cheese. Stir to melt cheese.
- Cook pasta now that your water is boiling.
- Continue to melt the cheese. Add Worcestershire sauce, dijion mustard, and Montreal Chicken Seasoning to taste.
- Remove now melted sauce from the burner. Add the eggs one at a time, stirring vigorously as you add them.
- Put the pasta in a casserole dish. Pour cheese sauce over. Place the remaining 1/3 of your cheese on top of the casserole.
- Bake for 45 minutes to thicken. Turn on the broiler at the end to melt the cheeses a little better if you would like.
- Enjoy while wearing a cute apron.

May
17
2009The twins are girls! Poor Derek and Moonbeam’s lives will forever be filled with giggles and dresses and tutus and tea parties and lots of drama! But I think the two of them will manage 😉
In honor of a rainy day and wanting to get something for the girls while we were celebrating our anniversary trip to Helen, Georgia, Derek and I spent about 2 1/2 making this set! Honestly, I was surprised by how much Derek enjoyed the process of designing and painting these. He can be a meticulous as I can be!
Unpainted

Derek Painting the Tray and our color selections

Me painting the cream pitcher

Tray and Teacups

The Finished Set. I can’t wait until they fire it and ship it to us!
