Sep
10
2013I totally thought about writing this post myself, but I’m pretty sure I can’t top the following post written by Annie at Paint the Moon. So hop on over there to read this post and then come back here for your photo assignment.
Read Find the Light and Sparkly Eyes

Portrait Lighting Assignment
Go on out there and shoot some portraits. 5-9 should be a good number. I know this is a tough assignment for those of you who don’t have a passel of children to shoot like I do. Don’t be afraid to call a friend and say you’d like to shoot their portraits. Or even to approach a stranger with your mission: get the strangers email and send them a couple images as payment. 🙂
I want you to capture at least one portrait with sparkly catch lights in your subjects eyes. The rest are up to you. When you upload your images to the Flickr Pool, please tell us about the light quality in your photo. Was is back lit during the golden hour? Open shade side lit? Tell me why you chose or what you like about the lighting in your image.
Sep
03
2013So far in this class I have dissuaded you from using your flash at all. You’ve learned to take even low light images without the aid of on camera flash. One of the reasons I discourage the use of flash while you’re learning your camera is because your camera will automatically trigger the flash in the wrong lighting situations.
When to use On Camera Flash
Here are a few rules of when it’s okay to use flash.
- When your subject is at least 3 feet away from the camera and no more than 15 feet away.
- When you need to freeze motion in a dark scene and can’t get your shutter speed fast enough any other way and you’re still following rule 1.
- When you need fill flash for a dark subject.
- When you can use a diffuser for your on camera flash.
In this post, I’m going to cover reasons 3 and 4 since the first two are just sort of common sense guidelines.
Fill Flash
Remember our back lit scene? Remember how tough it is to get a good exposure for your subject without blowing out all the details in the background? A brightly back lit scene is the ideal place to use your on camera flash. This is also true for those harsh mid-day photos with the sun high overhead casting terrible shadows.
“What, Melissa?” You cry. “I thought flash was best used in low light situations?!” Well, unless your low light situations meet requirements 1 and 2, then this actually is the best place to use on camera flash. In this scenario it’s called fill-flash. You’ll have to manually activate your flash in these situations (mine has a simple button next to the pop up flash, but read your manual to be sure!)
You may need to adjust the strength of your flash to do this (read your manual to learn how), but you may not. You’ll know right away if your flash is too bright when your subject looks white and washed out. Power it down a little and try again.
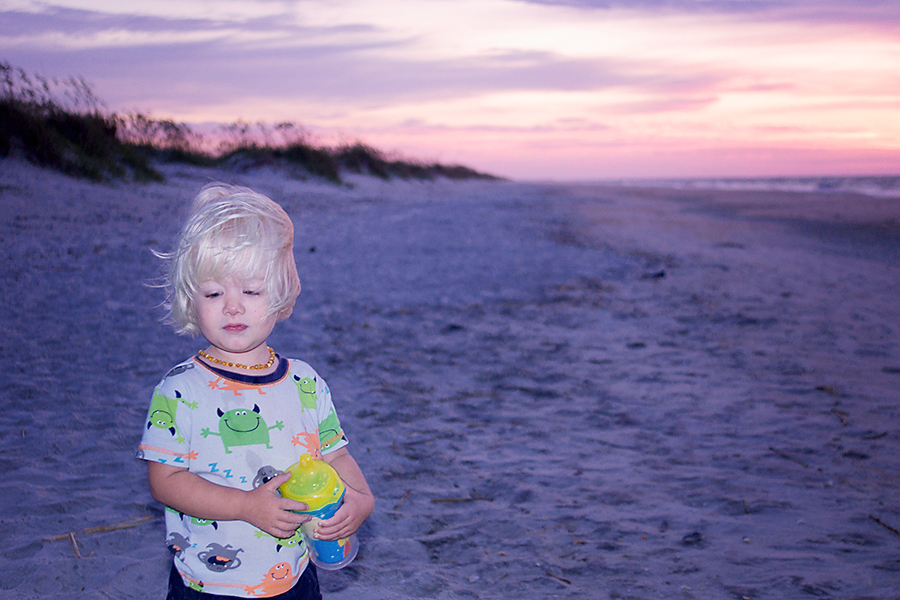
For this example I powered my flash down two stops. The extra light did make the sunrise a little brighter than it appeared in real life, but not so much that I’m unhappy with the outcome. Just in case you were wondering, if you’re tent camping with this little boy, he will wake you just prior to the sun. So what else should you do but take sunrise pictures?
Diffusing On Camera Flash
So what about those low light situations where don’t want a lot of grain and your subjects are closer than 3 feet or you’re hating the washed out look of your on camera flash?
This is a situation where your flash will need diffusing. You can start by taking your flash power down a few notches (read your manual), but if that doesn’t work you can buy a flash diffuser. Like most gear, this isn’t something you will need unless you face the situation over and over. But it’s a cheap little piece of gear if you like to play around. You can also improvise something like this with lightweight white fabric and a wire coat hanger for you DIY types 😉

A Little Housekeeping and your Assignment
Whew! I can’t believe we’ve powered through all of our lighting posts. The class is beginning to wind down. Over the next three weeks, I’ll be featuring a few sort of miscellaneous posts on things that haven’t really fit well elsewhere. Then, I’ll guide you in picking a final project to showcase your new skills. Finally, I’ll be featuring your images from these summer assignments on October 8th (so now is the time to catch up!). After those feature images, I’ll spend our remaining time on various editing topics (with just a few mini-assignments) while you work through your final projects.
To make it easy for you to finish all your unfinished assignments from summer here they are all in one place:
Using your Camera in Manual Mode Assignment
Manual Mode Workflow Assignment
Exposure Bracketing Assignment
Full Sun/Open Shade/Golden Hour Assignment
Portrait Lighting (the post is for next week so the link will work then)
Lighting Assignment
I’ve been preparing you for this throughout our lighting series. If you’ve been taking images concurrently throughout the series, you’ve likely covered all these assignments. If not, it’ll probably be pretty easy to combine them with the assignments above. Just make sure you label them for both assignments in the Flickr Pool.
- Front light an image or two.
- Side light an image or two.
- Back light an image so as to silhouette your subject.
- Back light an image exposing for your subject.
- Back light and use an improvised reflector (poster board, white towel, concrete, a lake, sand) OR use fill flash to get decent exposure for both the background and the subject.
Aug
27
2013There are situations where the image you want to create cannot be done well in the available light. When this occurs, it’s time for a little light modification. We’re going to explore the most simple forms of light modification here for those situations where you want to improve your imagery.
Reflectors
A reflector is anything that bounces light back at your subject. Photographers use both natural reflectors in our scenes as well as hand held reflectors.
Using a reflector is all a matter of angles. Lets say we’re side lighting a portrait but would like a little more light on the dark side of the face. Solution: hold up or use a natural reflector to angle light back into the portrait from the opposite side. Using a reflector during mid-day shoots is must for reducing those under eye shadows. Finding the right angle will be a matter of experimentation unless you’re good with visual geometry.
Natural Reflectors
Natural environmental reflectors are all around us. For instance, the white walls of a house will naturally reflect whatever light enters the home. Other natural reflectors include water, white/tan sand, light colored cement, white walls, and just about anything white/pale gray that will bounce light back into your subject from your environment.
With a natural reflector that’s immobile you’ll likely have to move your subject around to find the angle that works best.
Handheld Reflectors
I have used white poster board, towels, and burp clothes as handheld reflectors. You don’t have to buy a specialized piece of equipment, but if you want to buy here is a cheap one on Amazon (affiliate link). Purchased reflectors will have different colors: often silver, gold, and sometimes black to block light.
Examples when using a Handheld Reflector
The reflector used in this shoot is much larger than the one I linked, but this will give you a visual of using one.
Diffusers
Diffusers soften light and are great for those times where you can’t avoid mid-day portraits. Holding a diffuser over a subject will soften that overhead light. Diffusing light through a sheer white curtain will make window light softer in your portraits.
Like reflectors diffusers can be purchased, but for your purposes, a sheer white curtain panel and a white sheet/length of fabric should be perfect should you ever need to use one.
Aug
20
2013First, we learned about natural light in the forms of full sun, open shade, dappled shade, and the golden hour. Then we looked closely at front, side, and back lighting. This week we’re going to tackle using available light with and emphasis on indoor photography. There’s a lot of principles we’re going to borrow from our previous posts, but available light requires a little more analyzing on the spot. Are you ready for the challenge?
Available Light Photography
Technically, any photography that doesn’t use off-camera flash is available light photography. But when I talk about available light for the purpose of this post, I’m talking about indoor and night photography specifically.
When we’re shooting in these situations we’re likely using both a wide aperture and high ISO just to get the shutter speed fast enough to be handheld. We may be whipping out tripods at night so that we can use slow shutter speeds and keep our aperture (and ISO too) stopped down to capture all the beauty.
Things to Remember When Using Available Light
- Rarely will our camera meter get it right. If you’re truly trying to represent the scene as you see it, you’re going to have to aim for 1 or more stops of underexposure. If you rely on a camera meter, the scene will be much brighter than you see: that may be a desired affect, but remember that in manual mode (or program mode) you get to decide the look you desire.
- Locate your light sources. Note how light is falling. Ask your subject to move toward better light (if appropriate) or move yourself to a capture a better angle. Window light is my favorite light for inside imagery, but sometimes we’re working with our overhead bulbs.
- All of the principles of front, side, and back lighting will apply to available light imagery but may be more dramatic.
- White balance is crucial. If you miss white balance, things are going to be very off. However, inside images also have color casts due to painted walls. So if you’re shooting under florescent, but the wall is yellow, you may want to see if incandescent is the better white balance. The same with blue walls: switch to florescent. Working in Kelvin for white balance helps too. Take some test shots before you shoot your subject and play around with white balance. There’s no excuse for you not learning how to white balance for each paint color in your own home. Practice.
- Due to high ISO, available light images are often super grainy. Even if you nail white balance and manage to remove color casts the noise/grain in the image can still distort colors and distract. Therefore, embrace the black and white conversion. We’ll touch on doing black and white conversions when we learn about editing, but in whatever software you use to edit, there’s always a simple way to do it.
Case Studies
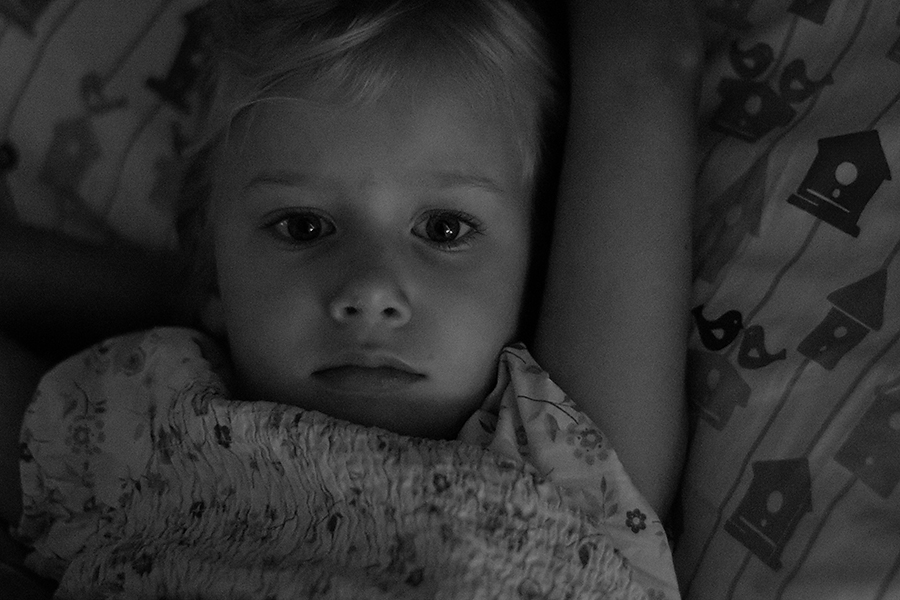
I was thinking about this post when I woke my Aeralind from nap one afternoon. I loved the light! Here head is pointing toward a wall and there is a widow on that wall about 3 feet from where she is lying. It’s casting gorgeous directional side lighting across her face. I kept this image dark and knew when I took this series that they would be black and white; I chose black and white mainly because her dress and pillow clashed in color but also because it would highlight the yummy light better than a color image.
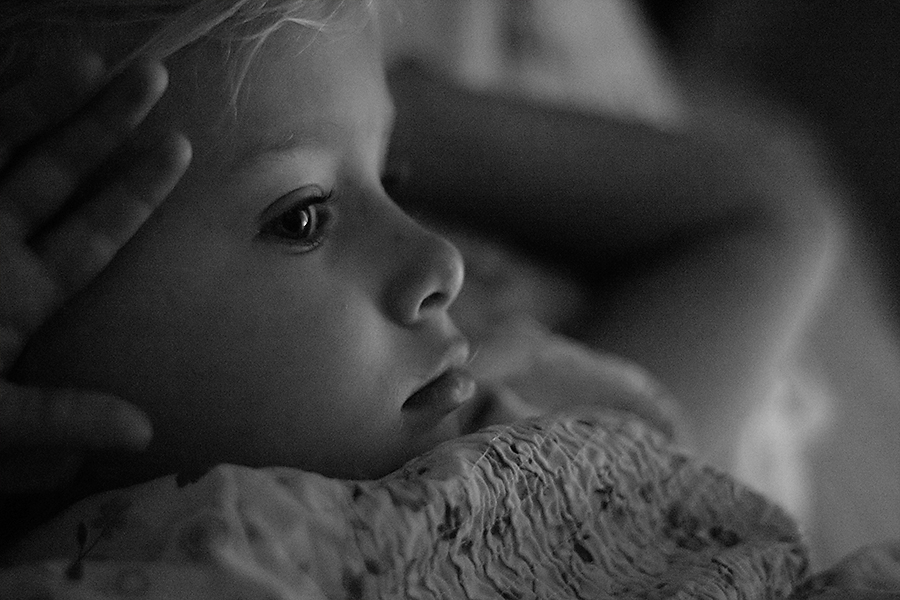
Same light, same day. I moved my position to almost back light her profile. See how much photographer movement can change both light quality/direction?
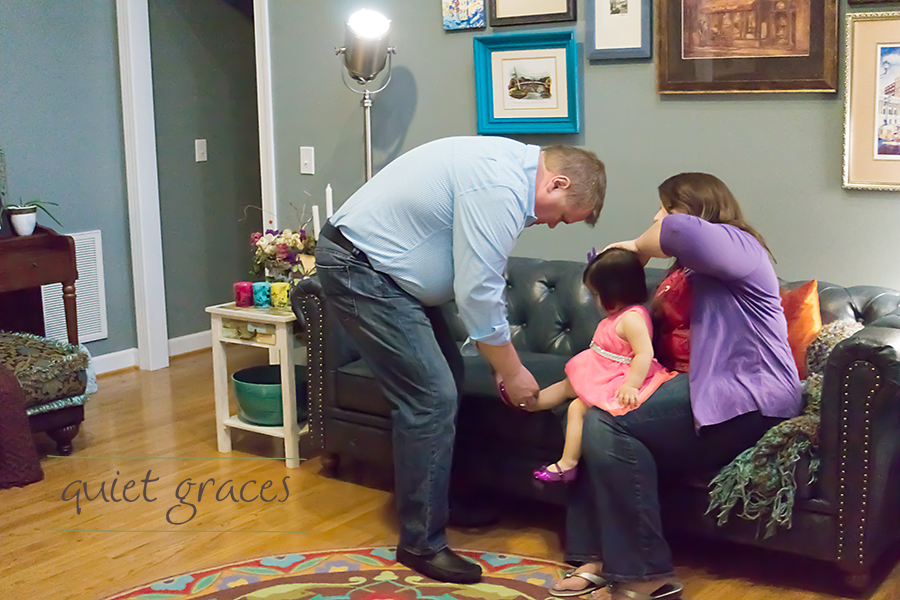
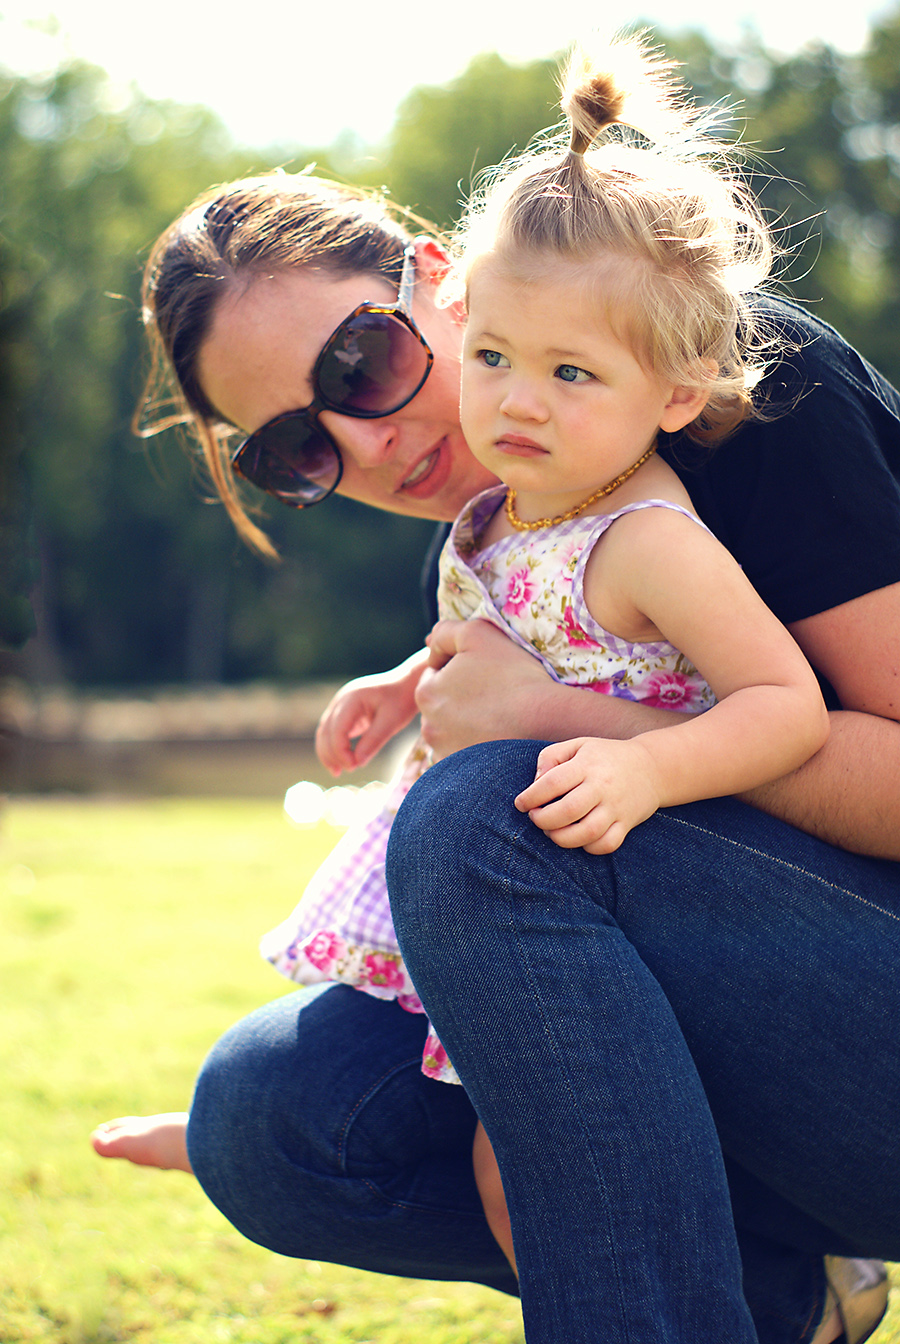
I had a really tough time with this wall color for this family session. Perfecting white balance was hard and even now I’m not wholly satisfied. There were a bunch of lights on in this room but I still had to crank my ISO all the way up to 12,500 to get a shutter speed fast enough to freeze a toddler.
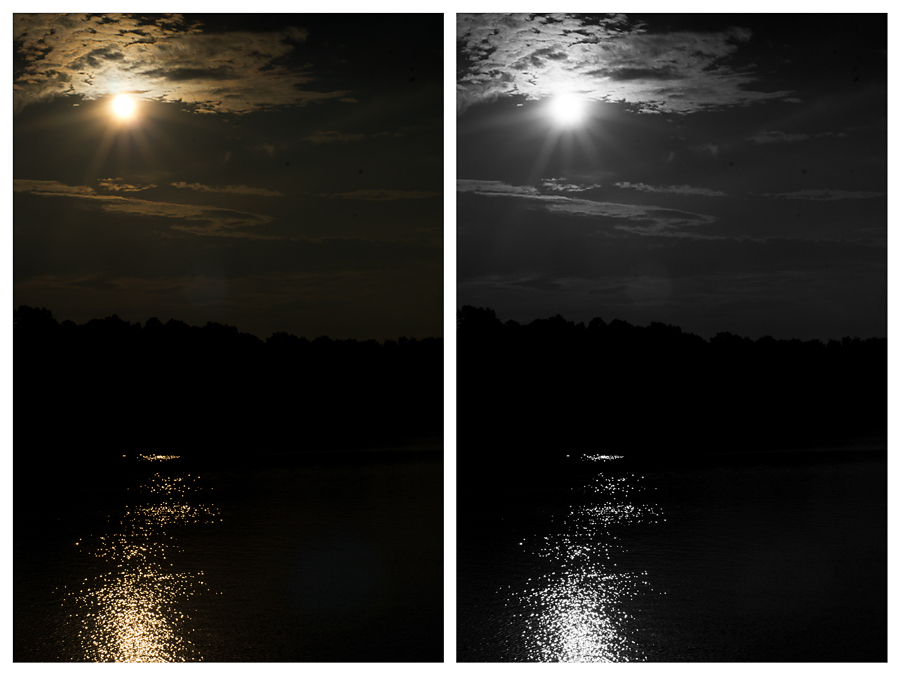
First: I can’t decide if I like this image better in color or B&W so you get to see both. This is not a nighttime image, but it follows the principles that I would use for a night time image. I seriously underexposed this image (at least -2 stops) to keep the sky/water dark. Since this was daylight, I was able to hand hold, but had it been night I would have needed a tripod.
Questions?
For this lesson, I know I dropped a ton a of general principles on you that I’m asking you to apply in available lighting conditions. That means that I may have left something out or been slightly unclear. Please let me know in the comments if you have questions and I’ll try to answer them directly.
Aug
13
2013As I mentioned when I was defining all of these terms in my Painting with Light post, back lighting can be just plain tough! Oh, but I love to backlight for families and maternity… so I’m a bit giddy about this post regardless :-p
Lighting a subject from behind requires us to meter for the light in one of three ways in camera: meter for the background, meter for the subject, or meter for the subject and then adjust using the Zone System or by trial and error, so that we keep some detail in the background. I’m going to touch on the advantages and disadvantages of each of these methods briefly in this post.
However, I want you to know that you can modify the light in a back lit photo through the use of light modification: for our class that would mean: on-camera flash or a reflector. Or you can modify the image in post-processing/editing to get a pleasing composition. Both of those options will be covered in upcoming lessons.
Metering Back Lighting for the Background
Using an evaluative or multi-segmented metering mode (most camera’s default) and not adjusting manually using zone system (or trial and error) is going to create a back lit image where your subject is either very dark or silhouetted every single time.
Advantages
Back lit subjects exposed for the background can create dramatic silhouettes. Those whose figures are just shadowed, can give you a sense that you’re peaking in on their world but still retain some detail in the imagery.
It is easy to create back lit images where the background is properly exposed using Auto/A/S/P modes with no to just a bit of an adjustment in Exposure Value.
Disadvantages
You’re going to have a dark subject with very little detail. Depending on what you’re trying to capture: this could be detrimental to your imagery.
Case Studies
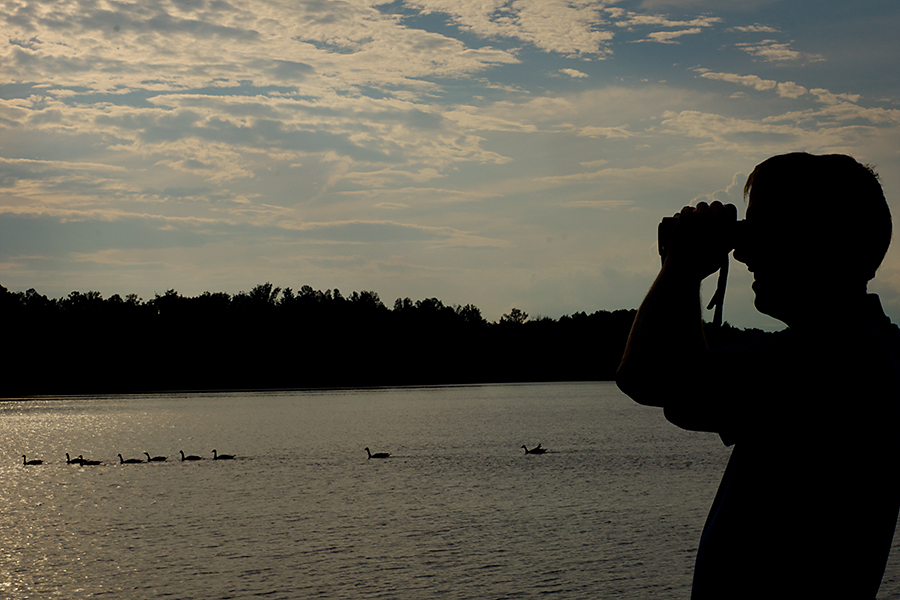
My husband bird watching. I pretty much made him drop everything when I saw this back lighting and the geese in the water. This is so him!
I exposed here for the background (specifically the sky). It’s actually a little distracting with all those cars and buildings… but I love the silhouette high in the sky.
Metering Back Lighting for the Subject
To meter for the subject, we’ll have to switch our metering mode to spot metering. You’re going to have to dive into your manual to figure out how to choose the spot, but you’ll want to spot meter right on your subject whether that is a person (aim for their skin if so) or a palm tree.
Advantages
The advantages of metering your back lit scene for your subject is that your subject will be clearly defined. You’ll be able to see all the detail in that person or tree or scene.
With Spot metering as your metering mode, you may be able to use Auto/A/S/P modes to capture your image.
Disadvantages
The disadvantage of using this method is that if your scene is very bright, you’re likely to blow the highlights of the background. The resulting image will have a well lit subject with a bright almost white background with little detail.
Case Studies
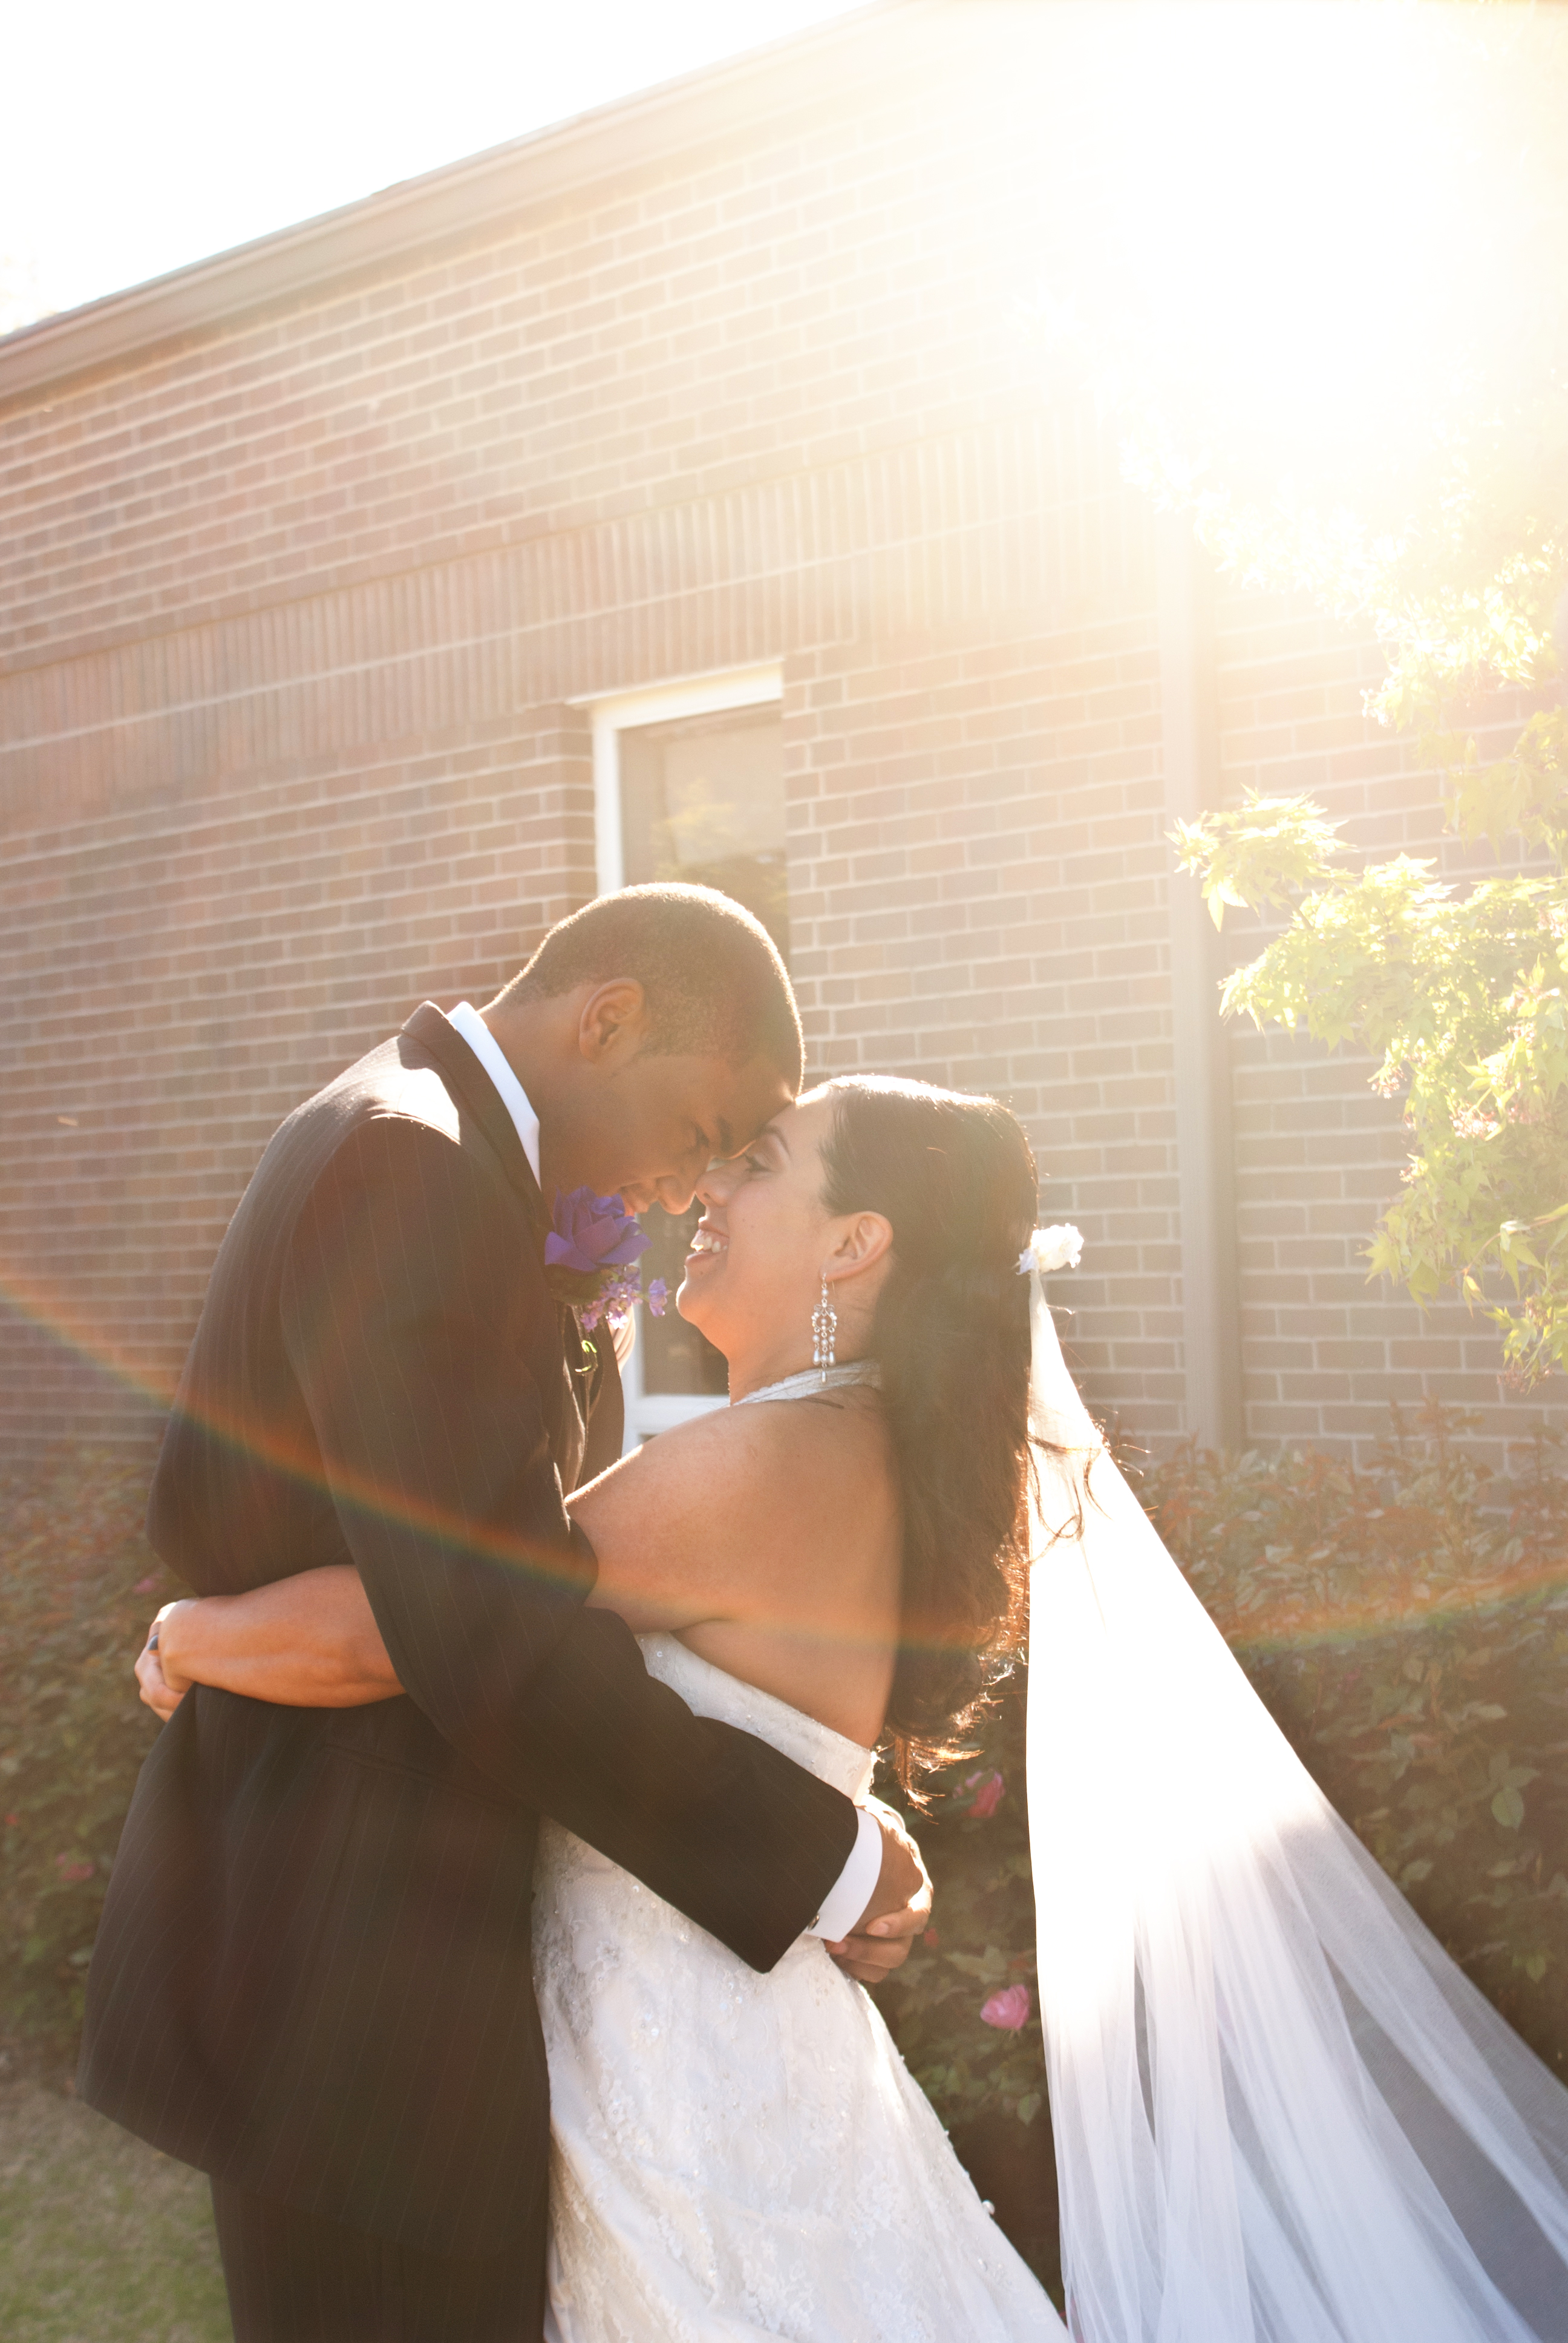
Here I exposed for the subjects. (no… I don’t do weddings. I was a volunteer second shooter here for my sister in law. I never would have posed these guys in front of that brick building… sigh). The sky is blown out, but luckily the sky is not the majority of this image. And that intentional sunflare… ah… to die for. 🙂
Metering for the Subject and Adjusting in Manual Mode
So this is our middle ground for back lit subjects. If you’re trying not to silhouette your subject and yet you’re in a situation where metering for your subject will blow out the background, this is the only way to correct in-camera without light modifiers, editing, or com positing two images together.
To do this: meter for your subject in spot metering. Then use exposure bracketing to bracket up to a full 2 stops below. Have a look-see on the LCD and decide which image has the best exposure for both your subject and your backdrop. (Alternatively, you could use the zone system to calculate how many stops you would need to move below to retain some detail in your highlights.)
Advantages
You’ll have a pretty decent exposure for both the background and your subject.
Disadvantages.
Your subject may still be darker and your background may still be lighter than you would like. You’ll likely want to run this image through editing software in post-processing to fix both of these downfalls.
Case Studies
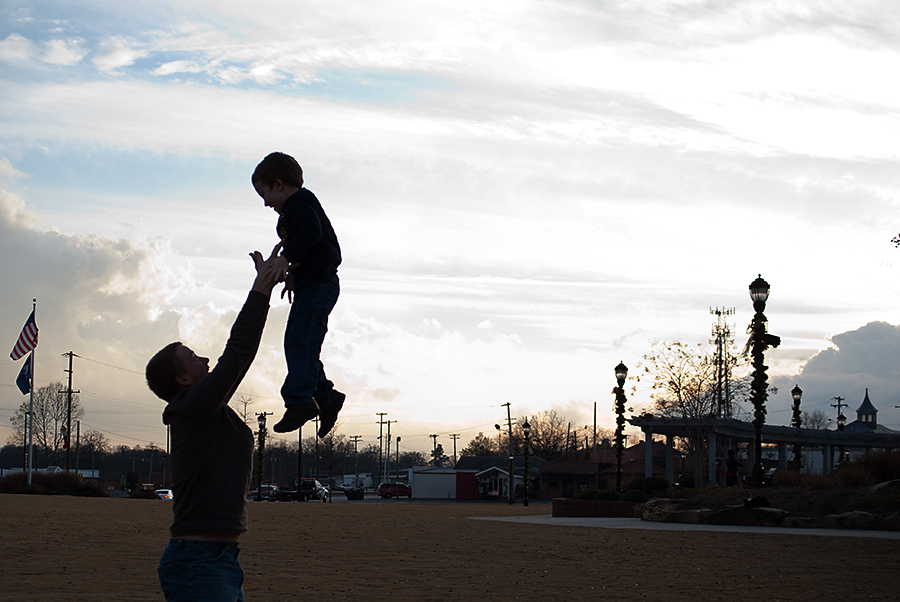
I aimed for the middle in this image. I wanted some detail in the back and some on the subjects. I think I could have done a better job here, but it was a moment inspired solely by the angle/location of the sun 🙂
Side by Side Comparison
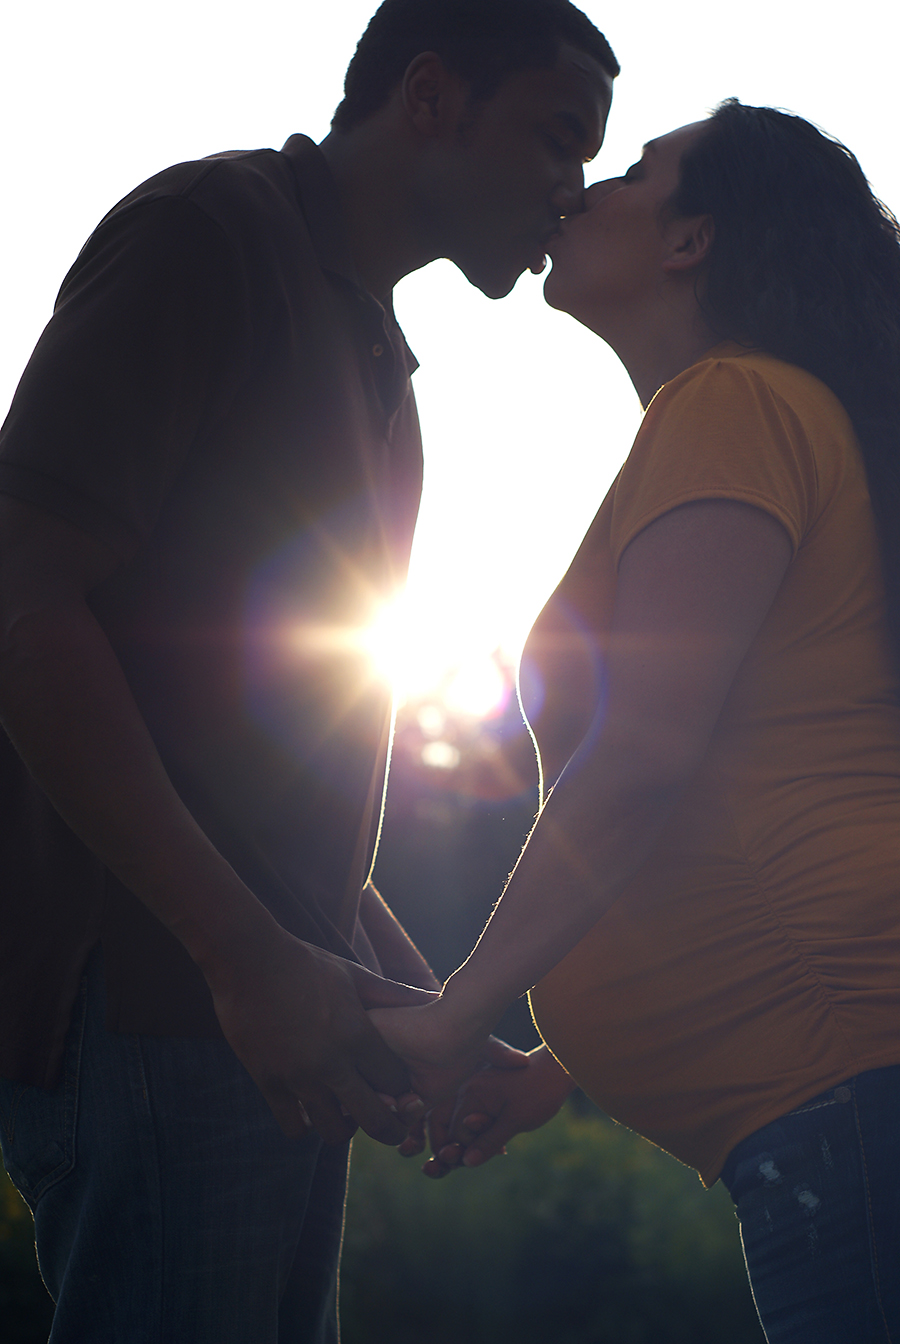
I actually exposed for the background with this image straight out of the camera (I liked the rim lighting around the baby bump.) So this series of images are actually different post processing edits that would show you how each of these scenarios would look as if I had did it in all of the methods described above.
Exposed for the background (or using evaluative/multi-segment metering)
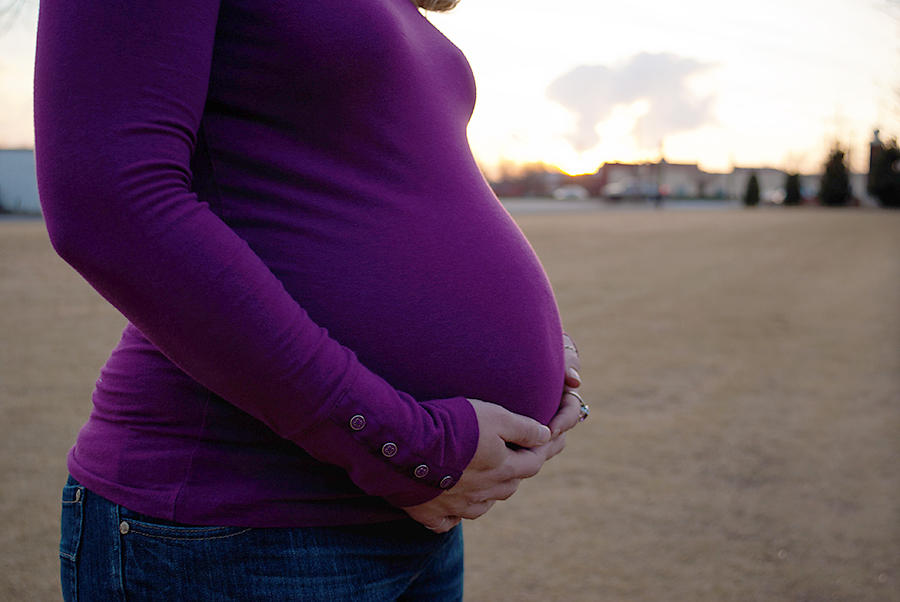
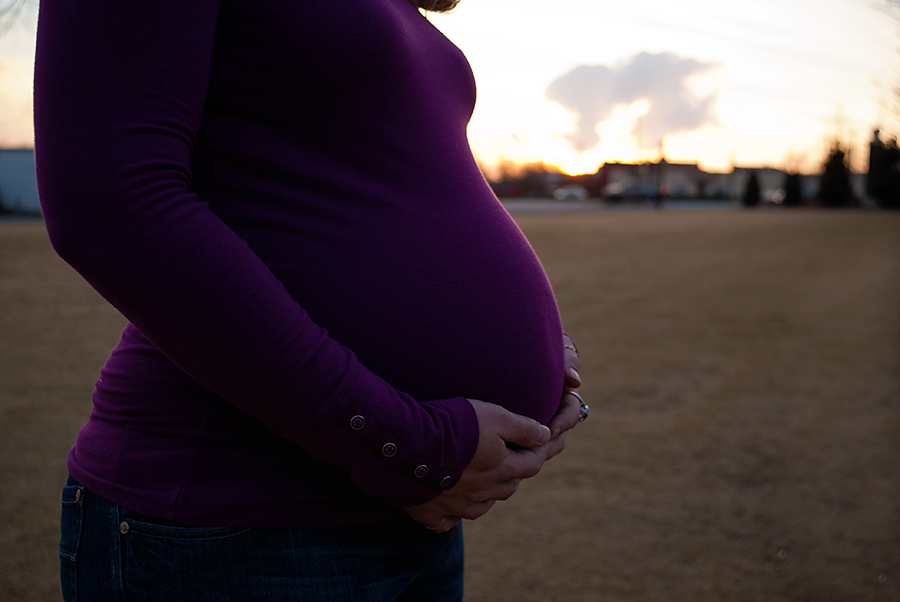
Best of both worlds or spot metering and then adjusting to keep some detail in the background.
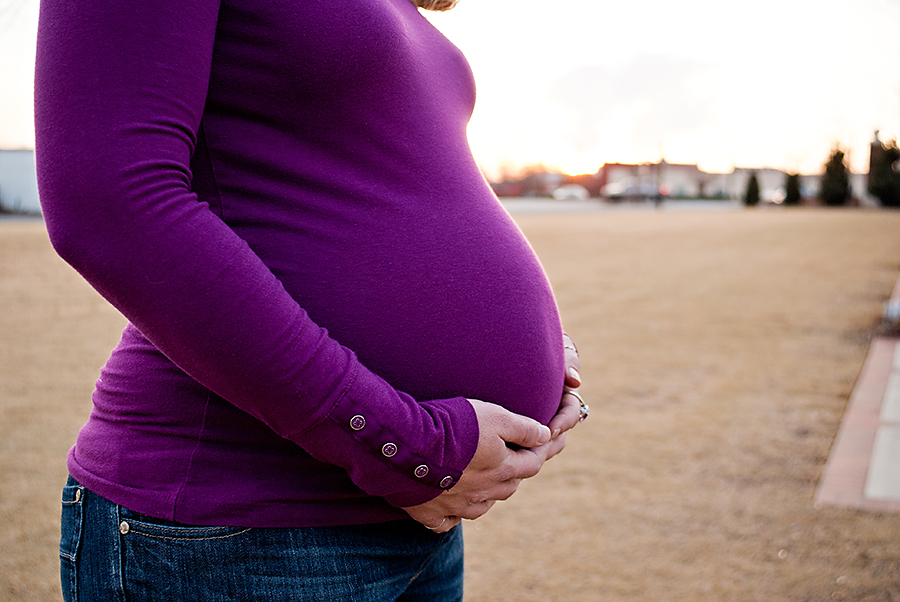
Exposing for the subject using spot metering and blowing out the background detail.
Assignment
Remember at the end of August I’ll be giving you an assignment to take imagery in a bunch of lighting types. You can start on this now or wait until I announce the assignment. September will be a no assignment month, giving everyone a bit of time to catch up.
