Nov
12
2013We’ve worked all year on trying to take the best Straight out of the Camera (SOOC) images that we possibly can. Today, I’m going to give you a brief overview of the editing software on the market.
After all this work to make almost perfect SOOC images, it sort of feels weird to be pointing you toward software to make things look even better. Yet, even the great film photographers played with their images in the darkroom: dodging, burning, contrast filters, and extra or less developing time for darker or brighter images were all used to improve on the original. I’m not saying it’s necessary by any means. If you don’t want to use editing software, go right ahead and ignore this series.
Gimp
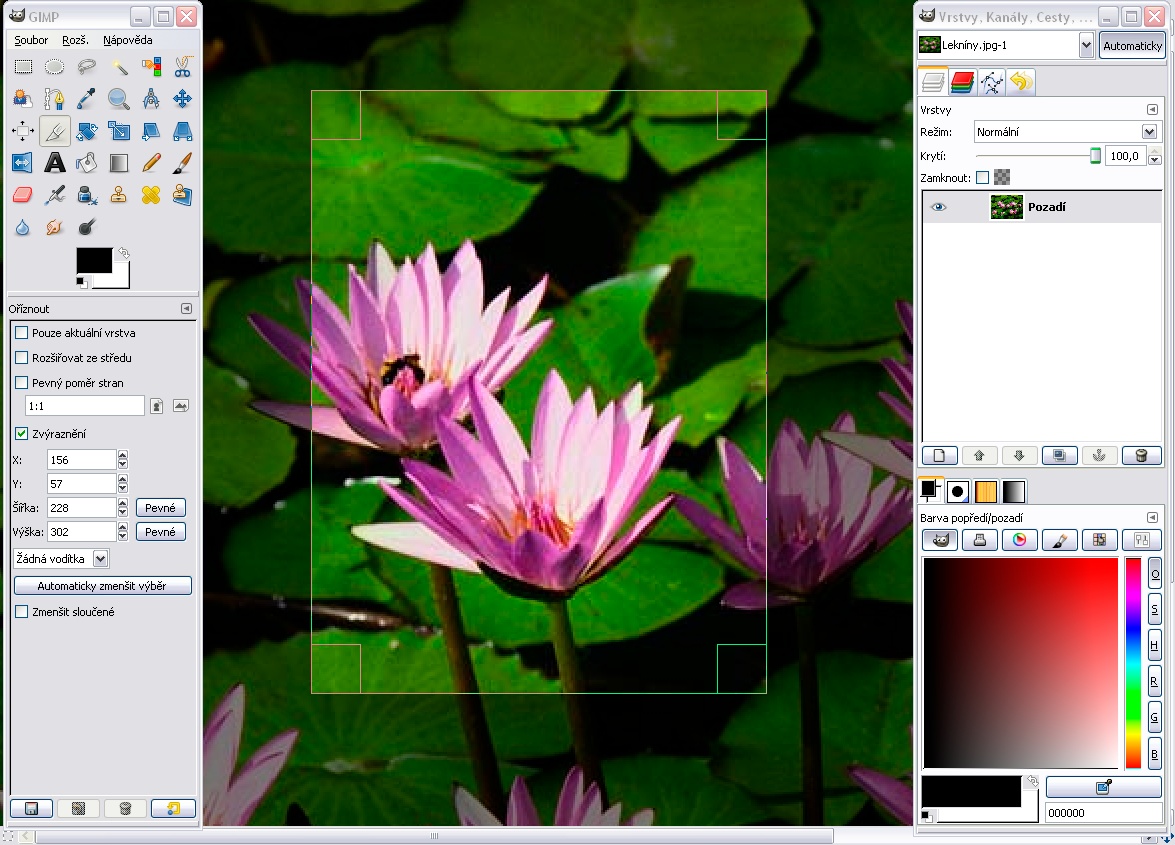
Gimp is a free graphics manipulation program. It provides a lot of the same functions as Photoshop Elements, but I’ve read that the interface is less intuitive the PSE. I know very little about it (although I do believe I used it prior to purchasing Elements 9).
Photoshop Elements
Photoshop Elements costs around $80 dollars . This is the program that I use currently for all of my editing. I’m just now starting to outgrow it and hunger for a few more capabilities in Lightroom or full Photoshop. All around I think PSE is a great investment for the beginner photographer. Like GIMP, I feel that PSE isn’t extremely intuitive to learn and it took me over a year to feel proficient. Most of my PSE learning came from Amanda at Everyday Elements.

Adobe Lightroom
Adobe Lightroom costs twice as much as PSE at around $140. Lighroom is beyond amazing at a few things: cataloging all your files, editing multiple files from the same series all at one time (a huge time saver), working with RAW files, and some specific editing like skin smoothing and such. Combine Lightroom with PSE and I think most professional photographers would find this a very powerful combination. I just bit the bullet and purchased LR because it’s taking me so long to do each file individually rather than doing some things in a batch.

Photoshop Creative Suite or Creative Cloud
Photoshop just went to a model they’re calling Creative Cloud. Basically, full Photoshop will only be available through a subscription service rather than as a software that you’ve purchased and owned. This has created a ton of outrage in the photography and graphic design communities. Creative Cloud is cheaper for a full year than purchasing the last software copy Photoshop Creative Suite 6, but most PS users didn’t upgrade for 2-5 years which is the cause of the outrage in the photography/design communities.

Is full PS better than a PSE/Lightroom combination? Yes. Would I recommend this software for a beginner photographer? No. Therefore, this will be the only discussion on this software during this series. If you have Photoshop (even an ancient version) I recommend reading 10 Essential Photoshop Skills if you’d like to learn to use it better.
Editing Posts
I’ll be writing a short series of editing posts through November/December while ya’ll work on your Final Projects. There will be no assignments, but feel free to use what you learn however you would like. All of my editing posts will be written using Photoshop Elements 9 or 12 as my visual guide. I just purchased LR so I may toss in a few tutorials from there: especially when I’m talking about black and white conversions. If you don’t have PSE and are using GIMP or Lightroom or Photoshop, feel free to Google the topic I’m talking about. Maybe “How to use Levels in GIMP/Lightroom/Photoshop?” I’m sure a quick and easy visual tutorial to using that function in your program will arise 🙂
***Disclosure: links in this post to Amazon and FlatBooks are affiliate links. If you purchase software or a book, I will receive minor compensation. Maybe enough to buy a back up camera battery, but not enough to buy a Sony a99. 😉 I have linked to these products because I think they’re helpful for you. Thank you for supporting me through purchasing or just reading my thoughts 🙂
Nov
05
2013Welcome back class! I see you’ve made the best of our little break and I am super excited to see your images in the Flickr Group! I’ll be posting some of your images from the Flickr Group tomorrow to showcase how you’ve grown over the summer.
If you haven’t posted anything in the Flickr Group recently, today is your last chance to get your images in so I can include them on tomorrow’s blog.
Today we’re going to talk just a little bit about nailing focus before jumping into editing topics for the remainder of the year. There will be no more assignments outside of your Final Project. So start creating and consider this series of posts bonus materials.
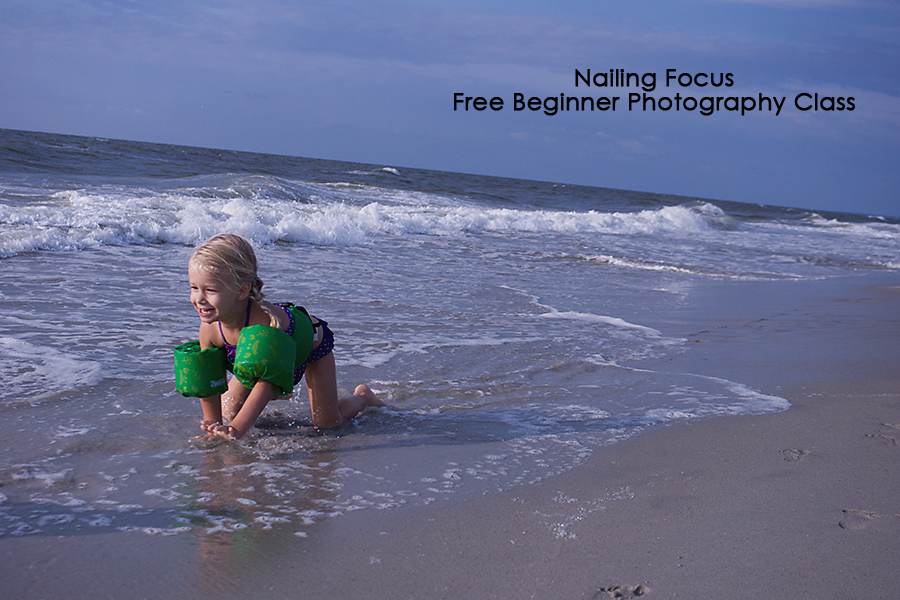
Nailing Focus
There’s nothing more disappointing to me than taking the ‘perfect’ shot only to pull it up on the computer and discover that I missed focus. Ug! This is one of these areas that I’m learning along with you because I learned on and used a manual focus film SLR until 2009. Yeah, I’m one of those die hard old school fans. I’d love to move my lifestyle family mini sessions back to film someday… ah, dreamy.
Wait. Where were we? Oh, yeah, nailing focus.
There are two things that tie into nailing focus: Focus Mode and Auto Focus Area. Let’s tackle these one at a time.
Focus Modes
You’re going to have to consult your manual to find out how to toggle these handy dandy focus modes.
Manual Focus or MF
Manual focus is focusing with the focus ring on your lens. Depending on your camera, you’ll need to switch either the lens or the camera into MF mode. Some cameras even allow you to toggle manual focus temporarily with a button on the back.
Manual focus is best used in the following situations:
- When you don’t have enough light or contrast in your scene to lock focus with Auto Focus. You’ll know this is happening if your lens keeps running and your camera won’t allow you to fully depress the shutter button.
- When you’re shooting still life or a very still subject
- When you’re shooting at infinity on a tripod for say a landscape with a closed down aperture
- When you know the exact distance from your sensor (marked on your camera body) to your subject. Usually the camera is on a tripod for this.
One Shot/AF-S/Auto Focus Single Shot
When you half depress the shutter button halfway, this will grab focus on the point the camera or you have selected it and hold focus on this point. You can use this mode to focus on a certain point and then recompse an image by holding down the shutter button halfway.
This focus mode is used for still subjects like landscapes or adult portraits or cooperative children. Keep in mind that if you’re shooting wide open, even a small movement of your subject can cause missed focus in AF-S mode.
Al Servo/AF-C/Auto Focus Continuous
When you half depress the shutter button, this focus mode will lock to the subject. As long as the button is half depressed, the camera will attempt to continue focusing on that moving subject.
Obviously this is heaven for toddlers, animals, and fast moving subjects. Switching into this mode could be a game changer with fast subjects. This focus mode works best when your subject is in the center of the frame. So shoot wide and crop later.
Al Focus/AF-A/Auto Focus Automatic
When you half depress the shutter button, the camera will decide whether the subject requires AF-S or AF-C. But just like manual mode, the camera can get it wrong. You get to pick whether you want the camera to decide for you or not.
Auto Focus Area
In addition to choosing the Focus Mode (how your camera will focus), you also can also choose Auto Focus Area (where your camera will focus). Again, you’ll have to consult your manual to determine how to change your Auto Focus Area, but it’s totally worth it!
I’ll be using the names for the Focus Area as Sony describes it… so you may have to consult your manual to determine your respective names 😉
Automatic or Wide
The default setting. Do you really want your camera choosing where to focus and deciding on an area different than you would have wanted? I thought not. So lets move away from keeping it on AF Automatic.
Spot
The spot selected for focus is usually dead in the center. This is great if you’re using AF-S to set focus with a half depressed shutter button and then recomposing the image. You just may want to make sure you use a slightly more closed aperture for this technique. Obviously, spot also works great for taking images where your subject is in the center.
Zone
Here’s where you start bossing your camera around rather than letting it decide for you. In zone focus area, you can select which side of the frame the camera will pick focus from: left, middle, or right. It’ll still do half the work in picking the specific point of focus, but at least you’ll know it was pointed in the right direction. I use this AF Area when photographing toddlers or subjects that don’t allow me enough time to use Local focus area.
Local
Local allows you to pick the specific point where the camera will focus. I have 19 focus points in my professional level Sony a77 SLT. I had only had 9 in my entry level Sony a200. Using a joy-stick, I toggle between the focus points and tell my camera where I want it to focus: for most portrait situations this is the subject’s leading eye. I would not use this with subjects that don’t give you a lot of time to toggle focus points: namely children, or cars, or animals.
Further Resources for Nailing Focus
This is the first post in a series about nailing focus and goes into a bit more depth than I have written here.
If you’re interested in getting really precise with learning focus, there’s a great ebook called Tack Sharp: A Step by Step Guide to Nailing Focus. This is affiliate link for a product that goes into further depth on this subject. If you have problems with focus, feel free to invest.
Oct
01
2013Free Beginner Photography Class Final Project
For the remainder of the year, I want you to pick a project or subject that sort of encapsulates your mission statement or gets you all excited. Then we’re going to compose a photo essay of 10-15 images around our subject. You can use pictures you’ve previously taken or you can do a brand new series. Use your big DSLR or use your phone camera. It’s all your choice.
When you post your images to the Flickr Group, you’ll simply give a brief description of what you wanted to accomplish and we’ll give critique on your work based on that statement.
Here are some ideas for final projects based on things I’ve noticed you guys capturing:
- My town: your view of your world.
- Never lose hope: on a transition of unwanted/broken things into beauty
- Tender Girlhood: on the innocent musings of your little girl
- I’m glad they haven’t broken a bone: on the incredible feats of your little guys
- Running Behind my Husband: on your view from behind your running buddy.
- Motherhood: These are my days. The Glorious and mundane intermingled.
I’m going to jump into this final project with ya’ll. That last topic is mine (though you’re welcome to steal it!). My vision is a series of both self-portraits and portraits of my surroundings and surrounding people all in black and white. I’m going for raw emotion here. It could get a little crazy… but at the very least, I will start appearing in my family images. Woohoo!
Gratitude and Upcoming Class Work
I’m so thankful for the folks who have stayed the course. Things slowed way down in the Flickr Group over the summer. I really struggled to keep writing because I wasn’t seeing your work and comments on this series of posts were few and far between. A couple of you (you know who you are) kept me going with your enthusiasm, emails/FB messages, and encouragement. Thank you!
That said, I’m going to give this class a break for the month of October. It’ll be a chance for you all to catch up on work from the summer, and begin work on the final assignment. It’ll also give me some space to write, photograph, and soak in my 31 Days to See Beauty in Your Mess series.
Class will jump back into session in November with a bit of basic information on the types and uses of editing software. Thank you for your grace in both enjoying this class and waiting through this October season of growth for me. I’ll see ya’ll in November when hopefully the Flickr Group will be bursting with goodness from all of you once again and I’ll start right off by sharing your images in this space.
I can’t wait to see your growth and your vision for the art you were made to create.
Sep
24
2013Back in our Storytelling with Images series I challenged you to change perspective. Today I’m going to come back to that briefly with a short definition of each possible shooting perspective.
Eye level

Eye level perspective occurs when your camera is on the eye level of your subjects.
Above

The Above perspective occurs when you are shooting down on your subject.
Below
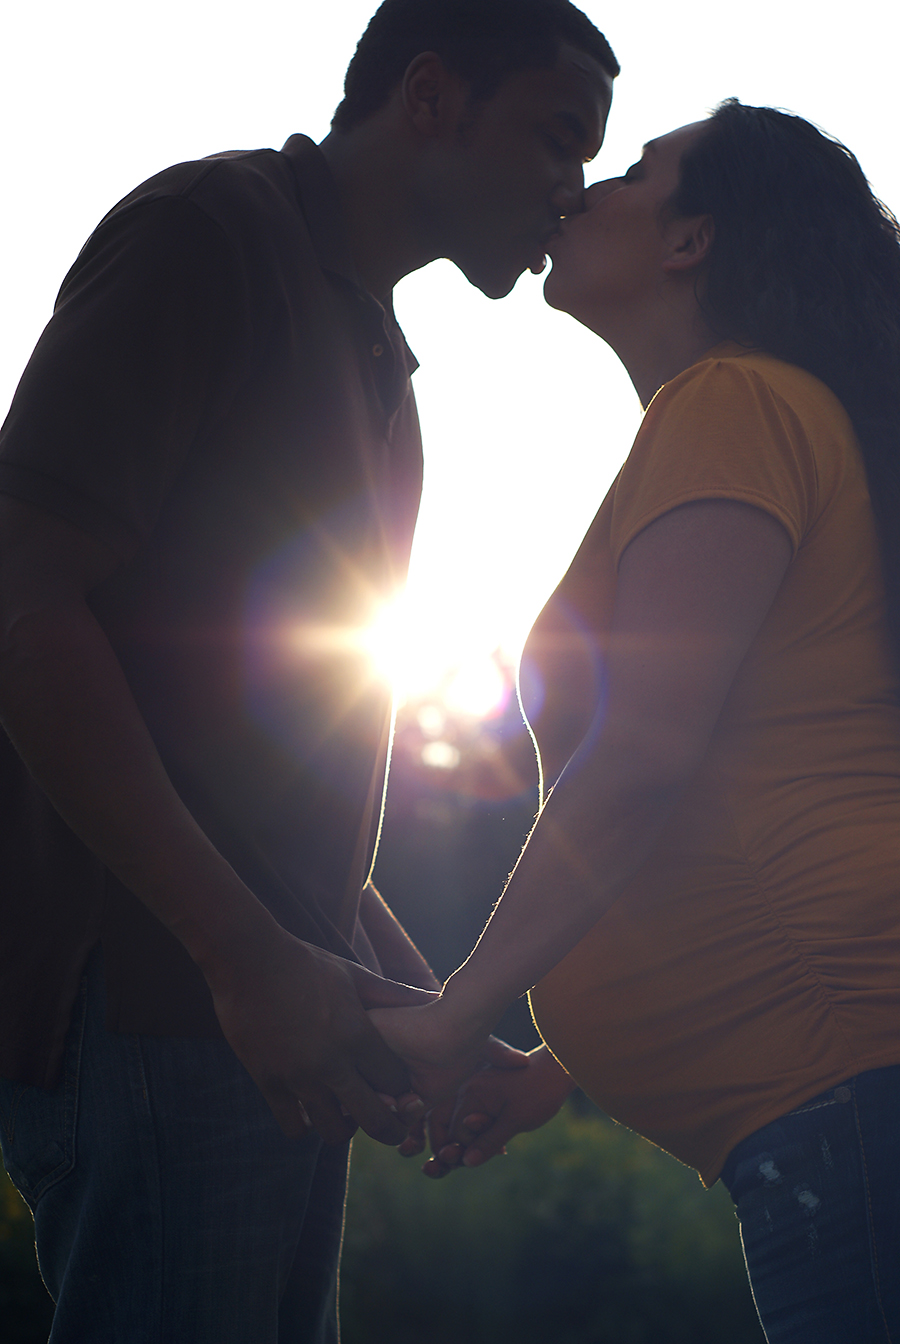
The Below perspective occurs when you are shooting up at your subjects.
Framed

The Framed perspective occurs when something in your image literally makes a frame around your subject.
Hidden

A Hidden perspective occurs when you place something in the fore ground so close to the lens that it blurs out making the viewer feel like they are peering into a secret world.
Close-Up


Close-Up perspective form images with little background details outside of your subject. This may be a macro shot or a tight portrait.
Wide
 A Wide perspective contains lots of background detail to assist in telling the story.
Vanishing Point
(Obviously, I don’t use this perspective much… it’s kinda hard to see/nail. But there’s clear examples in Brooke’s Class recommended below.)
Vanishing point perspectives place the subject along a leading line that ends abruptly right into the subject.
Why Just Quick Definitions?
The reason I’m only giving you a quick definition is that there’s the great free e-course by Brook Snow on Photo Perspectives. I really admire her work and this course is simply beautiful! Sign up and enjoy 🙂
Sep
17
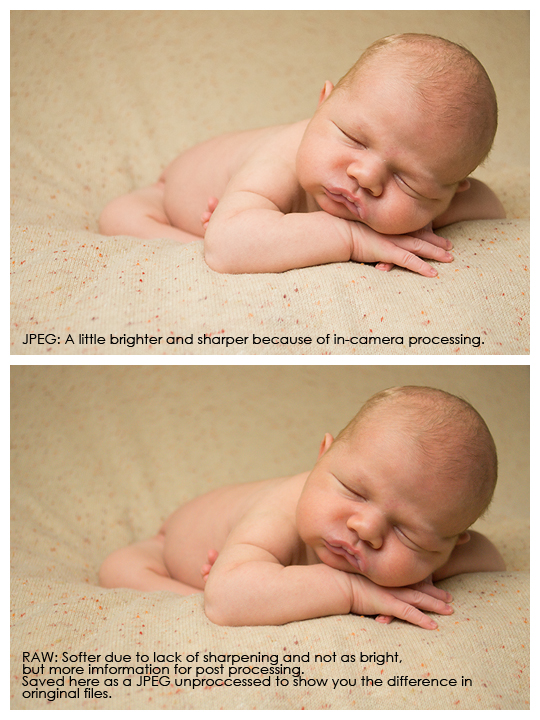
2013If you’ve been perusing other photography blogs, you may have noticed that a lot of photographers sweat by RAW files. So I’m going to take a minute to explain the differences between RAW and JPEG. However, first I want you to hear this: I would not recommend shooting all the time in RAW. If you shoot in RAW, you should have a purpose for doing so. A fear that you might mess up exposure for a very important event or a need to pull out more detail in post processing. That said, let’s explore the differences.
JPEG
A JPEG is likely the file type that you are using on your camera presently. It is a smaller compressed image that is processed in camera to look good immediately.
Pros
- JPEGs can go straight from your camera to your computer to your printer or a website. No editing required. It’s a sort of universal file type.
- JPEGs look sharp and have been brightened/had contrast added.
- JPEGs are smaller (my camera produces 10mb JPEGS)
Cons
- With the JPEG format you only have control over certain things. The camera will sharpen, brighten, add contrast, and a number of other things before compressing the file. You can manipulate how your camera will process a JPEG by selecting Vivid or other color presets in your menu. Check your camera manual for these presets and play around with them. See if you like one over the other.
- JPEGs store less information, therefore, you have less latitude for error.
RAW
A RAW file is uncompressed. When you view it on your computer it will look less bright, sort of fuzzy, and seem to have very little contrast.
Pros
- All that data means you have a lot of room for error. If you miss exposure by about a stop, you can change it in post processing (but there will still be consequences).
- Since the image is unprocessed, you will have full control over the final JPEG
- The file is a digital negative that you use to create your own image
Cons
- RAW files are GINORMOUS. A typical RAW file is 25MB or more. HUGE. And then you still have to process it to make it a JPEG. So if you keep both the RAW and final JPEG that’s 35mb of hard drive space.
- RAW files cannot be printed/placed on the web as is. Every RAW file must be processed in editing software prior to use.
- Learning to edit a RAW file so that it looks as nice as an in-camera JPEG takes a while.
Conclusion
I would totally recommend a beginner photographer shoot everything in JPEG. I’ve recently been kicking myself for not switching my camera back to JPEG mode after shooting a client session in RAW. I really don’t have time to edit each image and save them as JPEG for my own family. However, if you have a specific project or goal that requires more latitude than a JPEG file is capable of handling (for instance a seriously contrasted scene) I would recommend giving RAW a try. It’s worth learning how to use effectively for those times when you want full control, but the totality of the topic is beyond the scope of this class.
