Jun
11
2011A couple weeks ago I won these adorable bird pillows from AnneCrafted.
I chose them because my girls are currently obsessed with birds (thanks to their birding father). And then I found out that Anne has the most adorable 8 month old twin boys!
Well, Anne, you sure know how to make twins (and their momma) happy! Here’s the evidence from my girls:
Jun
09
2011I’ll tell you a little secret.
Our guest room is our junk/storage room. It’s filled to the brim with photography props, bookshelves, a queen bed, my double stroller (I’m seriously contemplating selling it…), and other random assorted junk.
Here’s just a peak into the door.

(Cringes)
Fortunately for this room, it’s going to have to get cleaned out and made into a nursery. So in order to motivate the cleaning… here’s what’s floating around in my head as far as nursery design ideas. Keep in mind that we’re not finding out the gender of this little one so this room is going to quite neutral.
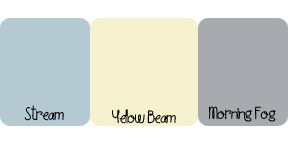
We’ve always known that the walls in that room were destined to be yellow. So here’s the color scheme (All paint samples from Sherwin Williams).
My entire upstairs has taken on a bird and tree them. The girls room has some pretty fantastic Bird Art. The bathroom is built around this amazing tree/owl/squirrel shower curtain from Target. And I just realized today that even our room participates in this theme with a eagle embroidery above our bed. So it seems only natural that the tree and bird theme overflows into our new little one’s nursery.
Here’s a design board of the elements I’d love to include.

Here’s where you can find these items:
(I love it in these colors! Though I might request a lighter blue for the Owls and Birds)
Dresser Building Plan
Dresser Building Plan
(painted in the Stream Color.. or maybe Morning Fog? Or a little Morning fog glaze over Stream?)
(Our neighbor gave us a slightly faded wing back chair like this one that I’m sooo ready to slip cover)
Ikea Leksvik Crib (we’re borrowing it from a friend)
Premier Prints Hoot Owl Village (my idea is to use it as an accent fabric: maybe quilt backing and pillow for the wing back chair)
Premier Prints ZigZag Village Blue/Natural (Curtain Option 1?! Or Changing Pad Cover? or Crib Skirt? or Simple top for quilt/coverlet?)
Premier Prints Ozbourn Village Blue/Natural (Curtain Option 2?! Or Changing Pad Cover? Or Crib Skirt?)
Premier Prints ZigZag Village Blue/Natural (Curtain Option 1?! Or Changing Pad Cover? or Crib Skirt? or Simple top for quilt/coverlet?)
Premier Prints Ozbourn Village Blue/Natural (Curtain Option 2?! Or Changing Pad Cover? Or Crib Skirt?)
So I need some serious help with what fabrics to use for the quilt, changing pad, and curtains. What do you think?
Jun
07
2011I opened the girls closet the other day (as the temperatures soar into the 90s here) looking for something cool for them to wear. My eyes fell upon the two Grow-up Together Dresses. Perfect!
I thought I’d let you know how it’s working out this year. Let’s revisit a second. Here’s 9 month old Bronwyn modeling her dress.


Look how tiny she was!
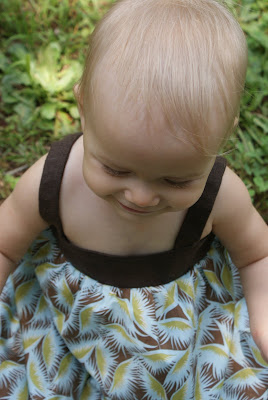
And here are 20 month old Aeralind and Bronwyn taking their dresses for a run at the local playground.


I didn’t have to modify the dress at all to fit, but I may have to lengthen the straps just a little by the end of the summer. The length is perfect for a climbing and romping toddler: not long enough to trip her and long enough to cover her. And it’s so much easier to have hyper active toddler girls in one pieces for quick and painless diaper changes.
I still love the Grow Up Together Dresses and the girls seem to approve! Let me know if you make one 🙂
Jun
01
2011When I made this spring top last year, I had a ton of requests for a tutorial on how to make these fabric flowers. The girls were around 7 months at that time and within a week or so, they just took off. I haven’t been able to catch up on a lot of sewing since. But I’m getting my sewing mojo back… so here it is finally!
Fabric Flower Tutorial
1. Find something circular to use as a pattern. I used the bottom of a sippy cup for small flowers and the lids of cups for larger flowers. Trace onto your knit fabric and cut out. I use 5 flowers for each flower. (While you could easily use woven fabric for these flowers, I don’t because of all the spaces for fraying. However, with ample Fray Check it might work out for the better)


2. Fold your circles in half. Then fold them in half again.

3. Using a thick thread, sew basting stitches around the widest portion of each petal. I think you’d be better off with longer stitches that I did here.

4. Without clipping your thread baste all 5 petals.

5. Pull the thread taunt and stitch the first and last petals together a few times to secure before knotting off your thread.

6. Cut a rough circle larger than your center.

7. This is the tricky part to explain. I start sewing my center from the front of the flower with the right sides of the center to the right side of the flower. I stretch and sew it as far as I can before flipping the center in and sewing from the back of the flower. Some centers turn out better than others 😉


And that’s it. Enjoy your flowers!


