Mar
12
2013Last week we learned how our camera light meters are used to determine exposure in Auto, Aperture priority, and Shutter priority modes. We also learned that our camera’s light meters will fail miserably in the following situations:
- mostly light
- mostly dark
- scenes with a huge contrast ( very dark areas and very bright areas with very little mid tone areas).
Today we’re going to learn how Program mode can alleviate some of those difficulties without the stress of adjusting everything at once as if we were in Manual mode.
Program Mode
Program mode is pretty nifty. I personally think it would be extremely useful not only in the 3 situations above, but also if you’re photographing fast moving toddlers/kids who won’t stand still while you fiddle with settings (but are staying in the same basic lighting). Oh, and I wish the wedding I had shot (my first… and likely my last), I would have set program mode at each distinct lighting situation so I wouldn’t have been so stressed out trying to change my settings quickly in manual. Program mode is a great place to warm up to learning full manual mode.
What does Program Mode let you Control?
Program mode turns off the flash (unless you manually turn it on) lets you change Aperture or Shutter Speed, ISO, Metering Mode (which we talked about last week), White Balance, and Exposure Value. However, in program mode your camera’s light meter is still doing the main job of setting exposure. The difference in program mode is that you’re telling the light meter the exposure you want to be set.
Aperture and Shutter Speed in Program Mode
You can change aperture and shutter speed through the use of your adjustment dial in this mode. However, you can’t change them independently. So if you want an aperture of f/22 and a shutter speed of over 1/300th, you’ll need to shoot in manual. However, if you just want to specifically change one variable or the other, almost as if you were in aperture or shutter priority mode, you can do that. The important thing to remember in Program Mode is to focus on which value (aperture or shutter speed) will help you create the image you want.
ISO in Program Mode
If you can’t change your ISO in Auto, but still want the freedom of turning off your flash and changing ISO then Program mode may become your favorite ‘lazy’ mode. Just like aperture and shutter priority you can change your ISO.
Metering Mode in Program Mode
Just like we learned last week, you can change your metering mode while in Program Mode. However, you’ll find that your multi-segmented mode (or normal metering mode) will typically be fine in Program mode because you’ll be changing the exposure value to fit the situation.
The one exception is in the situation where your image has both very bright and very dark spots with little to no mid tones; in that situation you’ll want to use your center-weighted or spot metering mode to help the camera pick whether you’d like it to meter for the light or dark section of an image. You’ll never be able to light meter/expose for both the light and dark sections in a super contrasted scene so you will always have to choose one. Your camera can’t capture the world the way they eye sees it and this is one of those areas of limitation.
The only way to capture a very high contrast scene is using a a multiple exposure technique that is then combined either in camera (some pro level cameras have this feature) or in photo editing software. This technique is called High Dynamic Range (HDR) photography. We’ll touch on this again later in our class so for now HDR is trivia knowledge.
White Balance in Program Mode
White Balance lets you change the way your camera meters color in a scene. It tailors your exposure for your specific lighting situation. This is going to be the topic for next week’s class because it’s not quite as revolutionary as exposure value 😉
Program Mode’s Main Perk: Changing Exposure Value
Up until this point, your camera has chosen your exposure value. You have no say in exposure value unless you’re in Program or Manual Mode. Since we’re going to do one more technical lesson in white balance and then move on to creative storytelling with your images for a few weeks before learning to shoot in full manual mode, I really want you to focus on this idea.
What is Exposure Value?
Exposure is measured in stops. All three areas of the exposure triangle let in or close down a ‘stop’ of light as you change a variable. We’ll go into more detail about these stops when we tackle full manual. For now I’ll keep in very basic, but I wanted you to know the word stop because I’m about to use it in describing exposure value.
Your camera light meter in Auto/A/S always exposes images with a exposure value of zero. If you’ve ever shot in manual, this is what my Father in Law (and many others) refer to as “getting rid of the blinkie lights”. But if we’re spending our time getting our exposure value to zero when shooting in Program or Manual, we may as well be shooting in Auto/A/S because we’re doing exactly what the camera would have done!
So lets make this visual. Here’s my camera exposure value menu at “0” or what the camera shoots in Auto/A/S.

Here is the resulting image at the exposure value of 0
Here’s my camera exposure value menu at +1 (or one stop over exposed).

Here is the resulting image at the exposure value of +1 Stop
Here’s my camera exposure value menu at -1 (or one stop under exposed).

Here is the resulting image at the exposure value of -1 Stop
In this particular scene an exposure value of 0 (or what your light meter says is perfect), is closest to what my eye saw before taking the photograph.
Why would I want to Change the Exposure Value?
Read More»Mar
06
2013I’ve been serving on Holley’s God-sized dream team for three months now. But let me tell you, really it’s Holley and all the other beautiful dreamers who have served me. We have this private Facebook group and each day there are hundreds of inspiring posts to read and women speaking really truth into each others’ hearts. It’s been an incredible journey both taking my small steps to my dream and walking arm and arm with these amazing ladies.
Holley’s book launched this week. You’re Made for a God-Sized Dream: Opening the Door to All God Has for You
I don’t want you to over look this post and think: “I don’t have any God-sized dreams.” Within the introduction Holley defines a God-sized dream as “wanting more of what God has for you.” So welcome to the club, fellow God-sized dreamer. Let me know in the comments what you think God might have for you (just knowing and serving him is a God-sized dream!)
My dream at the beginning of my God-sized dream journey was to have 12 paid client sessions this year. It wasn’t a very big dream… but it’s not very small either. It’s evolved and grown over the past 12 weeks and each little step of obedience toward his call only bring joy-even if the step is hard. I’ve had one paid client and two sessions that I gifted friends (and they’ll be visiting the blog soon!) There’s been obstacles and I’m sure there will be more, but one thing I’m certain of: I wouldn’t dare to pursue this dream if I didn’t have confidence that it is God who does the work both in and through me. Having a slew of God-sized dreamers encouraging me along the way sure helps, too!
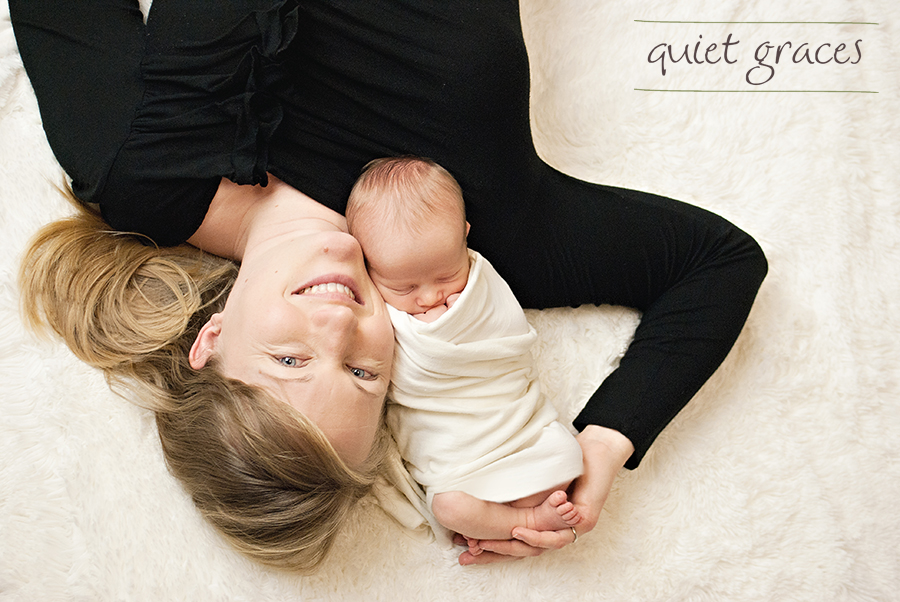
My favorite image from my last session of my friend Karen and one of her God-sized dreams: Baby Zan. 🙂
What I’m enjoying most about Holley’s book is how it brings lofty dream ideas down to the level of an over coffee pow wow with your dearest girlfriend. Holley has this rare gift of seeing the whole picture but breaking it down into manageable steps of simple obedience. I need that perspective.
I’ve been sneaking chapters in during quiet moments around the house on my new-to-me Ipad and I can’t wait to read more. Would you join me?
Starting on Tuesday next week Holley is doing chapter by chapter writing prompts to help us grow toward our God-sized dream. She’s inviting everyone to come join. Pray about participation, pray about your dreams, order the book, and jump right in. Let me know if you do, I’d love to encourage you in your dreaming any way I can 🙂
Mar
05
2013Hey, you.
The one washing spit up rags and taking out the diaper pail trash for the third time this week.
And you too, the one hopping in your car to spend 9 long hours working in a dead end job while at the same time wishing you could be home with the ones you support.
Or you, fearless teen, who wears her bright red lipstick and natural hair color proudly even with that nagging feeling that you might be the only authentic one in the bunch.
Or you, mom of teens who takes naps midday to be ready when your young ones are ready to talk at quarter past your bedtime.
Or you, empty nester, reconnecting with your husband while courageously facing your too quiet house.
Hey, there ordinary person. The kind that doesn’t seem notable. The kind who feels overlooked. The kind who feels like no one understands you.
I understand you. I know that you go through the daily motions with courage. But I also know that it takes you even more courage to dream. And more courage than that to set aside time to take that one step toward that dream: your holy calling to pursue more of what God has for you.
But, dreamer, as you pursue that extra ordinary I don’t want you to miss right now. The beautiful mess of your day to day living. Because these moments now: they’re part of your holy calling to pursue more of what God has for you right now. These quiet few moments stolen here for me tapping out words while watching a Carolina Wren frolic on the obnoxiously purple plastic play set are a gift. A gift for me to soak up who God is: beauty in the midst of my own chaos. A gift for you to open and be encouraged that this day to day right now sort of mess matters just as much as pursuing your dream.
We can’t hit pause on everything in our life and just run wild toward our dream. And that’s okay. God intentionally uses the day to day beautiful mess to refine us for the day to day pursuit of that small corner of our dream. We need this crazy right now, these seemingly unexplained obstacles to prune us for the dream moments to come.
Soak in these everyday moments (even the hard ones), dreamer friend, and know that God is creating new things in you for His glory.
Mar
05
2013Over the last 4 weeks, we’ve been working as a class toward learning how to use our camera’s in modes other than Auto. I’m sure you’re all excited over being able to explore the creativity in Shutter Speed Priority (or Sports on a point and shoot) and Aperture Priority (Portrait and a few others on a point and shoot). Yet, even these two modes have their limitations. In this lesson, we’re going to explore why shooting in Auto, S-Priority, and A-Priority often produces less than satisfactory results as well as when using these modes might be a great option. But first, a round up of some of the great images taken as a part of our Aperture Assignment!
Aperture Assignment Images
I gave 6 images for the Aperture Assignment. I’m not going to number your images here because the assignment I gave was for you to get a feel for the things (like how distance from a subject and lens focal length) that affect depth of field. We discussed depth of field last week in detail so by now you probably have a feeling why these specific assignments affected your depth of field. I will categorize these as wide open and closed though so you can see the difference.
I’m also going to practice giving quick specific critique. Remember, giving and receiving critique is by far the best way to grow as photographic artists.
Wide Open Images

Jessica took this shot of her daughter using a wide open (on her lens) aperture of f/4. It caught my eye because I’m a complete sucker for detail images. The lighting on her right side hand and her shoulders is a little uneven (likely shot during mid-afternoon where there’s little shade other than the shade caused by her little body). But the focus those little dirty and thirsty hands is nailed. Beautiful day to day shot.

TeddyBouch snapped this image of a tiger (at a zoo, which you can’t even tell!) wide open on his lens at f/5.6. He was also zoomed in to 120mm which makes the depth of field on this image even more narrow. What caught my eye was the wild expression the tiger is giving me with lens eye contact. What I don’t really love is the lighting. It’s coming in at almost 90 degrees from the right side of the image. That caused the left eye to be rather dull and shadowed. But this angled lighting also creates the high contrast that Teddy really likes in his images… so it might be a style thing 🙂 Teddy nailed waiting for this expression/eye contact and threw the potentially distracting background way out of focus with the open aperture and the long focal length.
Closed Down Images

This image by Amber caught my eye because of the vibrant colors. She has a small amount of white along the right of the center where the white petals are blown out (meaning there is loss of detail in the highlight area), but other than that Amber brought us in close, nailed her focus, and has a very clear focus point on that front flower despite having a very wide depth of field from an f/22 aperture. Rumor has it she’s blowing it up for her wall and I know it’s going to make her space so cheery!

Flowers were the clear choice for closed down images because they stand for the longer exposure times required by closed down apertures. Sarabeth (my girl who is still rocking her point and shoot!!) has a highest closed down aperture of f/8. It’s sort of right in the middle of the traditional f/stop scale so the depth of field is still pretty narrow and is made more narrow by the closeness to the subject. What drew me to this image initially is the brightly colored flower. I think I might like to see this as a vertical crop with the flower on the far left on the image, though I typically prefer horizontal crops. But what I like most is the leading lines of the branches on the left of the image.

Andrew chose to document these snowy trees at f/29. I shared this in last weeks post, but I felt the need to share it again. 🙂 What caught my eye was the saturated blue of the sky. I think I would like this image even better if I could see right down to the snowy ground. Andrew really captured a great exposure where the whites are white and the blacks black with a fair dose of mid tones tossed in too.
Using Camera Light Meters: Shooting in Auto/S/A Mode
Each camera is equipped with a light (or exposure) meter. A light meter measures the amount of light intensity and while in Auto/S/A modes it chooses your exposure value for you. In plain English: your camera’s light meter is responsible for telling the camera the amount of light in the scene and it will adjust your camera settings in Auto/S/A modes for you.
Read More»Feb
26
2013So I consulted with my Flickr active class members and all of them concur that they’d rather learn and experiment in a spiral learning fashion than go ahead shoot in full manual mode. So I’m extending the aperture assignment for another week while we get more in depth with depth of field (overuse of the word depth intended… I couldn’t resist!).
Just a note: if you’re new to the class feel free to jump in! If you’ve been following along and sort of learning at your own pace, feel free to post on Flickr whenever you finish an assignment for valuable critique (just label your photo with the assignment so we know your end goal!). I personally can’t keep up with my own assignments between my 3 children, keeping up with house and client work, as well as writing the next post. The only perk for getting your assignment in “on time” is having the chance to have your image featured in the next week’s post. In short, jump in when you can, but don’t stress over falling behind.
Visual Depth of Field Study
Since I didn’t have time to take photographs for last week’s post, here are a visual study of depth of field.
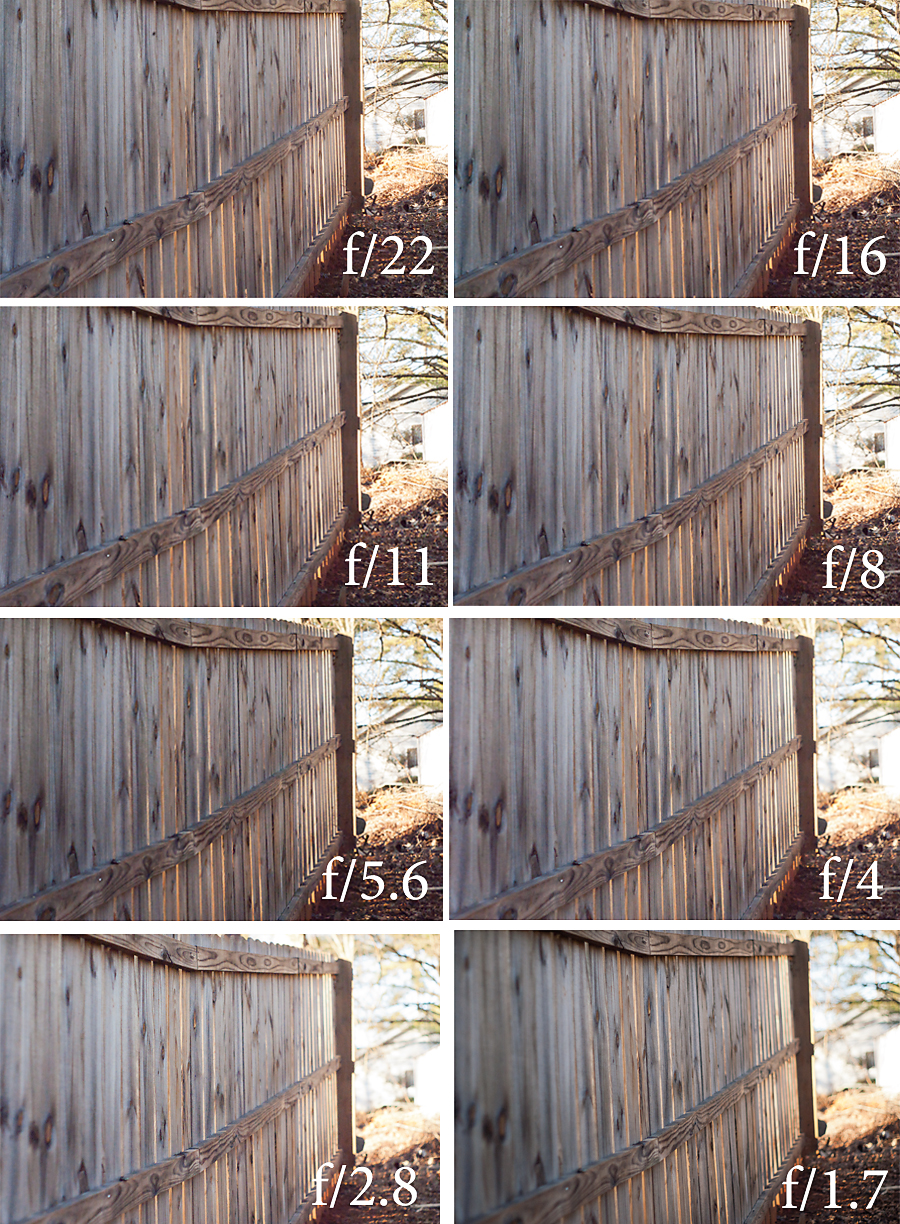
For every picture I focused on the warm honey colored board and all the exposures are the same.
F/22 (a closed down aperture) produces a wide depth of field where nearly everything is in focus. F/1.7 (this lens’s wide open aperture) produces a very narrow depth of field. Which depth of field do you think makes this shot more interesting?
Circle of Confusion and Depth of Field
As you can see from the above image series, when you shoot wide open you end up with a very narrow slice of focus. At f/1.7, the golden board is sharply focused and a couple of boards outside of that are focused enough to be recognizable. Outside of that focused area is what’s known as the circle of confusion.

Take a look at this image above (also shot at f/1.7). Ask yourself: where did she tell the camera to focus? Where can I stop distinguishing clearly what is in this image? Is the circle of confusion more prominent in the fore or back ground? Why? Think on it a second, and I’ll give you the “answers”.
